Vicon V1000-WIR-360 Скачать руководство пользователя страница 1

Vicon Industries Inc. does not warrant that the functions contained in this equipment will meet your requirements or 
that the operation will be entirely error free or perform precisely as described in the documentation. This system has not 
been designed to be used in life-critical situations and must not be used for this purpose. 

Document Number: 8009-8304-40-01 Product specifications subject to change without notice.  
Issued: 8/2021 Copyright © 2021 Vicon Industries Inc. All rights reserved.

Vicon Industries Inc. 

Tel: 631-952-2288) Fax: 631-951-2288 

Toll Free: 800-645-9116 

24-Hour Technical Support: 800-34-VICON 

(800-348-4266) UK: 44/(0) 1489-566300

www.vicon-security.com
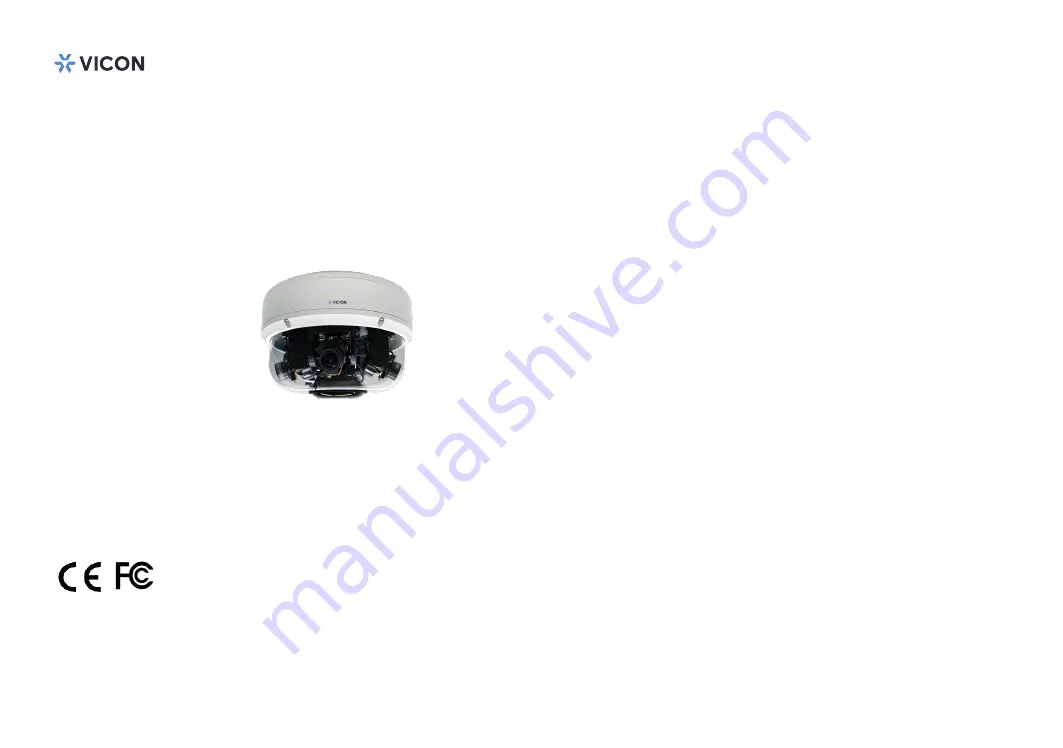
V1008-WIR-180-1 

V1000-WIR-360 Multi-Sensor Camera 

Installation & Operation Manual

XX304-40-01

Содержание V1000-WIR-360

Страница 1: ...ical situations and must not be used for this purpose Document Number 8009 8304 40 01 Product specifications subject to change without notice Issued 8 2021 Copyright 2021 Vicon Industries Inc All rights reserved Vicon Industries Inc Tel 631 952 2288 Fax 631 951 2288 Toll Free 800 645 9116 24 Hour Technical Support 800 34 VICON 800 348 4266 UK 44 0 1489 566300 www vicon security com V1008 WIR 180 1...

Страница 2: ...allation Ceiling Mount 12 Chapter 2 Camera Configuration Accessing the Camera s Configuration Menu Graphical User Interface 16 Installing IP FINDER Software 16 IP FINDER 19 Introduction to the IP FINDER User Interface 20 Button Functions 20 Web Browser 21 Main Screen Overview 22 Configuring the Camera s Setting 23 Browsing Through the Configuration Menu 24 Video Video Configuration 25 Primary Stre...

Страница 3: ...ystem 54 System User Management 55 Admin Setting 55 User List 55 User Information 56 Event Alarm Handler 57 Alarm Handler Configurations 57 Alarm Schedule Settings 57 Event Motion Detection 58 Motion Configurations 58 Zone1 to Zone5 Setup 58 Motion Schedule Settings 59 Event Tampering Alarm 60 Tampering Alarm Configurations 60 Tampering Schedule Settings 60 Event Video Analysis 61 Video Analysis C...

Страница 4: ... Reserved SD Record Handler Configurations 71 SD Information 71 Alarm Motion Tampering Video Analysis Settings 73 Record Type Selected Snapshot 73 Alarm Motion Tampering Video Analysis Settings 74 Record Type Selected Video 74 Trigger Scheduled Settings 75 Day Time Inclusion Filter 75 ...

Страница 5: ...ss for any particular purpose is also disclaimed Acknowledgements Vicon and its logo are registered trademarks of Vicon Industries Inc All other product names mentioned herein are registered trademarks of their respective owners Safety Information Before installing and using the device note the following precautions Read all instructions carefully Follow all warnings and cautions in this manual Do...

Страница 6: ...d Polybrominated diphenyl Ethers PBDE 0 1 or 1 000ppm In order to meet the RoHS compliant directives Vicon has established an engineering and manufacturing task force to implement the introduction of green products The task force will ensure that we follow the standard Vicon development procedure and that all the new RoHS components and new manufacturing processes maintain the highest industry qua...

Страница 7: ... not use needle nose pliers to disconnect connections as these can damage the soft metal or plastic parts of the connectors Technical Support and Assistance 1 For the most updated information of Vicon products visit Vicon s website at www vicon security com 2 For technical issues that require contacting our technical support team or sales representative please have the following information ready ...

Страница 8: ...this Manual Warning Information about certain situations which if not observed can cause personal injury This will prevent injury to yourself when performing a task CAUTION CAUTION CAUTION Caution Information to avoid damaging components or losing data Note Provides additional information to complete a task easily ...

Страница 9: ...reface Copyright 2021 Vicon Industries Inc All Rights Reserved Package Contents The V1020 WIR 180 package contains the following accessories Name Quantity IP camera 1 Grommet kit 1 Quick installation guide 1 Mounting accessory pack 1 ...

Страница 10: ...02 3bt 98 ft 30M if powered by IEEE802 3at Day and night Supported WDR 120dB True WDR Minimum illumination 30IRE BW IR Off 0 03 lux BW 0 01 lux Electronic shutter speed Auto Manual 1 7 1 20000 Gain control Auto Manual Backlight compensation Yes White balance mode Auto Manual Image settings Brightness Contrast Saturation Sharpness Mirror Flip Local storage Support stream 2 640 480 2x SD card Analyt...

Страница 11: ...er Google Chrome Mozilla Firefox Event Management Event trigger Motion detection 5x5 areas Tampering detection Notifications Send message via e mail or FTP Power AC 24V DC 24V AC PoE IEEE 802 3at IEEE 802 3bt PoE Class 5 auto detect depends on the power switch you use General Power consumption Max 40 W Connectors Audio Line in 1 Line out 1 Digital input 1 Digital output 1 DC AC power input RJ45 We...

Страница 12: ...ion Copyright 2021 Vicon Industires Inc All Rights Reserved Removing the Protective EPE Foam and Preparing the Network Cables 2 Remove the coil cord from the top cover 1 Loosen the 6 captive screws on the dome bubble using the torx tool supplied and open it ...

Страница 13: ... Product Introduction Copyright 2021 Vicon Industires Inc All Rights Reserved 3 Remove and discard the protective EPE from the lens modules EPE 4 Plug the coil cable back to the top cover Then tighten the 6 captive screws on the top cover ...

Страница 14: ...Product Introduction Copyright 2021 Vicon Industires Inc All Rights Reserved Hardware Installation Wall Pendant Mount 5 Loosen the captive screw on the side of the bottom cover 6 Rotate the cap to align s from LOCK to OPEN to remove the cap ...

Страница 15: ...Chapter 1 Product Introduction Copyright 2021 Vicon Industires Inc All Rights Reserved 7 Rotate the cap to secure on the wall mount bracket 8 Attach the safety harness on the camera mounting plate to the hook on the camera bottom ...

Страница 16: ... CAT5 cable use RJ 45 cap provided to help push the connector through the grommet with hole Wiring Diagram for Alarm Inputs Outputs DI Alarm In Trigger Low 0 0 4 V Trigger High 3 3 12 V DO Alarm Out V in max 30 V I out max 100 mA Note To maintain watertight intergity warranty be sure to use the appropriate grommet t Note If using the I O cables use the I O cable assembly provided and plug them int...

Страница 17: ...Manual Chapter 1 Product Introduction Copyright 2021 Vicon Industires Inc All Rights Reserved 11 Tighten the 3 captive screws on the camera to secure it 12 Assemble camera with cap first The s should be aligned with OPEN s ...

Страница 18: ...hts Reserved 13 Rotate the camera from OPEN to LOCK in order to fix the camera The smark should be aligned with the LOCK s mark 14 Tighten the captive screw on the lateral side of the bottom cover to secure the camera Note default head position of camera for 360 view 1 2 3 4 Conduit Entrance Vicon Logo ...

Страница 19: ...dustires Inc All Rights Reserved Ceiling Installation 1 Secure the positioning label mounting template on to the ceiling Drill a hole on the mark to allow the screw on the camera to pass through the drilled hole 2 Remove the 4 screws on the plate to remove plate from the mounting cap ...

Страница 20: ...ction Copyright 2021 Vicon Industires Inc All Rights Reserved 3 Use the supplied expansion bolts anchors and screws to secure plate onto the ceiling Positioning Label 4 Attach the safety harness on the camera mounting plate to the hook on the camera bottom ...

Страница 21: ...ghts Reserved 5 Secure the camera to the plate aligning the screws on the camera with the slots in the plate Note that the OPEN s should be aligned with the screw hole on the plate there is only 1 screw hole on the plate 7 Refer to Step 10 in Wall Pendant installation for details on preparing the cable ...

Страница 22: ...User Manual Chapter 1 Product Introduction Copyright 2021 Vicon Industires Inc All Rights Reserved 8 Twist the camera counterclockwise until it is secure and can t move Then tighten the screw to secure camera on ceiling ...

Страница 23: ...You can access the camera via a web browser or IP FINDER software The following information outlines the instructions for each method Installing IP FINDER Software 1 Download the IP Finder installer file the IP Finder tool Discovery tool can be gotten from Vicon s website Software Downloads 2 Unzip the IP FINDER file to a location on the hard drive 3 Once unzipped double click on the setup file to...

Страница 24: ...click on the Browse button and locate the desired installation folder Next button Browse button Disk Cost button User accounts 8 Click on the Next button to continue 6 To check the available drives you can install the software to and their available and required disk space please click on the Disk Cost button 7 Specify which user accounts on the computer can access the program the options are Ever...

Страница 25: ...tion Copyright 2021 Vicon Industires Inc All Rights Reserved Next button 9 Click on the Next button to begin installation Close button 10 Once the installation process is complete click on the Close button to finish A shortcut will be created on the desktop ...

Страница 26: ...ing the camera s IP address under Camera List The IE will be opened automatically 2 When the program is launched it will begin searching the network for IP cameras automatically the search will last for up to 90 seconds You can also manually search cameras by clicking on the Search button 3 Once the camera is discovered it will show the following information Model Name IP address MAC address UUID ...

Страница 27: ...home page of the camera Firmware Upgrade Upgrades the camera firmware Search When the Search button is clicked the application will start searching cameras on the network To stop searching click the Done button Assign IP When the Assign IP button is clicked a pop up window IP Address Configuration will appear providing options to use DHCP or static IP address Home Page To view the home page of a p...

Страница 28: ...ss bar type IP address of the camera and then press the Enter button 3 You will be prompted with a pop up window asking for login information type in ADMIN default login name and 1234 default password 4 Once logged in you will see the main screen Web Browser Note The recommended browsers to use are Internet Explorer Safari Firefox and Chrome However Chrome only supports the viewing of the web Setu...

Страница 29: ... disabled or no triggered event is detected Red When a motion detection event is triggered the icon will flash red constantly as a warning Gray Event detection is disabled or no triggered event is detected Red When an alarm detection event is triggered the icon will flash red constantly as a warning Click to take a snapshot of View 1 View 2 View 3 View 4 Refreshes the page Switches to full screen ...

Страница 30: ...ter 2 Camera Configuration Copyright 2021 Vicon Industires Inc All Rights Reserved Configuring the Camera s Setting 1 To configure the camera s setting click on the Setup button on the main screen to enter the configuration menu Setup ...

Страница 31: ...ce clicking on each of them will open their corresponding sub menu on the right The following are the camera settings available on the left hand side A V Streams Video Configuration Audio Configuration Image Exposure Basic Settings PTZ ROI Privacy Zone OSD Network Basic FTP SSL 802 1x SNMP Firewall LDAP DDNS RTSP System Date Time Maintenance User Management Event Alarm Handler Motion Detection Tam...

Страница 32: ...0 2304x1296 2048x1536 1920x1080 1280x960 1280x720 800x600 and 640x480 Rate Control Configures the Rate Control mode as CBR constant bit rate or CVBR constrained variable bit rate for the stream Selecting CVBR will show the setting options for Smart ROI and Smart GOP Smart ROI Enables or disables Smart ROI feature Enabling it will increase the bit rate of moving objects and make them clearer Bit ra...

Страница 33: ... video stream the options are H 265 and H 264 Resolution Configures the resolution of the video stream The available options are 1920x1080 1600x1200 1296x972 1280x960 1280x720 800x600 and 640x480 Rate Control Configures the Rate Control mode as CBR constant bit rate or CVBR constrained variable bit rate for the stream Frame Rate Adjusts the frame rate of the video stream the range is 0 30FPS The s...

Страница 34: ...res the video quality of the stream The options are High Medium and Low Frame Rate Adjusts the frame rate of the video stream the range is 0 15FPS The stream will be off if 0 is selected Save Save button to apply the configurations click on this button once and all the settings are confirmed for the new changes to take effect Reset Reset button to discard all the settings and revert to the previou...

Страница 35: ... are High Mid and Low Audio Out Enables or disables audio out on the camera The available options are ON and OFF Audio Out Volume Volume adjustment for audio out of the camera The available options are High Mid and Low Encoding Configures the audio companding algorithm The available options are u Law and a law Save Save button to apply the configurations click on this button once and all the setti...

Страница 36: ... 4 image channels together After enabling Global ON also select Sync Brightness from the AE Mode Then the parameters of all the 4 image channels will be the same and can be adjusted together Press Save to keep the configurations Disable Global Mode OFF Set up the parameters for each image channel independently Each image channel can be adjusted individually After setting up the parameters press Sa...

Страница 37: ... Time can be edited the range is 1 7 1 20000 Adjustment Adjusts the exposure from 0 255 Users can enter the value or adjust it through the slider bar Exposure Time Control Select User Define to enter the values of Maximum Exposure Time the range is 1 7 1 30 and Minimum Exposure Time the range is 1 30 1 20000 manually Exposure Time The range is 1 7 1 20000 It can only be edited when Lock is selecte...

Страница 38: ...cklight glare or high contrast lighting The available options are OFF Low Medium and High AWB Mode Auto White Balance Mode White balance allows the camera to produce more accurate colors under different lighting conditions The default setting is Auto Ref OFF means each channel individually and automatically adjusts the white balance to suit the current lighting condition The other available option...

Страница 39: ...Low Medium and High IR Cut Control Select the IR Cut Control mode to use The available options are Auto Force Day and Force Night DayNight Switching Level Select the desired level to sense and switch between day and night mode the range is 1 10 Reference Channel OFF means each channel individually and automatically adjusts the DayNight setting The other available options are 1 2 3 and 4 Save Save ...

Страница 40: ...ness Enter the values or adjust the bar to increase or decrease the values The default value is 127 Saturation Adjust Configures the color saturation of the image the range is 0 100 with 0 being the lowest saturation Enter the values or adjust the bar to increase or decrease the values The default value is 50 Contrast Adjust Configures the contrast of the image the range is 0 100 with 0 being the ...

Страница 41: ...0 Increasing the value will adjust the image hue towards red Decreasing the value will adjust the image hue towards blue The default value is 50 Restore Settings to Defaults Discards all the settings applied to the image and resets to the default settings Restore All Image Settings Discards all the settings applied to the image and reverts to the previous settings Basic Settings Cont ...

Страница 42: ... is focusing for the full focal length the focusing time is longer Preset The available options for the preset buttons are Home 360 270 User Preset 1 and User Preset 2 User Specified Presets Users can set up custom preset configurations The available options are Create Preset 1 Save Preset 1 Create Preset 2 and Save Preset 2 Note that this is not a traditional PTZ In order to create a precise pres...

Страница 43: ...ROI on Each channel can be edited individually 2 There are 5 ROI zones that can be configured zone 1 zone 5 Switch to ON to enable ROI function The default is OFF 3 Set the image quality of the ROI in the Level drop down menu the options are Low Medium or High 4 Select the area to set the ROI by holding down the mouse button and drag to make a rectangular square release the button once the desired...

Страница 44: ...N to enable Privacy Zone function The default is OFF Each channel can be edited individually 2 Select the area to set the privacy zone by holding down the mouse button and drag to make a rectangular square release the button once the desired area is covered 3 Press the Set Area button for the setting to take effect The masked area will be filled with black and the label Mask will be seen on the vi...

Страница 45: ...ight Bottom Left Bottom Right There are 4 content positions Top Left Top Right Bottom Left and Bottom Right to display the camera name current date time and text overlay Content OFF The default setting is OFF Date Time Displays the current date time Camera Name Displays the device name Camera Name Date Time Displays the device name and date time Custom Text A customized text can be specified here ...

Страница 46: ...is connected to a network with DHCP server To manually configure an IP address disable DHCP and input the IP address subnet mask default gateway primary and secondary DNS server address System Settings HTTP Port Configures the HTTP port number of the web configuration menu HTTPS Port Configures the HTTPS port number of the web configuration menu Hardware Address Unique MAC address for each camera ...

Страница 47: ...ction To manually input an IP address enable IPv6 and input the address prefix default route enable disable router advertisement and DNS server address Save Save button to apply the configuration click on this button once and all the settings are confirmed for the new changes to take effect Reset Reset button to discard all the settings and revert to the previous settings ...

Страница 48: ...inserted You can access files in the SD card attached to the IP camera Password Specifies the FTP login password to access the IP camera Max Connection Specifies the maximum number of FTP connections the IP camera can support Save Save button to apply the configurations click on this button once and all the settings are confirmed for the new changes to take effect Reset Reset button to discard all...

Страница 49: ...ovides options to install a new CA certification Select Certificate Install Method Selects the certificate installation method The available options are Self Signed Certificate and Upload Certificate Press Next after selecting the installation method Save Save button to apply the configurations click on this button once and all the settings are confirmed for the new changes to take effect Reset Re...

Страница 50: ...ols to enable 802 1x function The available protocols are EAP MD5 EAP TLS EAP TTLS or EAP PEAP After the protocol has been selected manually configure the username password and other required information Save Save button to apply the configurations click on this button once and all the settings are confirmed for the new changes to take effect Reset Reset button to discard all the settings and reve...

Страница 51: ...3 Enables or disables SNMPv3 support User Configures the SNMPv3 username Authentication Configures the Authentication mode The options are None MD5 and SHA Privacy Configures encryption for SNMPv3 The options are DES and AES Trap Configuration Specifies the destination IP address to send SNMP trap messages Download MIB Download MIB file for SNMP Save Save button to apply the configurations click o...

Страница 52: ...own menu to specify the type of filtering rule applied to the IP address entered Address1 to Address8 The IP address and associated protocol TCP UDP or None to filter can be entered here A total of 8 IP addresses can be added to the list Save Save button to apply the configurations click on this button once and all the settings are confirmed for the new changes to take effect Reset Reset button to...

Страница 53: ...this feature if the camera is connected to a network with LDAP server After enabling LDAP manually configure the LDAP server and other required information Save Save button to apply the configurations click on this button once and all the settings are confirmed for the new changes to take effect Reset Reset button to discard all the settings and revert to the previous settings ...

Страница 54: ...er from the drop down menu the available providers are DynDNS NO IP and Two DNS The default option is DynDNS Username Username of the DDNS account Password Password of the DDNS account Re type Password Type the same password again for confirmation Save Save button to apply the configurations click on this button once and all the settings are confirmed for the new changes to take effect Reset Reset...

Страница 55: ...of the account and password Port Configures the port number for stream 1 to stream 3 The range is 554 1025 65535 Stream 1 to Stream 3 Enables or disables RTSP unicast for stream 1 to stream 3 The RTSP port number and pathname for each stream can be configured here Default URL Path of Stream 1 to Stream 3 Stream 1 rtsp cameraIP stream1 Stream 2 rtsp cameraIP stream2 Stream 3 rtsp cameraIP stream3 ...

Страница 56: ...st Check this option to enable the video stream to start multicast streaming without using RTCP Video IP Configures the multicast address to stream video Video Port Configures the port number of the video stream Audio IP Configures the multicast address to stream audio Audio Port Configures the port number of the audio stream Meta IP Configures the multicast address for the html meta Meta Port Con...

Страница 57: ...dress of the video stream TTL Configures the time to live threshold of the multicast datagram before it is discarded by the router Save Save button to apply the configurations click on this button once and all the settings are confirmed for the new changes to take effect Reset Reset button to discard all the settings and revert to the previous settings ...

Страница 58: ...er None Disables synchronization of the current date time through the internet DHCP If your DHCP server provides NTP server information select this setting to enable NTP information retrieval Manual Select this option to configure the NTP server address manually for date and time synchronization Manually setting Manually define the date and time The format is yyyy mm dd or hh mm ss Sync with compu...

Страница 59: ...n to begin CAUTION CAUTION CAUTION During update please do not disconnect the network cable reset or power off the IP camera as you may damage the device Reboot Camera Click this button to reboot the camera Reset to Default Click this button to restore all the camera s setting back to factory default except IP address keeps all the settings on the Network Basic setting page Reset to Factory Defaul...

Страница 60: ...s to a backup file Restore Update and Restore Click on the Choose a file button and locate the backup file once the file is selected press the Update and Restore button to restore camera settings Video System Switch Video System Select the desired video system type Maintenance Cont Note Switching the video system type will cause the camera to restart and reset to default ...

Страница 61: ...it Password Set up the password for administrator s authorization Re type Password Retype the same password to confirm User List Displays user accounts available on the camera Press Add New User to add a new account and set up the authorization level of this user under User Information Press Cancel to delete the new user if you do not want to continue the setup To delete an account press the Del U...

Страница 62: ...ol read write over every configuration menu item Views Only has access read to the live view of the camera main screen User Name Username must be at least 1 and up to 16 characters Password Password must be at least 1 and up to 16 characters Re type Password Retype the same password to confirm Save Save button to apply the configurations click on this button once and all the settings are confirmed...

Страница 63: ...tically Configure the scheduled time by holding down the mouse button and clicking the time block to enable the schedule settings on the selected time A light blue color on the time block indicates that the alarm schedule is enabled while a light gray color indicates that the alarm schedule is disabled Alternatively you can manually enter numbers to configure the hours and minutes from start to en...

Страница 64: ...es the type of area layout to use for motion detection You can configure up to 5 zones The instructions below illustrate how to set up 5 zones Each channel can be setup individually 1 To create zone 1 on the live video screen select the area to set the zone by holding down the mouse button and drag to make a rectangular square release the button once the desired area is covered 2 Press the Set Are...

Страница 65: ... holding down the mouse button and clicking the time block to enable the schedule settings on the selected time A light blue color on the time block indicates that the alarm schedule is enabled while a light gray color indicates that the alarm schedule is disabled Alternatively you can manually enter numbers to configure the hours and minutes from start to end for all weekdays Save Save button to ...

Страница 66: ...r weekday to clear all the previous scheduled settings automatically Configure the scheduled time by holding down the mouse button and clicking the time block to enable the schedule settings on the selected time A light blue color on the time block indicates that the alarm schedule is enabled while a light gray color indicates that the alarm schedule is disabled Alternatively you can manually ente...

Страница 67: ...ng To create a Line Crossing area for triggering events on the live video screen select the area by holding down the mouse button and draw the Line Crossing lines release the button once the desired area is covered Then select the Two way or One way option trigger method from the Direction drop down menu Note Object detection function must be enabled in the Network Storage menu to enable event tri...

Страница 68: ...res the direction of counting method Count Displays the counting result One way for Line Counting There will be two parallel lines red and green Only objects passing the green line first will be calculated and counted If the green line is on the right it will be counted as Right in Count if the green line is on the left it will be counted as Left in Count Two way for Line Counting There will be tw...

Страница 69: ... Reset Resets all the counting results of Line Counting or Zone Counting to zero Setup Detection Area Enable Enables or disables the detection area for monitoring objects When enabled the minimum and maximum width and height of the detection area can be configured through the slider bars Save Save button to apply the configurations click on this button once and all the settings are confirmed for t...

Страница 70: ... holding down the mouse button and clicking the time block to enable the schedule settings on the selected time A light blue color on the time block indicates that the alarm schedule is enabled while a light gray color indicates that the alarm schedule is disabled Alternatively you can manually enter numbers to configure the hours and minutes from start to end for all weekdays Save Save button to ...

Страница 71: ...ion Trigger Tampering Alarm Trigger Video Analysis Trigger Scheduled Remote Server Host Address Specifies the host name or IP address of the FTP server Port Specifies the port number of the FTP server Username Specifies the login username for the FTP server Password Specifies the login password for the FTP server Save Save button to apply the configurations click on this button once and all the se...

Страница 72: ... sending emails From Specifies the email address of the sender Trigger Event Configures which type of event trigger to enable and the SMTP server address that the camera will connect to The options are Trigger Alarm Detection Trigger Motion Detection Trigger Tampering Alarm Trigger Video Analysis Message Specifies the message content Subject Specifies the subject of the message Attach JPEG Snapsho...

Страница 73: ...the login password for the SMTP mail server Authentication Mode Specifies the SMTP server authentication mode the options are NO_AUTH SMTP_PLAIN LOGIN and TLS_TLS Recipient List Specifies the email address to send the email to when an event is triggered by Alarm Motion Tampering or Video Analysis A maximum of 10 email addresses can be configured Save Save button to apply the configurations click o...

Страница 74: ...he network storage server that the camera will connect to The options are Enable Trigger Alarm Detection Enable Trigger Motion Detection Enable Trigger Tampering Alarm Enable Trigger Video Analysis Enable Trigger Scheduled Recipient Setup Network Storage Status Displays the current connection status with the network storage server not_mounted or ok Network Address Specifies the IP address of the n...

Страница 75: ... All the video recordings or snapshots from event triggers will be uploaded to the network storage server After the setting is complete the Network Storage Status field will display ok Remove Delete the previous setting or set up a new one After the setting is removed the Network Storage Status field will display not_mounted Save Save button to apply the configurations click on this button once an...

Страница 76: ...etection When a motion detection event is detected the Alarm out will be triggered Trigger Tampering Alarm When a tampering event is detected the Alarm out will be triggered Trigger Video Analysis When a video analysis event is detected the Alarm out will be triggered Types The options are N O and N C Off Time Configure the seconds from 0 to 30 seconds Save Save button to apply the configurations ...

Страница 77: ... Alarm Enable Trigger Video Analysis Enable Trigger Scheduled SD Information Available If an SD card is installed this section will display information on the availability of the SD card Usage If an SD card is installed this section will display the percentage of the total storage used Format SD Card Formats the SD card all data stored on the SD card will be erased if this option is used Status Di...

Страница 78: ...write Record Type Configures the recording method to record the stream onto the SD card The options are Video or Snapshot Save Save button to apply the configurations click on this button once and all the settings are confirmed for the new changes to take effect Reset Reset button to discard all the settings and revert to the previous settings SD Record Cont ...

Страница 79: ... the interval of pre event snapshots The options are 1 3 5 and 10 Post event Snapshot Interval Configures the interval of post event snapshots The options are 1 3 5 and 10 FileName Prefix Configures a prefix to append to the filename The default prefixes for Alarm Motion Tampering Detection and Video Analysis are Alarm Motion Tampering and Video Analysis respectively The format of the filenames Al...

Страница 80: ...ename The default prefixes for Alarm Motion Tampering Detection and Video Analysis are Alarm Motion Tampering and Video Analysis respectively The format of the filenames Alarm_yyyymmddhhmmss Motion_yyyymmddhhmmss Tampering_yyyymmddhhmmss Video Analysis_yyyymmddhhmmss Post event Record Configures the length of the post event recording The range is 5 100 seconds Server Path Configures a folder name ...

Страница 81: ...le FileName Prefix Configures a prefix to append to the filename Server Path Configures a folder name on the SD card Day Time Inclusion Filter Select the day of the week to trigger the schedule Schedule1 and Schedule2 previously configured or AllDay for whole day recording can be selected for each weekday Save Save button to apply the configurations click on this button once and all the settings a...

Страница 82: ...VICON INDUSTRIES INC For office locations visit the website www vicon security com ...

Отзывы: