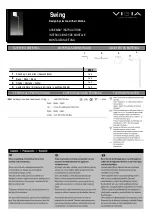
ASSEMBLY INSTRUCTIONS INSTRUCCIONES DE MONTAJE MONTAGEANLEITUNG
EN
ES
D
1.
To put the base, first remove the washer (A) and the nut (B). In
continuation, pass the bolt through the hole of the base (E). Screw the
bolt (C) in the column (D) and tighten them firmly together.
2.
Unfasten the ring (F) from the lamp-holder.
3.
Position the shade (G) on the lamp-holder and fix it with the ring (F).
Place the bulb.
4.
IMPORTANT: The arm is perfectly assembled, but if this come a little
loose in time, you can adjust them by doing the following:
1- Remove the peg (H) using the supplied Allen key.
2- Use the Allen key to tighten the inner nut (I) through the slot on the
lower side of the arm.
3- Replace the peg (H).
1.
Para montar la base, quitar primero la arandela (A) y la tuerca (B). A
continuación pasar el tornillo (C) por el agujero de la base (E), roscar el
tornillo en la columna (D) y apretar fuertemente para fijar el conjunto.
2.
Desmontar el aro (F) del portalámparas.
3.
Montar la pantalla (G) y fijarla roscando el aro (F). Por último, instalar
la bombilla.
4.
IMPORTANTE: El brazo viene perfectamente ajustado, pero si durante
el uso se aflojase ligeramente, se puede volver a reajustar de la siguiente
manera:
1- Extraer la espiga (H) con la llave allen suministrada.
2- Con un extremo de esta llave apretar la tuerca interior (I) a través de la
ranura situada en la parte inferior del brazo.
3- Volver a roscar la espiga (H) en el agujero de la tuerca que quede mas
disponible para asegurar el conjunto.
1.
Ziehen Sie zur Montage des Gestells zunächst die Unterlegscheibe
(A) und die Mutter (B) heraus. Führen Sie anschließend die Schraube
(C) durch die Öffnung des Gestells (E) ein und drehen Sie die Schraube
in die Säule (D) fest ein, um die Stabilität des Systems zu erreichen.
2.
Nehmen Sie den Ring (F) vom Lampenhalter ab.
3.
Setzen Sie den Schirm (G) auf und befestigen Sie diesen durch
Drehen des Rings (F). Setzen Sie anschließend die Birne ein.
4.
WICHTIG: Der Leuchtenarm wird perfekt eingestellt geliefert, sollte er
sich jedoch im Lauf der Zeit durch den Gebrauch leicht gelockert haben,
kann er wie folgt nachjustiert werden:
1- Lösen Sie die Stiftschraube (H) mithilfe des mitgelieferten
Inbusschlüssels heraus.
2- Führen Sie eine Seite des Inbusschlüssels durch den Schlitz am
unteren Leuchtenarm ein und drehen Sie die Mutter im Innern (I) fest.
3- Schrauben Sie nun die Stiftschraube (H) wieder in die Mutteröffnung,
damit die Leuchteneinheit fest sitzt.
A
B
C
D
E
3
2
1
F
H
1
st
I
2
nd
H
3
rd
4
G


