background image


Linux BSP v1.

Linux BSP v1.

Linux BSP v1.

Linux BSP v1.2

2

2

2....0

0

0

0 Development

 Development

 Development

 Development Guide

 Guide

 Guide

 Guide    


47


GPIO Output Enable Registers 


Address 0xd81100B0 


GPIO[23:20] Output Enable Register 

BIT 

Attribute 

Default 

Description 

7:0 

RW 

00h 

GPIO[23:20] Output Enable Register 


Address 0xd81100B1 


GPIO[27:24] Output Enable Register 

BIT 

Attribute 

Default 

Description 

7:0 

RW 

00h 

GPIO[27:24] Output Enable Register 


GPIO Output Data Registers 


Address 0xd81100F0 


GPIO[23:20] Output Data Register 

BIT 

Attribute 

Default 

Description 

7:0 

RW 

00h 

GPIO[23:20] Output Data Register 


Address 0xd81100F1 


GPIO[27:24] Output Data Register 

BIT 

Attribute 

Default 

Description 

7:0 

RW 

00h 

GPIO[27:24] Output Data Register 


Содержание ARTiGO-A600

Страница 1: ...1 00 09232015 100600 DEVELOPMENT GUIDE ARTiGO A600 Linux BSP v1 2 ...

Страница 2: ...s no warranties implied or otherwise in regard to this document and to the products described in this document The information provided in this document is believed to be accurate and reliable as of the publication date of this document However VIA Technologies assumes no responsibility for the use or misuse of the information in this document and for any patent infringements that may arise from t...

Страница 3: ...ux BSP v1 2 2 2 2 0 0 0 0 Development Development Development Development Guide Guide Guide Guide iii Revision History Version Version Version Version Date Date Date Date Remarks Remarks Remarks Remarks 1 00 09 22 2015 Initial external release ...

Страница 4: ...0 8 kernel source 6 4 4 4 4 Making System Booting Media Making System Booting Media Making System Booting Media Making System Booting Media 9 9 9 9 4 1 Set booting media 9 4 1 1 Prepare the Debian 7 file system 9 4 1 2 Boot from eMMC 9 4 1 3 Boot from SD card 10 4 1 3 1 Update the uboot parameters 10 4 1 3 2 Format the SD card 11 4 1 3 3 Install the kernel and root filesystem to SD card 11 4 1 3 4...

Страница 5: ...et date and time to external RTC 32 5 7 4 Test auto power on control of external RTC 33 5 7 5 Disable alarm2 and clear alarm2 status of external RTC 33 5 8 Watch dog control 34 5 8 1 Enable the watch dog 35 5 8 2 Set the watch dog timer 35 5 8 3 Get the watch dog timer 36 5 8 4 Disable the watch dog 37 5 9 Set up VAB 600 E RS485 39 5 9 1 Check whether VAB 600 E RS485 is running on VAB 600 39 5 9 2...

Страница 6: ... C Appendix C Appendix C Appendix C GPIO registers GPIO registers GPIO registers GPIO registers 46 46 46 46 GPIO Input Data Registers 46 GPIO Enable Registers 46 GPIO Output Enable Registers 47 GPIO Output Data Registers 47 GPIO Pull up Pull down Enable Registers 48 GPIO Pull up Pull down Control Registers 48 GPIO Interrupt Request Status Registers 49 ...

Страница 7: ...in client functions 1 2 Package content The evaluation package includes 1 Kernel source BSP Kernel_Source_Codes VAB 600_Linux_BSP_Kernel_Source_0 07 tar gz BSP Frame_Buffer_Driver ANDROID_3 0 8_VE 2 Toolchain BSP arm_201103_gcc4 5 2 tgz 3 Kernel image EVK Kernel_Image uzImage bin 4 Graphics driver package located in EVK BSP Graphics_Driver folder 5 Multimedia package located in EVK BSP Multimedia ...

Страница 8: ...et board Target board Target board Target board ARTiGO A600 platform with 4G EMMC SD Card 4GB SDHC at least ARTiGO A600 now supports up to class 6 SDHC 2 2 Setup cross compiling environment Get root permission Get root permission Get root permission Get root permission If you are not login as a root use su command to get the root permission Setup the Setup the Setup the Setup the Tool Chain Tool C...

Страница 9: ...stall debian get install debian get install debian archive archive archive archive keyring keyring keyring keyring Install the build essential packages apt get install git core gnupg flex bison gperf build essential zip curl zlib1g dev libc6 dev lib32ncurses5 dev ia32 libs x11proto core dev libx11 dev lib32readline gplv2 dev lib32z1 dev libgl1 mesa dev g multilib mingw32 tofrodos python markdown l...

Страница 10: ...is NO warranty not even for MERCHANTABILITY or FITNESS FOR A PARTICULAR PURPOSE Written by Roland McGrath and Ulrich Drepper Unzip the Tool Chain to usr local arm If this folder doesn t exist in your system previously you must create manually with mkdir usr local arm tar zxvf arm_201103_gcc4 5 2 tgz C usr local arm As Figure 1 shows the cross compiler is located in usr local arm arm_201103_gcc4 5 ...

Страница 11: ...n alias arm_1103_le as arm_1103_le as mcpu cortex a9 mfpu neon mfloat abi softfp alias arm_1103_le c arm_1103_le c mcpu cortex a9 mfpu neon mfloat abi softfp alias arm_1103_le cpp arm_1103_le cpp mcpu cortex a9 mfpu neon mfloat abi softfp alias arm_1103_le g arm_1103_le g mcpu cortex a9 mfpu neon mfloat abi softfp alias arm_1103_le gcc arm_1103_le gcc mcpu cortex a9 mfpu neon mfloat abi softfp ali...

Страница 12: ..._BSP_Kernel_Source_0 07 tar gz 600_Linux_BSP_Kernel_Source_0 07 tar gz 600_Linux_BSP_Kernel_Source_0 07 tar gz 600_Linux_BSP_Kernel_Source_0 07 tar gz Then the kernel source will be located in VAB 600_Linux_BSP_Kernel_Source_0 07 tar gz The ANDROID_3 0 8 is the source code Copy all the files that are under the sub folder BSP Frame_Buffer_Driver ANDROID_3 0 8_VE to your corresponding kernel tree fo...

Страница 13: ...ig After selecting the particular options now it is time to build the kernel image make ubin CROSS_COMPILE arm_1103_le make ubin CROSS_COMPILE arm_1103_le make ubin CROSS_COMPILE arm_1103_le make ubin CROSS_COMPILE arm_1103_le jX jX jX jX X The threads to build the kernel image depend on the efficiency of your host PC For example a platform with three cores CPU and 8GB RAM should sustain j8 parame...

Страница 14: ...SP v1 Linux BSP v1 2 2 2 2 0 0 0 0 Development Development Development Development Guide Guide Guide Guide 8 Clean the kernel source and it will clean all the built binaries in ANDROID_3 0 8 make clean make clean make clean make clean ...

Страница 15: ...ootfs rootfs 20131003_v0 01 tar tgz 20131003_v0 01 tar tgz 20131003_v0 01 tar tgz 20131003_v0 01 tar tgz to install Debian with full functions It is located under EVK Update_Package bspinst packages folder Patches Patches Patches Patches Moreover there are some other patches in EVK Update_Package bspinst packages which must be manually copied to SD card when booting from SD card In this version th...

Страница 16: ...sername debian debian debian debian Password Password Password Password temppwd temppwd temppwd temppwd 4 1 3 Boot from SD card 4 1 3 1 4 1 3 1 4 1 3 1 4 1 3 1 Update Update Update Update the the the the uboot parameters uboot parameters uboot parameters uboot parameters Connect the ARTiGO A600 and host PC through COM port Update uboot parameters as below setenv boot method boot emmc setenv ethadd...

Страница 17: ...tition to continue Click the SD card reader Create a FAT FAT FAT FAT partition with 200MB 200MB 200MB 200MB and name it kernel kernel kernel kernel Create an EXT3 EXT3 EXT3 EXT3 partition with the remaining space about 3 7GB and name it fs fs fs fs Then you will get a SD card with FAT and ext3 partition 4 1 3 3 4 1 3 3 4 1 3 3 4 1 3 3 Install Install Install Install the the the the kernel and root...

Страница 18: ...wnload the fully Debian7 file system Download the fully Debian7 file system Download the fully Debian7 file system Download the fully Debian7 file system Connect the ARTiGO A600 and host PC through COM port On the host PC you will see the kernel message and login prompt through serial console The default username and password are debian temppwd debian temppwd debian temppwd debian temppwd Use the ...

Страница 19: ... bin ipconfig ethX X X X Please confirm that the DNS information in etc resolv conf is correct For example the DNS for VIA in etc resolv conf is domain via com tw domain via com tw domain via com tw domain via com tw search via com tw search via com tw search via com tw search via com tw nameserver 10 5 254 150 nameserver 10 5 254 150 nameserver 10 5 254 150 nameserver 10 5 254 150 nameserver 10 5...

Страница 20: ...Please choose the default setting during installation apt apt apt apt get install get install get install get install lxde lxde lxde lxde Once you finish the above steps please reboot the ARTiGO A600 after the installation is completed It It It It is required is required is required is required to install the graphic driver to install the graphic driver to install the graphic driver to install the...

Страница 21: ...VAB600 VAB600 VAB600 VAB600 Debian7 0 Debian7 0 Debian7 0 Debian7 0 Graphics Graphics Graphics Graphics v1 0 v1 0 v1 0 v1 0 4 4 4 4 tgz tgz tgz tgz from the folder EVK BSP Graphics_driver 2 Uncompress the graphics driver tar xzf VAB600 tar xzf VAB600 tar xzf VAB600 tar xzf VAB600 Debian7 0 Debian7 0 Debian7 0 Debian7 0 Graphics Graphics Graphics Graphics v1 0 4 tgz v1 0 4 tgz v1 0 4 tgz v1 0 4 tgz...

Страница 22: ...XA var log Xorg 0 log Success Success Success Success 41 073 II MALI 0 Mali EXA driver will use GE 41 073 II MALI 0 Mali EXA driver is loaded successfully 41 073 WW MALI 0 Initializing EXA Driver 41 073 II EXA 0 Driver allocated offscreen pixmaps 41 077 II EXA 0 Driver registered support for the following operations Failure Failure Failure Failure 41 073 WW MALI 0 Failed allocating EXA Driver If t...

Страница 23: ...Debian7 0 Debian7 0 Multimedia Multimedia Multimedia Multimedia v1 0 v1 0 v1 0 v1 0 3 tgz 3 tgz 3 tgz 3 tgz cd cd cd cd VAB600 VAB600 VAB600 VAB600 Debian7 0 Debian7 0 Debian7 0 Debian7 0 Multimedia Multimedia Multimedia Multimedia v1 0 3 v1 0 3 v1 0 3 v1 0 3 install_quick sh install_quick sh install_quick sh install_quick sh 3 Check gst plugins version Run gst inspect command to check version num...

Страница 24: ...n8 0 115200n8 0 115200n8 0 115200n8 console tty0 console tty0 console tty0 console tty0 init init init init init init init init saveenv saveenv saveenv saveenv reset reset reset reset 1920 1080 is HDMI monitor resolution Actually it will detect EDID information automatically and choose the maximum resolution therefore the setting influences U Boot logo resolution only Xorg Xorg Xorg Xorg Edit etc ...

Страница 25: ...MI monitor normally HDMI monitor normally you have to you have to you have to you have to modify both modify both modify both modify both U U U U Boot and Xorg Boot and Xorg Boot and Xorg Boot and Xorg L L L Lack of any step of them may probably cause the failure to ack of any step of them may probably cause the failure to ack of any step of them may probably cause the failure to ack of any step o...

Страница 26: ...dr q command shows the combination subset of the mode that your display device supports from EDID and the mode listed in the following table Please do not set mode mode mode mode outside of the result of xrandr q the rate rate rate rate can only be followed by 60 or 75 If you see the refresh rate 59 9 just set it 60 Refresh VIA Refresh VIA Refresh VIA Refresh VIA Resolutions Resolutions Resolution...

Страница 27: ...change can take effect 5 4 Multimedia local playback Currently we support MPEG1 MPEG2 MPEG4 except MSMPEGv1 v2 WMV9 VC1 H264 HW acceleration Play local multimedia files by the following command gst gst gst gst launch launch launch launch 0 10 0 10 0 10 0 10 playbin uri file path playbin uri file path playbin uri file path playbin uri file path and and and and file file file file name name name nam...

Страница 28: ...alsamixer The following figure shows a fine tuned result of alsamixer Click or to choose the item to be modified Press M M M M to turn on or turn off an option and click or to subtract or add the value To enable PCM audio volume control asound conf asound conf asound conf asound conf must be reloaded To achieve this goal install the necessary packages first apt apt apt apt get install alsa get ins...

Страница 29: ...onf s s s speaker peaker peaker peaker test test test test Dsoftvolume Dsoftvolume Dsoftvolume Dsoftvolume c2 c2 c2 c2 twav twav twav twav After it outputs the test music for several seconds use CTRL C to stop the examination Next step is to open alsamixer again check whether PCM audio volume control appears or not The name of PCM audio volume control is PCM PCM PCM PCM Change its value to observe...

Страница 30: ... devmem2 utility to access the GPIO which was pre installed in the file system image If you need to change the kernel configurations please refer to VAB 600_Linux_defconfig in BSP Kernel_Source_Codes to ensure the GPIO function 5 6 1 GPIO hardware design The GPIO function was provided by CN9 GPIO SMBus Interface Pin Header They are mapped to GPIO20 GPIO27 The corresponding pins in VAB 600 are list...

Страница 31: ...ide Guide Guide 25 You can connect your own device to the pins and operate it via the relative GPIO settings To manage the particular GPIO the homologous register values have to be changed 5 6 2 devmem2 utility This utility can also be installed in Linux official distribution Use devmem2 utility to read write GPIO registers ...

Страница 32: ... 5 6 2 1 devmem2 utility read and write devmem2 utility read and write devmem2 utility read and write devmem2 utility read and write For example if you want to read the register 0xd8110030 in byte format you must type the command below devmem2 0xd8110030 b devmem2 0xd8110030 b devmem2 0xd8110030 b devmem2 0xd8110030 b Same as the writing operation write 0xff value to the register 0xd81100b0 in byt...

Страница 33: ... v1 Linux BSP v1 Linux BSP v1 Linux BSP v1 2 2 2 2 0 0 0 0 Development Development Development Development Guide Guide Guide Guide 27 For detailed descriptions of GPIO register values please refer to Appendix C ...

Страница 34: ...an the relative registers devmem2 0xd81100b0 b 0x0 devmem2 0xd81100b0 b 0x0 devmem2 0xd81100b0 b 0x0 devmem2 0xd81100b0 b 0x0 devmem2 0xd81100b1 b 0x0 devmem2 0xd81100b1 b 0x0 devmem2 0xd81100b1 b 0x0 devmem2 0xd81100b1 b 0x0 devmem2 0xd81100f0 b 0x0 devmem2 0xd81100f0 b 0x0 devmem2 0xd81100f0 b 0x0 devmem2 0xd81100f0 b 0x0 devmem2 0xd81100f1 b 0x0 devmem2 0xd81100f1 b 0x0 devmem2 0xd81100f1 b 0x0...

Страница 35: ...0xd81100b0 b 0xf0 Write GPIO 20 23 Output Enable Registers c Then set the value of GPIO 20 23 output data registers also to be high state devmem2 0xd81100f0 b 0xf0 devmem2 0xd81100f0 b 0xf0 devmem2 0xd81100f0 b 0xf0 devmem2 0xd81100f0 b 0xf0 Write GPIO 20 23 Output Data Registers Now GPIO 20 23 should output the high state which changes the low state of GPIO 24 27 to be high state d Examine the va...

Страница 36: ... input data register value devmem2 0xd8110030 b devmem2 0xd8110030 b devmem2 0xd8110030 b devmem2 0xd8110030 b Read GPIO 20 23 input Registers Obviously the value should be 0x0 b To begin the experiment set the value of GPIO 24 27 output enable registers to be high state devmem2 0xd81100b1 b 0x0f devmem2 0xd81100b1 b 0x0f devmem2 0xd81100b1 b 0x0f devmem2 0xd81100b1 b 0x0f Write GPIO 24 27 Output ...

Страница 37: ...be 0xF because of the influence of GPIO 24 27 5 7 External RTC control This section describes how to operate the external RTC function Please use i2c tools utility to access the external RTC which was pre installed in the file system image If you need to change the kernel configurations please refer to VAB 600_Linux_defconfig in BSP Kernel_Source_Codes to ensure the external RTC function 5 7 1 Ext...

Страница 38: ...x68 0x4 0x date d y 0 0x68 0x4 0x date d y 0 0x68 0x4 0x date d date of month date of month date of month date of month i2cset i2cset i2cset i2cset f f f f y 0 0x68 0x5 0x date m y 0 0x68 0x5 0x date m y 0 0x68 0x5 0x date m y 0 0x68 0x5 0x date m month month month month i2cset i2cset i2cset i2cset f f f f y 0 0x68 0x6 0x date g y 0 0x68 0x6 0x date g y 0 0x68 0x6 0x date g y 0 0x68 0x6 0x date g ...

Страница 39: ...d 0x80 y 0 0x68 0xd 0x80 alarm2 day or date alarm2 day or date alarm2 day or date alarm2 day or date i2cset i2cset i2cset i2cset f f f f y 0 0x68 0xf 0x0 y 0 0x68 0xf 0x0 y 0 0x68 0xf 0x0 y 0 0x68 0xf 0x0 clear alarm status clear alarm status clear alarm status clear alarm status i2cse i2cse i2cse i2cset t t t f f f f y 0 0x68 0xe 0x6 y 0 0x68 0xe 0x6 y 0 0x68 0xe 0x6 y 0 0x68 0xe 0x6 enable alarm...

Страница 40: ...order to boot on schedule please remember to clear alarm2 status and enable alarm2 before shutdown Clear alarm status and enable alarm2 i2cset i2cset i2cset i2cset f f f f y 0 0x68 0xf 0x0 y 0 0x68 0xf 0x0 y 0 0x68 0xf 0x0 y 0 0x68 0xf 0x0 clear alarm status clear alarm status clear alarm status clear alarm status i2cset i2cset i2cset i2cset f f f f y 0 0x68 0xe 0x6 y 0 0x68 0xe 0x6 y 0 0x68 0xe 0...

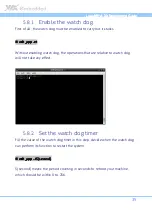
Страница 41: ...app wdt_app wdt_app et et et et Without enabling watch dog the operations that are relative to watch dog will not take any effect 5 8 2 Set the watch dog timer Fill the value of the watch dog timer in this step decide when the watch dog can perform its function to restart the system wdt_app wdt_app wdt_app wdt_app t second t second t second t second second means the period counting in seconds to r...

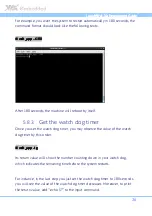
Страница 42: ...nds the machine will reboot by itself 5 8 3 Get the watch dog timer Once you set the watch dog timer you may observe the value of the watch dog timer by this order wdt_app wdt_app wdt_app wdt_app tg tg tg tg Its return value will show the number counting down in your watch dog which indicates the remaining time before the system restarts For instance in the last step you just set the watch dog tim...

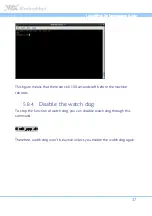
Страница 43: ...de Guide Guide 37 This figure means that there are still 150 seconds left before the machine reboots 5 8 4 Disable the watch dog To stop the function of watch dog you can disable watch dog through this command wdt_app wdt_app wdt_app wdt_app dt dt dt dt Therefore watch dog won t be active unless you enable the watch dog again ...

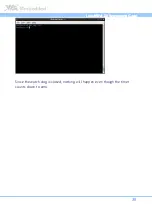
Страница 44: ...ux BSP v1 Linux BSP v1 Linux BSP v1 2 2 2 2 0 0 0 0 Development Development Development Development Guide Guide Guide Guide 38 Since the watch dog is closed nothing will happen even though the timer counts down to zero ...

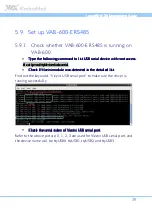
Страница 45: ... tty driver usbserial cat proc tty driver usbserial cat proc tty driver usbserial Check if Viz Check if Viz Check if Viz Check if Vizzi zi zi zini ni ni ni module was detected in the detailed list module was detected in the detailed list module was detected in the detailed list module was detected in the detailed list Find out the keyword Vizzini USB serial port to make sure the driver is running ...

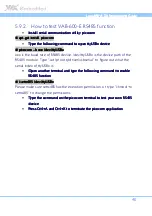
Страница 46: ...ial to figure out what the serial index of ttyUSBx is Open another terminal and type the following command to Open another terminal and type the following command to Open another terminal and type the following command to Open another terminal and type the following command to e e e enable nable nable nable RS485 RS485 RS485 RS485 functio functio functio function n n n setrs485 setrs485 setrs485 s...

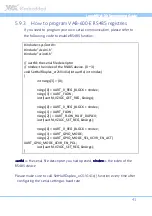
Страница 47: ...lex_xr21V141x int uartfd int nIndex int nArgs 3 0 nArgs 0 UART_0_REG_BLOCK nIndex nArgs 1 UART_FLOW ioctl uartfd VZIOC_GET_REG nArgs nArgs 0 UART_0_REG_BLOCK nIndex nArgs 1 UART_FLOW nArgs 2 UART_FLOW_HALF_DUPLEX ioctl uartfd VZIOC_SET_REG nArgs nArgs 0 UART_0_REG_BLOCK nIndex nArgs 1 UART_GPIO_MODE nArgs 2 UART_GPIO_MODE_SEL_XCVR_EN_ACT UART_GPIO_MODE_XCVR_EN_POL ioctl uartfd VZIOC_SET_REG nArgs ...

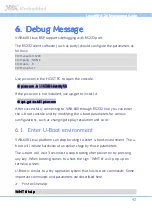
Страница 48: ...it apt apt apt apt get install picocom get install picocom get install picocom get install picocom After successfully connecting to VAB 600 through RS232 line you can enter the u boot console and try modifying the u boot parameters for various configurations such as changing display resolution and so on 6 1 Enter U Boot environment VAB 600 Linux platform can stop booting to enter u boot environmen...

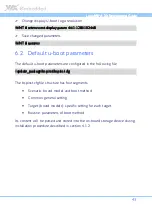
Страница 49: ... saveenv WMT saveenv WMT saveenv WMT saveenv 6 2 Default u boot parameters The default u boot parameters are configured in the following file update_package update_package update_package update_package bspinst bspinst cfg bspinst bspinst cfg bspinst bspinst cfg bspinst bspinst cfg The bspinst cfg file structure has four segments Scenario board model and boot method Common general setting Target bo...

Страница 50: ...rying to setup static IP address in Network Connections the IP setup does not take effect A After setting the Network Connections user should open a console to shut down the Ethernet adapter and turn it on by following the command below target Ethernet adapter is eth1 ifconfig eth1 down ifconfig eth1 down ifconfig eth1 down ifconfig eth1 down ifconfig eth1 up ifconfig eth1 up ifconfig eth1 up ifco...

Страница 51: ...80x1050 146 25 1680 1784 1960 2240 1050 1053 1059 1089 hsync vsync then switch to this mode 2 Support smooth video playback of 720P on 1280x1024 display mode 3 If making action to the playing video or moving mouse over the video this video will not sound and be blocked 4 XVID video will sometimes show garbage 5 Some VC1 video files may become static when seeking or having abnormal issue for audio ...

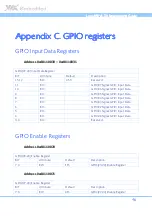
Страница 52: ...12 RO 4 h0 Reserved 11 RO GPIO27 Signal GPIO Input Data 10 RO GPIO26 Signal GPIO Input Data 9 RO GPIO25 Signal GPIO Input Data 8 RO GPIO24 Signal GPIO Input Data 7 RO GPIO23 Signal GPIO Input Data 6 RO GPIO22 Signal GPIO Input Data 5 RO GPIO21 Signal GPIO Input Data 4 RO GPIO20 Signal GPIO Input Data 3 0 RO Reserved GPIO Enable Registers Address 0xd8110070 GPIO 23 20 Enable Register BIT Attribute ...

Страница 53: ... 7 0 RW 00h GPIO 23 20 Output Enable Register Address 0xd81100B1 GPIO 27 24 Output Enable Register BIT Attribute Default Description 7 0 RW 00h GPIO 27 24 Output Enable Register GPIO Output Data Registers Address 0xd81100F0 GPIO 23 20 Output Data Register BIT Attribute Default Description 7 0 RW 00h GPIO 23 20 Output Data Register Address 0xd81100F1 GPIO 27 24 Output Data Register BIT Attribute De...

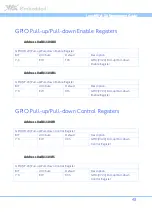
Страница 54: ...Enable Register Address 0xd81104B1 GPIO 27 24 Pull up Pull down Enable Register BIT Attribute Default Description 7 0 RW 0Fh GPIO 27 24 Pull up Pull down Enable Register GPIO Pull up Pull down Control Registers Address 0xd81104F0 GPIO 23 20 Pull up Pull down Control Register BIT Attribute Default Description 7 0 RW 00h GPIO 23 20 Pull up Pull down Control Register Address 0xd81104F1 GPIO 27 24 Pul...

Страница 55: ...en this bit is active an one it indicates that an interrupt request has been configured and detected on the associated signal Once this bit is active an one software must write an one to this bit to clear it inactive a zero otherwise this bit and the associated GPIO Interrupt Request will remain active an one 6 RW1C 0 GPIO22 Interrupt Status 5 RW1C 0 GPIO21 Interrupt Status 4 RW1C 0 GPIO20 Interru...

Страница 56: ......
Отзывы: