background image

Vespa would like to thank you

for choosing one of its products. We have prepared this manual to help you to get the very best from your vehicle. Please read it carefully before riding
the vehicle for the first time. It contains information, tips and precautions for using your vehicle. It also describes features, details and devices to assure
you that you have made the right choice. We believe that if you follow our suggestions, you will soon get to know your new scooter and it will serve you
well for a long time to come. This booklet forms an integral part of the vehicle; should the vehicle be sold, it must be transferred to the new owner.

Vespa S 50 4T 2V

Ed. 02_10/2012

Содержание S 50 2T 2012

Страница 1: ...tion tips and precautions for using your vehicle It also describes features details and devices to assure you that you have made the right choice We believe that if you follow our suggestions you will soon get to know your new scooter and it will serve you well for a long time to come This booklet forms an integral part of the vehicle should the vehicle be sold it must be transferred to the new ow...

Страница 2: ...regular checks that should be carried out on the vehicle at an authorised Dealer or Service Centre The booklet also contains instructions for simple repairs Any operations not specifically described in this booklet require the use of special tools and or particular technical knowledge to carry out these operations refer to any authorised Dealer or Service Centres 2 ...

Страница 3: ...ging the environment Vehicle intactness The incomplete or non observance of these regulations leads to the risk of serious damage to the vehicle and sometimes even the invalidity of the guarantee The signs that you see on this page are very important They are used to highlight parts of the booklet that should be read with particular care The different symbols are used to make each topic in the man...

Страница 4: ...4 ...

Страница 5: ...edriving 28 MAINTENANCE 31 Engineoillevel 32 Engineoillevelcheck 32 Engineoiltop up 33 Engineoilchange 33 Huboillevel 34 Tyres 35 Sparkplugdismantlement 36 Removingtheairfilter 37 Secondaryairsystem 38 Checkingthebrakeoillevel 39 Brakingsystemfluidtopup 40 Battery 41 Useofanewbattery 42 Long periods of inactivity 42 Fuses 44 Frontlightgroup 45 Headlightadjustment 47 Frontdirectionindicators 47 Rea...

Страница 6: ...6 ...

Страница 7: ...Vespa S 50 4T 2V Chap 01 Vehicle 7 ...

Страница 8: ...d 01_01 A Ignition key switch B Bag hook C Horn button D Turn indicator switch E Rear brake lever F Headlight switch G Analogue instrument panel H Front brake lever I Throttle grip L Starter button 8 1 Vehicle ...

Страница 9: ...01_01 9 1 Vehicle ...

Страница 10: ...01_02 10 1 Vehicle ...

Страница 11: ...1_03 Located in the instrument panel it displays hours and minutes with 1 to 12 hour time AM or PM Operate the function selection button B and month day and seconds are also dis played besides hours and minutes To adjust the different functions select the desired function with button A and adjust with button B The time counter can be reset by pressing button A with the clock in the seconds functio...

Страница 12: ...RONMENT THEY MUST DIS POSED OF IN SUITABLE CONTAINERS AS PRESCRIBED BY THE REGULA TIONS IN FORCE Keyswitch 01_04 Ignition key A is located on the front leg shield back plate near the bag hook 01_04 SWITCH POSITIONS ON 1 Ready to start position non extractable key mechanical antitheft device dis abled OFF 2 Ignition disabled extractable key mechanical antitheft device disabled LOCK 3 Ignition disab...

Страница 13: ...leasingthesteeringwheel Reinsert the key B and turn it to KEY OFF CAUTION DO NOT TURN THE KEY TO LOCK OR KEY OFF WHILE RIDING 01_06 Switchdirectionindicators 01_06 Lever D towards 1 left turn indicators switched on Lever D towards 2 right turn indicators switched on The lever D automatically goes back to 0 and the turn indicators remain on push the lever D to turn them off 13 1 Vehicle ...

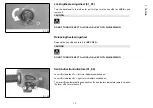
Страница 14: ...1_07 Hornbutton 01_07 Push the C button to sound the horn 01_08 Lightswitch 01_08 When the light switch F is set to 0 the low beam light is on When set to 1 the high beam light is activated 14 1 Vehicle ...

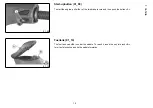
Страница 15: ... the engine pull either of the two brake levers and then push the button L 01_10 Fueltank 01_10 The fuel tank cap B is under the saddle To reach it insert the key into lock A turn it anticlockwise and tip the saddle forwards 15 1 Vehicle ...

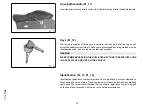
Страница 16: ...cation code to be quoted when ordering duplicates WARNING WE RECOMMEND KEEPING THE DUPLICATE KEY TOGETHER WITH ITS CODE IN A SAFE PLACE AND NOT ON THE VEHICLE Identification 01_13 01_14 Identification registration numbers are made up of a prefix and a number stamped on the chassis and on the engine These numbers must always be quoted when ordering spare parts We recommend checking that the chassis...

Страница 17: ...TO SERIOUS PENAL SANCTIONS IMPOUNDING OF THE VEHICLE ETC 01_13 Chassis number The number A is stamped near the battery compartment Remove the helmet com partment to read it 01_14 Engine number The engine number B is stamped near the rear left shock absorber lower support 17 1 Vehicle ...

Страница 18: ...01_15 Bagclip 01_15 To use the retractable bag hook B mounted on the leg shield back plate pull it slightly towards the back of the vehicle 18 1 Vehicle ...

Страница 19: ...Vespa S 50 4T 2V Chap 02 Use 19 ...

Страница 20: ...of the front and rear brakes 02_02 Refuelling 02_02 Fill fuel tank A with unleaded petrol minimum octane rating 95 When the fuel reaches the reserve level the warning light fitted on the instrument panel lights up CAUTION SHUT OFF THE ENGINE BEFORE REFUELLING WITH PETROL PETROL IS HIGHLY FLAMMABLE DO NOT LET PETROL SPILL FROM THE TANK OR WHILE REFUELLING CAUTION DO NOT BRING NAKED FLAMES OR CIGARE...

Страница 21: ...3 Check tyre pressure as indicated in the scheduled maintenance table CAUTION TYRE PRESSURE SHOULD BE CHECKED WHEN TYRES ARE COLD INCOR RECT TYRE PRESSURE CAUSES ABNORMAL TYRE WEAR AND MAKES RID ING DANGEROUS TYRES MUST BE REPLACED WHEN THE TREAD REACHES THE WEAR LIMITS SET FORTH BY LAW TYRE INFLATION PRESSURE Front tyre pressure with passenger 1 6 bar 1 6 bar 21 2 Use ...

Страница 22: ...0 70 10 54L 02_04 Runningin 02_04 WARNING DURING THE FIRST 1000 KM DO NOT RIDE THE VEHICLE OVER 80 OF ITS MAXIMUM SPEED AVOID TWISTING THE THROTTLE GRIP FULLY OR KEEP ING A CONSTANT SPEED ALONG LONG SECTIONS OF ROAD AFTER THE FIRST 1000 KM GRADUALLY INCREASE SPEED UNTIL REACHING THE MAX IMUM PERFORMANCE 22 2 Use ...

Страница 23: ...tarted To start it up it is necessary to 1 Place the scooter on its stand E check that the rear wheel is off the ground 2 Keep the throttle grip to idle speed 3 Insert the key into the switch D and turn it to ON 4 Pull the rear brake lever B or the front brake lever C and then press the starter button A CAUTION DO NOT CARRY OUT THESE OPERATIONS IN CLOSED AREAS SINCE EX HAUST GASES ARE TOXIC CAUTIO...

Страница 24: ...tions In any case do not operate the starter motor longer than 20 in an attempt to start the engine 2 Battery or starter motor inefficiency Put the scooter on its stand E make sure that the rear wheel is off the ground turn the key switch D to ON and use the kick starter F 3 Empty fuel tank After refuelling the scooter start the engine by pressing the starter button A with the throttle at a minimu...

Страница 25: ...acceleration then turn the key switch D to OFF to stop the engine ex tractable key CAUTION DUE TO THE HIGH TEMPERATURES THE CATALYTIC CONVERTER CAN REACH ALWAYS TAKE CARE WHEN PARKING THE VEHICLE THAT THE EX HAUST DOES NOT COME INTO CONTACT WITH FLAMMABLE MATERIALS TO AVOID SERIOUS BURNS 25 2 Use ...

Страница 26: ... ACCESSORY IS NOT A THEFT PREVENTION GUARANTEE IT IS ONLY A DETERRENT Catalyticsilencer CAUTION TAMPERING WITH THE CATALYTIC SILENCER MAY CAUSE SEVERE DAMAGE TO THE ENGINE CAUTION WHEN PARKING THE VEHICLE DUE TO THE HIGH TEMPERATURES THE CAT ALYTIC CONVERTER CAN REACH ALWAYS BE CAREFUL THAT THE MUF FLER DOES NOT COME INTO CONTACT WITH FLAMMABLE MATERIALS TO AVOID SERIOUS BURNS 26 2 Use ...

Страница 27: ...trifugal clutch The system is designed to give the best possible performance in terms of both acceleration and consumption on level ground and uphill thanks to the adjustments made to engine speed and transmitted torque If you have to stop on an uphill slope traffic lights traffic jam etc only use the brake to keep the vehicle still leaving the motor running at idling speed Using the motor to keep...

Страница 28: ...d on rough roads and ride with care 3 After riding on a long stretch of wet road without using the brakes braking can be poor at the beginning In these conditions it is a good idea to apply the brakes from time to time 4 Do not brake hard on wet unsurfaced or slippery roads 5 Avoid riding off by mounting the scooter when it is resting on its support In any case in order to avoid abrupt departures ...

Страница 29: ...NGEROUS FOR RIDING CAUTION DO NOT ADJUST THE MIRRORS WHILE RIDING THIS COULD CAUSE YOU TO LOOSE CONTROL OF THE VEHICLE WARNING IN ORDER TO PREVENT ANY ACCIDENTS RIDE VERY CAREFULLY AFTER ADDING ACCESSORIES AND WHILE CARRYING LUGGAGE THE ADDITION OF ACCESSORIES AND LUGGAGE CAN REDUCE YOUR SCOOTER STABILITY AND PERFORMANCE AS WELL AS THE LEVEL OF SAFETY DURING USE SEE THE SPARE PARTS AND ACCESSORIES...

Страница 30: ...30 2 Use ...

Страница 31: ...Vespa S 50 4T 2V Chap 03 Maintenance 31 ...

Страница 32: ...Check oil level every time the vehicle is used with the engine cold The level should be between the MAX and MIN marks on the oil level dipstick A shown in the figure the stand should be firm on an even surface during the check If the check is carried out after the vehicle has been used and therefore with a hot engine the level line will be lower in order to carry out a correct check wait at least ...

Страница 33: ...r cleaning and mounting again the mesh filter screw cap C and fill with oil the hole of the cap dipstick used to check engine oil level Then start the vehicle leave it running for a few minutes and switch it off 5 minutes later check oil level and if necessary add oil without exceeding the MAX level Only use new oil of the recommend type for oil top ups and change CAUTION USED OILS CONTAIN SUBSTAN...

Страница 34: ...NG THE ENGINE WITH INSUFFICIENT LUBRICATION OR WITH THE IN ADEQUATE LUBRICANTS ACCELERATES WEAR AND TEAR OF THE MOVING PARTS AND CAN CAUSE IRRETRIEVABLE DAMAGE CAUTION USED OILS CONTAIN SUBSTANCES HARMFUL TO THE ENVIRONMENT FOR OIL REPLACEMENT CONTACT AN AUTHORISED SERVICE CENTRE WHICH IS EQUIPPED TO DISPOSE OF USED OILS IN AN ENVIRONMENTALLY FRIENDLY AND LEGAL WAY N B THE NOTCHES ON THE HUB OIL L...

Страница 35: ...not show signs of splitting at the sides or irregular tread wear If this occurs go to an authorised work shop or at least a workshop adequately equipped to remove and refit tyres CAUTION TYRE PRESSURE SHOULD BE CHECKED WHEN TYRES ARE COLD INCOR RECT TYRE PRESSURE CAUSES ABNORMAL TYRE WEAR AND MAKES RID ING DANGEROUS TYRES MUST BE REPLACED WHEN THE TREAD REACHES THE WEAR LIMITS SET FORTH BY LAW TYR...

Страница 36: ...re When refitting the plug tighten it manually being sure to insert it at the right angle Carefully reinsert the shielded cap C To reassemble the cover follow the steps in reverse order making sure to insert the pins in the lower part of the body CAUTION FOLLOW THESE PROCEDURES VERY CAREFULLY TO AVOID ANY SEVERE DAMAGE THAT MAY BE CAUSED BY THE VERY POWERFUL IGNITION SYS TEM CAUTION THE SPARK PLUG...

Страница 37: ...the 6 fixing screws C then take out the filter Clean with water and car shampoo afterwards dry with compressed air and submerge in a rec ommended oil and petrol mixture in ratio of 50 Afterwards squeeze it leave it to dry and mount it again CAUTION IN CASE OF RIDING ON DUSTY ROADS IT IS ADVISABLE TO CLEAN THE AIR FILTER MORE FREQUENTLY THAN INDICATED IN THE RELEVANT CHAPTER ON SCHEDULED MAINTENANC...

Страница 38: ...g element C made of sponge Wash the sponge with water and neutral soap then dry with a clean cloth and short blasts of compressed air While cleaning the filter check the condition of the reed valve D and fit it back in place on the housing Before closing the cover of the SAS housing check the good condition of the sealing O ring replace it if damaged or deformed N B The reed valve can be inserted ...

Страница 39: ...When the sight glass A is full the level inside the reservoir exceeds the MIN level when it is partially full the level drops to the MIN level when it is fully empty the level of fluid in the reservoir is below the MIN level The brake fluid level may fall due to wear on the brake pads In case the pad wear is below the minimum mark contact an Authorised Service Centre to have the braking system tho...

Страница 40: ... out by trained technicians take your scooter to an authorised Service Centre or Dealer WARNING ONLY USE DOT 4 CLASSIFIED BRAKE FLUID BRAKE CIRCUIT FLUID IS VERY CORROSIVE MAKE SURE THAT IT DOES NOT COME INTO CONTACT WITH THE PAINTWORK CAUTION AVOID CONTACT OF BRAKE FLUID WITH EYES SKIN AND CLOTHING IN CASE OF CONTACT RINSE WITH WATER THE BRAKING CIRCUIT FLUID IS HYGROSCOPIC THAT IS IT ABSORBS HUM...

Страница 41: ...gh maintenance WARNING USED BATTERIES ARE HARMFUL FOR THE ENVIRONMENT COLLECTION AND DISPOSAL SHOULD BE CARRIED OUT IN COMPLIANCE WITH REGULA TIONS IN FORCE CAUTION ELECTROLYTE CONTAINS SULPHURIC ACID AVOID CONTACT WITH EYES SKIN AND CLOTHES IN CASE OF ACCIDENTAL CONTACT RINSE WITH ABUN DANT WATER AND CONSULT A DOCTOR CAUTION IN ORDER TO AVOID DAMAGING THE ELECTRICAL SYSTEM NEVER DISCON NECT THE W...

Страница 42: ... THE ENVIRONMENT COLLECTION AND DISPOSAL SHOULD BE CARRIED OUT IN COMPLIANCE WITH REGULA TIONS IN FORCE Characteristic Battery 12V 9Ah Long periods of inactivity Battery performance will be poor if the vehicle is not used for a long time This is the result of the natural phenomenon of battery discharging and may be due to residual absorption by vehicle components with constant power consumption Po...

Страница 43: ...in a dry ventilated place Recharge at least once every two months N B THE BATTERY MUST BE CHARGED WITH A CURRENT EQUAL TO 1 10 OF THE RATED CAPACITY OF THE BATTERY AND FOR NOT LONGER THAN 10 HOURS CONTACT AN AUTHORISED SERVICE CENTRE TO CARRY OUT THIS OPERA TION SAFELY WHEN REFITTING THE BATTERY MAKE SURE THE LEADS ARE CORRECTLY CONNECTED TO THE TERMINALS WARNING DO NOT DISCONNECT THE BATTERY CABL...

Страница 44: ...tor CAUTION IN ORDER TO AVOID DAMAGING THE ELECTRICAL SYSTEM NEVER DISCON NECT THE WIRING WHILE THE ENGINE IS RUNNING DO NOT TIP THE VEHICLE TOO MUCH IN ORDER TO AVOID DANGEROUS LEAKAGE OF THE BATTERY ELECTROLYTE BULBS High low beam light bulb Type Halogen Power 12V 35 35W Quantity 1 Front side light bulb Type All glass Power 12V 5W Quantity 1 Front turn indicator light bulb Type Spherical Power 1...

Страница 45: ...ower 12V 1 2W Quantity 4 03_24 Frontlightgroup 03_24 03_25 03_26 03_27 To access the headlight bulbs remove the front of the handlebar cover as follows 1 Remove the rear view mirrors 2 Unscrew the 3 screws holding the handlebar cover The front central screw B and the 2 rear screws A Once this is done the handlebar cover can be removed To replace the high low beam headlight bulb 1 Disconnect the po...

Страница 46: ...NOTICED ON THE INSIDE OF THE HEADLAMP GLASS THIS DOES NOT INDICATE A FAULT AND IS ATTRIBUTABLE TO HUMIDITY AND OR TO LOW TEMPERATURES THE PHENOMENON SHOULD QUICKLY DISAPPEAR WHEN THE LIGHT IS SWITCHED ON THE PRESENCE OF DROPS OF WATER ON THE OTHER HAND COULD INDI CATE THAT WATER IS INFILTRATING CONTACT THE AFTER SALES SERVICE NETWORK 46 3 Maintenance ...

Страница 47: ...7 10 of the distance from the ground to the centre of the vehicle s headlamp 3 If otherwise adjust the right headlight with screw A N B THE ABOVE PROCEDURE COMPLIES WITH THE EUROPEAN STANDARDS RE GARDING MAXIMUM AND MINIMUM HEIGHT OF LIGHT BEAMS REFER TO THE STATUTORY REGULATIONS IN FORCE IN EVERY COUNTRY WHERE THE VE HICLE IS USED 03_30 Frontdirectionindicators 03_30 03_31 To replace the bulbs 1 ...

Страница 48: ...then take it out To refit proceed in reverse order N B IF MISTING IS NOTICED ON THE INSIDE OF THE HEADLAMP GLASS THIS DOES NOT INDICATE A FAULT AND IS ATTRIBUTABLE TO HUMIDITY AND OR TO LOW TEMPERATURES THE PHENOMENON SHOULD QUICKLY DISAPPEAR WHEN THE LIGHT IS SWITCHED ON THE PRESENCE OF DROPS OF WATER ON THE OTHER HAND COULD INDI CATE THAT WATER IS INFILTRATING CONTACT THE AFTER SALES SERVICE NET...

Страница 49: ...g by undoing the screw A 2 Take out the bulb holder B from its fitting by turning it anticlockwise 3 Press the bulb turn it anticlockwise and then take it out To refit proceed in reverse order Rear viewmirrors 03_36 The mirrors can be set to the desired position by adjusting the mirror frame 49 3 Maintenance ...

Страница 50: ...or tighten the screw B until you reach the recommended idle speed taking care the engine does not make the rear wheel move If it is difficult to adjust idle speed take your vehicle to an Authorised Dealer or Service Centre WARNING ADJUST IDLE SPEED WHEN THE ENGINE IS FAIRLY HOT AND HAS BEEN RUNNING FOR AT LEAST FIVE MINUTES BEFORE THIS OPERATION MAKE SURE THAT THE THROTTLE GRIP HAS THE RECOMMENDED...

Страница 51: ...itions the vehicle should be taken to an Authorised Service Centre or Dealer CAUTION BRAKING SHOULD BEGIN AFTER ABOUT 1 3 OF THE BRAKE LEVER STROKE CAUTION HAVE THE BRAKE PADS CHECKED BY THE DEALER ACCORDING TO THE CHECKS SPECIFIED IN THE SCHEDULED MAINTENANCE TABLE HOWEVER IN THE EVENT OF NOISES COMING FROM THE FRONT AND OR REAR BRAK ING SYSTEM DURING OPERATION IT IS ADVISABLE TO HAVE THE BRAKING...

Страница 52: ...A CAUTION BRAKING SHOULD BEGIN AFTER ABOUT 1 3 OF THE BRAKE LEVER STROKE Puncture The vehicle is equipped with Tubeless tyres without inner tube In the event of a puncture Tubeless tyres unlike tyres with inner tubes go flat very slowly resulting in a greater steering safety In the event of a puncture an emergency repair can be carried out using an inflate and repair spray can For a final repair t...

Страница 53: ...ead centre position remove the spark plug and pour 1 2 cm of recommended oil through its hole Press the engine start pedal 3 or 4 times letting the engine perform a few revolutions slowly then replace the spark plug 3 Drain up all the vehicle fuel spread antirust grease on the uncoated metal parts keep the wheels off the ground by resting the chassis on two wooden wedges 4 For the battery follow t...

Страница 54: ...e preceded by washing WARNING To avoid the appearance of oxidations wash the vehicle every time it is used in certain areas or in special conditions of Environmental seasonal conditions use of salt de icer chemical products on the road in winter Air pollution city and or industrial areas Salinity and humidity of the atmosphere marine areas hot and wet weather WARNING Prevent deposits from remainin...

Страница 55: ...D OFF AND COULD DAMAGE THE PAINTWORK NEVER USE RAGS SOAKED IN PETROL OR DIESEL OIL TO CLEAN THE PAINTED OR PLASTIC SURFACES IN ORDER TO PREVENT THEM LOSING THEIR SHINE AND MECHANICAL CHARACTERISTICS WARNING WHEN WASHING THE ENGINE WITH A HIGH PRESSURE WATER JET ONLY USE FAN SPRAY JETS DO NOT PLACE THE NOZZLE CLOSER THAN 60 CM DO NOT USE WATER AT TEMPERATURES OVER 40 C DO NOT DIRECT THE JETS DIRECT...

Страница 56: ...ck should only be carried out by an expert Make sure the electrodes are properly adjusted Check that they are clean with pure petrol and a metal brush or with emery cloth Check the spark plug insulator Replace the spark plug if the insulator is cracked or broken If the spark plug is in good conditions contact an Authorised Service Centre LACK OF COMPRESSION Spark plug loose Loose cylinder head wor...

Страница 57: ...T BRAKING Oil on drum or disc Worn Pads Shoes Contact an Authorised Service Centre incorrect rear brake adjustment Adjust INEFFICIENT SUSPENSION Oil leak worn limit switch bumpers worn shock absorber attachment points Contact an Authorised Service Centre AUTOMATIC TRANSMISSION PROBLEMS Deteriorated roller housing or belt Contact an Authorised Service Centre 57 3 Maintenance ...

Страница 58: ...f the SAS system and or of the tab Contact an Authorised Service Centre STAND DOES NOT RETURN TO POSITION Presence of dirt Clean and grease STARTER LEVER DOES NOT RETURN TO CORRECT POSITION Presence of dirt Clean and grease 58 3 Maintenance ...

Страница 59: ...Vespa S 50 4T 2V Chap 04 Technicaldata 59 ...

Страница 60: ...04_01 60 4 Technicaldata ...

Страница 61: ... a centrifugal fan LUBRICATION engine lubrication with lobe pump in the crankcase chain driven Mesh pre filter and centrifugal filter on the crankshaft Transmission Automatic expandable pulley variator with torque server V belt dry centrifugal automatic clutch gear reduction unit in oil bath and transmission compartment with forced air cooling system Electronic ignition Consisting of a capacitor d...

Страница 62: ...ements Front suspension Single arm with helical spring and single double acting hydraulic shock absorber Rear suspension Single chamber shock absorber Front brake Ø 200 mm disc brake with hydraulic control activated by handlebar right side lever Rear brake Ø 110 mm drum brake with mechanical control activated by handlebar left side lever Wheel rim type Light alloy wheel rims Front wheel rim 11 x 2...

Страница 63: ... passenger 2 0 bar 2 3 bar Kerb weight 102 5 kg Maximum weight allowed 290 kg Battery 12V 9 Ah CAPACITY Engine oil 850 cm Transmission oil 80 cm Fuel tank reserve 8 5 l 2 l 04_02 Toolkit 04_02 The toolkit comprises One box spanner One twin screwdriver The tools are stored under the saddle 63 4 Technicaldata ...

Страница 64: ...64 4 Technicaldata ...

Страница 65: ...Vespa S 50 4T 2V Chap 05 Sparepartsanda ccessories 65 ...

Страница 66: ...RE PARTS CAUSES YOUR WARRANTY RIGHTS TO EXPIRE WARNING PIAGGIO MARKETS ITS OWN LINE OF ACCESSORIES THAT ARE RECOG NISED AND GUARANTEED FOR USE IT IS THEREFORE ESSENTIAL TO CON TACT AN AUTHORISED DEALER OR SERVICE CENTRE IN ORDER TO CHOOSE AND FIT ACCESSORIES CORRECTLY THE USE OF NON ORIGINAL ACCES SORIES MAY AFFECT THE STABILITY AND OPERATION OF YOUR VEHICLE AND REDUCE SAFETY LEVELS WITH POTENTIAL...

Страница 67: ...Vespa S 50 4T 2V Chap 06 Scheduledmaint enance 67 ...

Страница 68: ...ehicle serviced to the prescribed intervals of time even if you have not reached the predicted mileage Punctual vehicle servicing is necessary for the correct use of the guarantee For any further information concerning Warranty procedures and Scheduled Maintenance please refer to the Warranty Booklet SCHEDULED MAINTENANCE TABLE Km x 1000 1 3 6 9 12 15 18 21 24 27 30 33 36 39 42 45 48 51 54 57 60 S...

Страница 69: ... I R I R I R I R I R I R I R I R I R I R Brake Pads Shoes I I I I I I I I I I I Tyre pressure I I I I I I I I I I I Headlight A A A A A Vehicle road test I I I I I I I I I I I Idle speed A A A A A A Odometer gear L L L L L CVT rollers I R I R I R I R I R Suspension I I I I I Steering A A A A A A Transmission L L L L L I CHECK AND CLEAN ADJUST LUBRICATE OR REPLACE IF NECESSARY C CLEAN R REPLACE A A...

Страница 70: ...G 5W 40 Synthetic based lubricant for high performance four stroke engines JASO MA MA2 API SL ACEA A3 AGIP FILTER OIL Special product for the treatment of foam filters AGIP GREASE MU3 Yellow brown lithium base medium fibre multipurpose grease ISO L X BCHA 3 DIN 51 825 K3K 20 AGIP GP 330 Water repellent stringy calcium spray grease R I D A D R 2 10 b 2 R I Na 2 42 I A T A 2 I M D G class 2 UN 1950 ...

Страница 71: ...TABLE OF CONTENTS B Battery 41 C Checks 20 Clock 11 F Fuses 44 I Identification 16 K Keys 16 M Maintenance 31 P Puncture 52 R Refuelling 20 S Stand 27 T Toolkit 63 Tyres 35 V Vehicle 7 71 ...

Страница 72: ... changes to components parts or accessories which it considers necessary to improve the product or which are required for manufacturing or construction reasons Not all versions models shown in this publication are available in all countries The availability of each model should be checked at the official PIAGGIO sales network Copyright 2012 Piaggio C S p A All rights reserved Reproduction of this ...

Отзывы: