


Quantity:
5
Instrument panel lighting bulbs
Type
: All glass
Power
: 12V 1.2W
Quantity
: 4
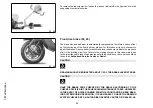
Front light group (03_28, 03_29, 03_30, 03_31)
To reach the headlight bulbs proceed as follows:
- Undo the two screws «
A
» that are supporting the unit. Retrieve the nut «
B
» from the
rear screw.
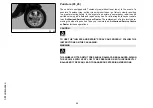
- Undo the two screws «
C
», remove the front frame and pull the headlight assembly
parabola out.
To replace the high-/low-beam headlight bulb:
- Disconnect the connector, disengage the tab and pull the bulb «
D
» out.
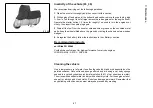
To replace the tail light bulb:
- Pull the rubber bulb holder «
E
» out from its seat.
- Take hold of the lamp and pull it out.
N.B.
IF MISTING IS NOTICED ON THE INSIDE OF THE HEADLAMP GLASS, THIS
DOES NOT INDICATE A FAULT AND IS ATTRIBUTABLE TO HUMIDITY AND/OR
TO LOW TEMPERATURES.
THE PHENOMENON SHOULD QUICKLY DISAPPEAR WHEN THE LIGHT IS
SWITCHED ON.
57
3 Maintenance
Содержание LXV 125 ie 2013
Страница 4: ...4 ...
Страница 7: ...Vespa LXV 125 ie Chap 01 Vehicle 7 ...
Страница 8: ...01_01 8 1 Vehicle ...
Страница 10: ...01_02 Analogue instrument panel 01_02 A Fuel gauge 10 1 Vehicle ...
Страница 23: ...Vespa LXV 125 ie Chap 02 Use 23 ...
Страница 36: ...36 2 Use ...
Страница 37: ...Vespa LXV 125 ie Chap 03 Maintenance 37 ...
Страница 59: ...03_29 03_30 03_31 59 3 Maintenance ...
Страница 74: ...74 3 Maintenance ...
Страница 75: ...Vespa LXV 125 ie Chap 04 Technical data 75 ...
Страница 76: ...04_01 76 4 Technical data ...
Страница 81: ...Vespa LXV 125 ie Chap 05 Spare parts and accessories 81 ...
Страница 83: ...Vespa LXV 125 ie Chap 06 Scheduled maintenance 83 ...


