11.2.2 Service Procedures of Power Module
1.
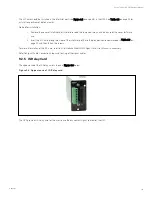
Place the ready switch on the front panel of the power module to unready state, at this time, the green indicator
beside the ready switch is off and the red indicator is on.
2.
Ensure that the red indicator on the power module is solid on, remove the fixing screws on both sides of the
front panel of the module, and pull the module out of the cabinet.
N O T E: T h e m o du le will be blo ck ed by a sprin g piece o n th e left side o f th e m o du le wh en th e m o du le is
pu lled o u t o f th e cabin et h alfway. A t th is po in t, yo u m u st press th e sprin g piece befo re yo u co n tin u e to
pu ll th e m o du le o u t.
3.
After servicing the module, check that the ready switch is in unready state.
4. Push the module (at least 10s after another) into the cabinet, and tighten the screws on both sides.
5.
Place the ready switch of the module to the left position, and the module will connect to the system
automatically.
11.2.3 Replacement Procedures of Bypass Power Module
Service procedures in bypass mode
1.
Make the UPS work in Normal mode or Maintenance bypass mode, refer to Procedures for Transfer Between
Operation Modes or Operation Procedures for Parallel System.
2.
Place the ready switch on the front panel of the power module to unready state, at this time, the red indicator
beside the ready switch is on.
3.
Remove the fixing screws on both sides of the front panel of the bypass power module, and pull the module out
of the cabinet, then maintain the module.
4. After servicing the module, push the module into the cabinet, and tighten the screws on both sides.
N O T E: W h en pu llin g th e bypass po wer m o du le o u t o f th e cabin et, m o ve it aro u n d an d pu ll o u tward
m an y tim es. W h en in sertin g th e bypass po wer m o du le, yo u sh o u ld in sert it fo rcibly, o th erwise th e
bypass po wer m o du le m ay h ave po o r co n tact with th e system , th u s affect th e n o rm al o peratio n o f th e
bypass po wer m o du le an d th e o verall u n it. T h e stan dard fo r th e bypass po wer m o du le n o rm al in sertio n
po sitio n is th at th e brack ets o n bo th sides o f th e bypass po wer m o du le can be clo se to th e cabin et
co lu m n .
5.
Place the ready switch to ready state, at this time, the red indicator beside the ready switch is off while the
green indicator is on.
6. Transfer the UPS to Bypass mode, refer to Procedures for Transfer Between Operation Modes or Operation
Procedures for Parallel System.
Service procedures of single UPS in normal mode
1.
Place the ready switch on the front panel of the power module to unready state, at this time, the red indicator
beside the ready switch is on.
2.
Remove the fixing screws on both sides of the front panel of the bypass power module, and pull the module out
of the cabinet.
3.
After servicing the module, push the module into the cabinet, and tighten the screws on both sides.
4. Place the ready switch to ready state, at this time, the red indicator beside the ready switch is off while the
green indicator is on.
11 Service and Maintenance
166
Vertiv™ Liebert® APM Plus User Manual
Содержание APM Plus 0500kMK16FN02000
Страница 1: ...Vertiv Liebert APM Plus User Manual 50 500 kVA UPS...
Страница 8: ...vi This page intentionally left blank Vertiv Liebert APM Plus User Manual...
Страница 16: ...1 Important Safety Instructions viii This page intentionally left blank Vertiv Liebert APM Plus User Manual...
Страница 34: ...2 Overview 26 This page intentionally left blank Vertiv Liebert APM Plus User Manual...
Страница 45: ...Four switches 500 kVA 3 Mechanical Installation 37 Vertiv Liebert APM Plus User Manual...
Страница 46: ...3 Mechanical Installation 38 This page intentionally left blank Vertiv Liebert APM Plus User Manual...
Страница 76: ...Figure 5 11 Customize the display 5 Touch Screen 68 Vertiv Liebert APM Plus User Manual...
Страница 86: ...Figure 5 20 Enable module redundancy 5 Touch Screen 78 Vertiv Liebert APM Plus User Manual...
Страница 91: ...Figure 5 24 Status Gauge setting options 5 Touch Screen 83 Vertiv Liebert APM Plus User Manual...
Страница 92: ...5 Touch Screen 84 Vertiv Liebert APM Plus User Manual...
Страница 94: ...5 Touch Screen 86 Vertiv Liebert APM Plus User Manual...
Страница 95: ...Figure 5 26 Unit status Bypass details 5 Touch Screen 87 Vertiv Liebert APM Plus User Manual...
Страница 96: ...Figure 5 27 Unit status Battery details 5 Touch Screen 88 Vertiv Liebert APM Plus User Manual...
Страница 97: ...Figure 5 28 Unit status Load details 5 Touch Screen 89 Vertiv Liebert APM Plus User Manual...
Страница 98: ...Figure 5 29 Unit status Environmental details 5 Touch Screen 90 Vertiv Liebert APM Plus User Manual...
Страница 100: ...5 Touch Screen 92 Vertiv Liebert APM Plus User Manual...
Страница 112: ...5 Touch Screen 104 This page intentionally left blank Vertiv Liebert APM Plus User Manual...
Страница 132: ...6 Single UPS Operation Introduction 124 This page intentionally left blank Vertiv Liebert APM Plus User Manual...
Страница 178: ...11 Service and Maintenance 170 This page intentionally left blank Vertiv Liebert APM Plus User Manual...
Страница 184: ...12 Specifications 176 This page intentionally left blank Vertiv Liebert APM Plus User Manual...
Страница 187: ...Vertiv Liebert APM Plus User Manual...

