ZL0030-0C
PAGE 3
©2012 Veris Industries USA 800.354.8556 or +1.503.598.4564 / [email protected]
02121
Alta Labs, Enercept, Enspector, Hawkeye, Trustat, Veris, and the Veris ‘V’ logo are trademarks or registered trademarks of Veris Industries, L.L.C. in the USA and/or other countries.
TM
MSC SERIES
INSTALLATION GUIDE
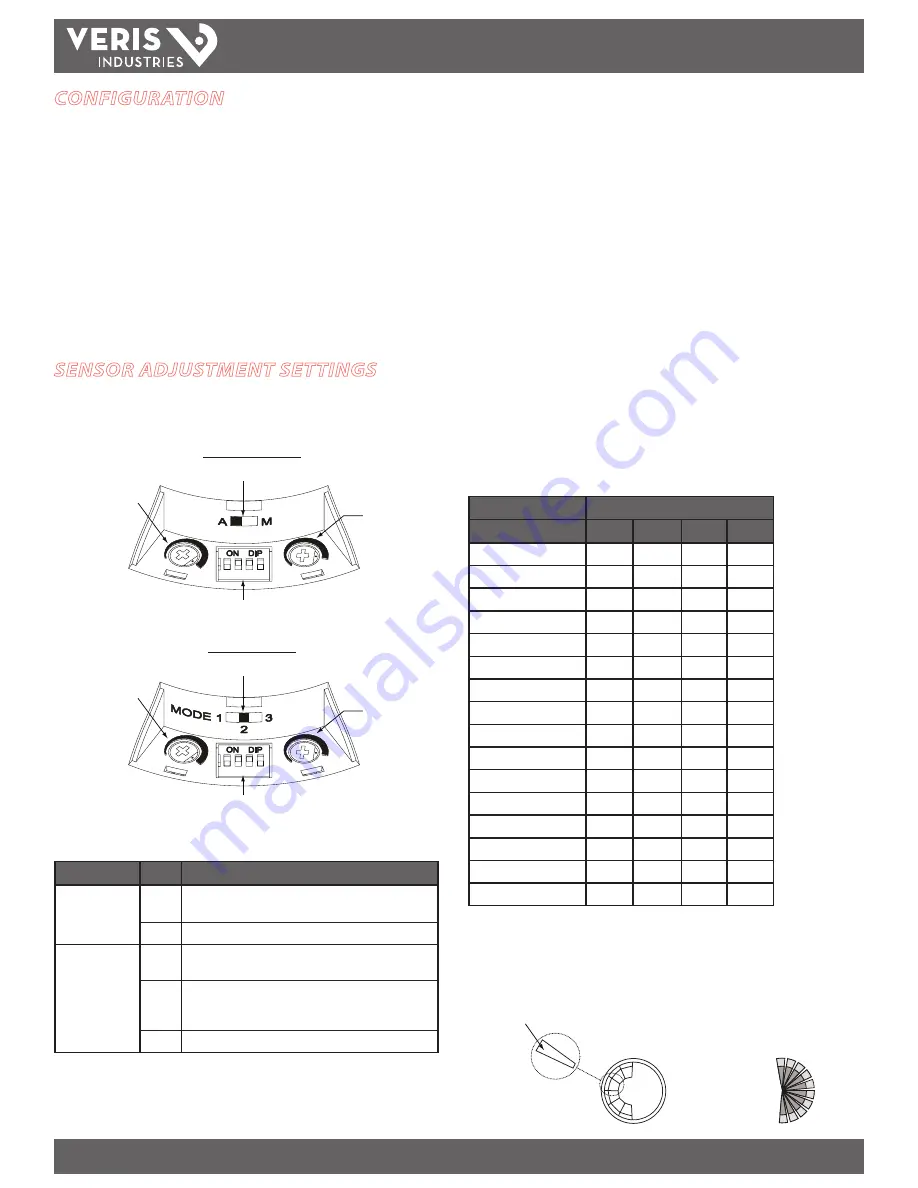
SENSOR ADJUSTMENT SETTINGS
The adjustment panel is located on the front of the sensor housing. Gently pry off the
cover with a small flathead screwdriver.
PIR and Ultrasonic
1
4
3
2
Photocell Dial
Mode Switch
DIP Switches
Sensitivity Dial
Dual Technology
1
4
3
2
Photocell Dial
Mode Switch
DIP Switches
Sensitivity Dial
Mode Switch:
Determines when lights are turned on or remain on.
Sensor
Mode
Description
PIR and
Ultrasonic
A
Automatic mode. Normal, default setting. Lights turn on or
remain on only when the sensor detects motion.
M
Manual override ON mode. Lights are always on.
Dual Technology
1
Instant ON setting. Either PIR or ultrasonic detection turns
the lights on or causes the lights to remain on.
2
Normal, default setting. Only PIR detection turns the lights
on. Either PIR or ultrasonic detection causes the lights to
remain on.
3
Override ON setting. Lights are always on.
Sensitivity Dial:
Determines the amount of movement required to trigger the
sensor and the distance from which movement is detected. Turn the dial to the
desired setting (MSCP1000: 60% to 100% of max.; MSCU2000, MSCD2000: 10% to
100% of max.). The default sensitivity setting is 100%.
Note: Consider the characteristics of the room when adjusting the sensitivity of
the Ultrasonic and Dual Technology sensors. Hard surfaces (concrete, tile, glass)
are reflective and create a higher sensitivity for ultrasonic detection. Soft surfaces
(carpet, drapes, acoustical tile) absorb some of the ultrasonic energy and reduce the
unit’s sensitivity. Building additions, such as cubicles and walls, may also require a
higher sensitivity setting.
Photocell Dial:
Sets the level above which ambient light will not trigger the sensor.
Set the ambient light level from 0.5 to 250 foot-candles. Turn the dial to the desired
setting (minimum setting is fully countercockwise; maximum is fully clockwise). The
default photocell setting is 250 foot-candles. This setting also disables the photocell
(i.e., ambient light will not inhibit sensor operation).
Time Delay Switches:
A set of four DIP switches determines how long lights will
stay on after motion is no longer detected. Settings range from 15 seconds to 30
minutes. The default time delay setting is 18 minutes. Possible DIP switch settings
are shown in the table below.
DIP Switch Number
Time Delay
1
2
3
4
15 sec. (test setting)
•
•
•
•
2 min.
•
•
•
—
4 min.
•
•
—
•
6 min.
•
•
—
—
8 min.
•
—
•
•
10 min.
•
—
•
—
12 min.
•
—
—
•
14 min.
•
—
—
—
16 min.
—
•
•
•
18 min. (default setting)
—
•
•
—
20 min.
—
•
—
•
22 min.
—
•
—
—
24 min.
—
—
•
•
26 min.
—
—
•
—
28 min.
—
—
—
•
30 min.
—
—
—
—
— = Off
•
= On
To reduce unwanted detection, such as people moving in adjacent areas, partially
mask the lens of the PIR or Dual sensor with the supplied white masking strips.
Masking Strip
Sensor with Masking
Field of View from the Top
CONFIGURATION
1. Turn on the circuit breaker and any wall switches that supply power to the sensor.
2. When first installed, allow the sensor to warm up for a few minutes before it is
fully operational. When the sensor detects motion, the LED on the housing flashes
for approximately 0.5 seconds, and the lights turn on or remain on.
3. Set the Time Delay to the test setting of 15 seconds.
4. Vacate the room until the lights turn off.
5. Re-enter the room. Lights should turn on immediately. If not, verify correct sensor
wiring.
6. Adjust settings as desired.


