background image

- 3 -

1.  Lea estas instrucciones. 
2.  Conserve estas instrucciones. 
3.  Tome en cuenta todas las advertencias. 
4.  Siga todas las instrucciones. 
5.  No use este aparato cerca del agua. 
6.  Limpie solamente con un paño seco. 
7.  No  bloquee  ninguna  de  las  aperturas  de  ventilación.  Instale  de  acuerdo  con  las  instrucciones  del 

fabricante. 

8.  No instale cerca de fuentes de calor tales como radiadores, registros de calor, estufas, u otros aparatos 

(incluyendo amplificadores) que produzcan calor. 

9.  No elimine el propósito de seguridad de la clavija polarizada o del tipo a tierra. Una clavija polarizada tiene 

dos cuchillas, una más ancha que la otra. Una clavija del tipo a tierra tiene dos cuchillas y una tercera 
punta para conexión a tierra. La cuchilla ancha o la tercera punta son suministradas para su seguridad. 
Si la clavija suministrada no se adapta dentro de su toma de corriente, consulte a un electricista para que 
reemplace la toma de corriente obsoleta. 

10.  Proteja el cable de corriente de pisotones o machucones particularmente en las clavijas, receptáculos 

de conveniencia, y en punto donde salen del aparato. 

11.  Use solamente accesorios/aditamentos especificados por el fabricante.
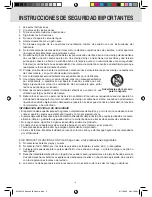
12.  Use solamente con el carro, soporte, trípode, consola, o mesa especificados 

por el fabricante, o vendidos con el aparato. Cuando se utiliza un carro, 
tenga  precaución  al  mover  la  combinación  de  carro/aparato  para  evitar 
lesión ocasionada por volcadura. 

13.  Desconecte este aparato durante tormentas eléctricas o cuando no sea 

utilizado por largos períodos de tiempo. 

14.  Refiera todo el servicio a personal de servicio calificado. El servicio es requerido cuando el aparato ha 

sido dañado de alguna forma, tal como daño a la clavija o al cable de corriente, cuando se ha derramado 
líquido o han caído objetos dentro del aparato, el aparato ha sido expuesto a lluvia o humedad, no funciona 
normalmente, o ha sido tirado.

INFORMACION ADICIONAL DE SEGURIDAD

•   El aparato no debe quedar expuesto a goteos o salpicaduras de líquidos, y, por lo tanto, no se deben colocar 

sobre el aparato objetos que contengan líquidos, como por ejemplo vasos.

•  Siempre deje suficiente espacio para ventilación alreadedor del producto. 0No ponga el producto en la cama, 

alfombra, librero o gabinete que pueda obstruir la corriente de aire a través de apeturas de ventilación. 

•  No pongan velas, cigarillos o cigarros encendidos encima de producto. 

•  Conecte sólo en receptáculos de corriente alterna como esta indicado en el producto. 

•  Tome precauciones para evitar que caigan objetos dentro del producto. 

•  Carros y Estantes–El artefacto deberá ser usado sólo con carros y estantes que hayan sido recomendados 

por el fabricante.

SI SU PRODUCTO FUNCIONA CON PILAS, 

haga caso a las precauciones siguientes: 

A.  No mezcle les baterías viejas y nuevas.
B.   No mezcle (NiCd, NiMH, etc.) las baterías alcalinas, estándares (carbón-cinc), o recargables.
C.   Cualquier pila puede explotar o gotear electrólito si se echa en un fuego o si trata de cargar una pila no 

recargable. 

D.   Deseche inmediatemente pilas con fuga. Estas pueden causar quemaduras a la piel otra herida personal. 

Cuando deseche las baterías asegúrese de deshacerse de ellas en una manera apropiada, de acuerdo 
con las regulaciones locales o del estado. 

E.  La baterís no debe exponerse al calor excesivo como es el caso de la luz del sol, fuego o similares.

INSTRUCCIONES DE SEGURIDAD IMPORTANTES

Advertencia sobre el carro

 para transporte

KLV39123 Spanish IB Generic.indd   4

8/11/2009   9:32:13 AM

Содержание KLV3915

Страница 1: ...15 4 Kitchen LCD TV DVD Combo OWNER S MANUAL KLV39123 Eng IB Generic indd 1 8 11 2009 9 32 56 AM ...

Страница 2: ...therthan those specified may result in hazardous radiation exposure Do not open covers and do not repair yourself Refer servicing to qualified personnel WARNING To reduce the risk of fire or electric shock do not expose this apparatus to rain or moisture USE OF CONTROLS OR ADJUSTMENTS OR PERFORMANCE OF PROCEDURES OTHER THAN THOSE SPECIFIED MAY RESULT IN HAZARDOUS RADIATION EXPOSURE DANGER OF EXPLO...

Страница 3: ...nd on the user is encouraged to try to correct the interference by one or more of the following measures Reorient or relocate the receiving antenna Increase the separation between the equipment and receiver Connect the equipment into an outlet on a circuit different from that to which the receiver is connected Consult the dealer or an experienced radio TV technician for help WARNING Changesormodif...

Страница 4: ...en the apparatus has been damaged in any way such as the power supply cord or plug is damaged liquid has spilled or objects have fallen into the apparatus the apparatus has been exposed to rain or moisture does not operate normally or has been dropped Additional Safety Information The apparatus shall not be exposed to dripping or splashing and that no objects filled with liquids such as vases shal...

Страница 5: ...oting Guide 30 Maintenance 31 Specifications 31 Safety Precautions 1 2 Important Safety Instructions 3 Table of Contents 4 Disc Formats 5 Accessories 6 Remote Control 6 Control Reference Guide 7 9 Mounting Instructions 10 11 Connections 12 13 Connecting the TV antenna 12 Connecting the Unit to a TV or Other Video Equipment 12 Connecting the AM LOOP Antenna 12 Plugging in the Unit 13 Monitor Operat...

Страница 6: ...Ds are divided into titles and chapters If the disc has more than one movie on it each movie would be a separate title Chapters are sections of titles Audio CDs are divided into tracks A track is usually one song on an audio CD Icons Used on DVDs Sample Icons Language selections for audio Language selections for subtitles Screen aspect ratio Multiple camera angles Region code indicator NOTE When p...

Страница 7: ... weak Batteries shall not be exposed to excessive heat such as sunshine fire or the like Weak batteries can leak and severely damage the remote control WARNING Do not dispose of batteries in a fire batteries may explode or leak To Install Batteries 1 Open the battery door 2 Insert two AAA batteries remote control Using the Remote Control This remote control is magnetic and can be attached to most ...

Страница 8: ...le of the video presentation when scenes with multiple camera angles are recorded on a DVD 7 DVD MENU Button Press to enter the main menu of the DVD you are watching 8 CURSOR Buttons Use to highlight selections on a screen and make adjustments to certain settings CH CH buttons Use to change TV channels ENTER Button Confirm selections on a menu screen 9 VOLUME Buttons Adjusts the volume 10 STOP BAN...

Страница 9: ...ress to display the on screen TV menu 20 PAUSE Button Pauses playback frames advance 21 PLAY Button Starts playback 22 NEXT Button Selects next title chapter or track on a disc Selects next preset station in radio mode 23 TUNING Buttons Scans all available radio stations Fast reverse playback Fast forward playback 24 LAST CH Button Press to switch repeatedly between the last two channels displayed...

Страница 10: ...pters tracks in DVD mode Press to change TV channel in TV mode Unit 2 3 4 5 6 7 8 9 10 13 12 11 14 15 16 17 1 Usetosearchforastationautomaticallyorselect presetted stations 10 CH Button Press to advance to chapters tracks in DVD mode Press to change TV channel in TV mode Usetosearchforastationautomaticallyorselect presetted stations 11 VOL Button Increases the volume level Makes adjustments to cer...

Страница 11: ...r cabinet bottom and extend at least 3 8 past the bottom of your cabinet overhang b This unit includes two sets of four spacers of various lengths The spacers can be put together to form longer spacers to accommodate various cabinet overhang thicknesses Determine the best combination of spacers which is equal to or longer than the cabinet overhang thickness c Hold the unit up against the bottom of...

Страница 12: ... may want to mark the hole locations with a nail pressed gently but firmly into the wood so that a slight impression is made This will also help keep the drill bit centered in the right location 5 Hold the drill firmly against the cabinet to keep the drill from walking Continued from previous page c Insert the four selected screws through each hole from the inside of the cabinet going down see Fig...

Страница 13: ...the AM LOOP antenna Connect the AM LOOP antenna included to the AM LOOP ANT terminal FM Fully unwind the antenna wire and position it for the best reception AM Fully unwind and rotate the loop antenna then position it for the best reception 1 2 TV antenna AM LOOP ANT FM ANT VIDEO OUT TV ANT IN To the TV ANT IN terminal AM LOOP ANT FM ANT VIDEO OUT TV ANT IN yellow VIDEO IN TV or other video Equipm...

Страница 14: ...n the Unit Plug the AC power cord into the wall outlet a Before plugging in the power cord make sure the voltage of the unit matches your local voltage b Plug the power cord directly into the nearest wall outlet and wrap the remaining cord around the cord storage knob at the rear of the unit Caution TO PREVENT ELECTRIC SHOCK MATCH WIDE BLADE OF PLUG TO WIDE SLOT OF WALL OUTLET THEN FULLY INSERT To...

Страница 15: ...soundtracks available on many DVDs Manufactured under license from Dolby Laboratories Dolby and the double D symbol are trademarks of Dolby Laboratories SOUND SYSTEM Press the ON OFF button to turn the unit on DVD will appear on the front display After a short period of time the DVD logo start up picture will appear on the screen Press the DVD TV RADIO button the FUNCTION button on the remote cont...

Страница 16: ...he TIMER button repeatedly to select following preset times 10 15 30 45 60 75 90 minutes You can then fine tune your time by using the buttons on the unit Press and hold the buttons on the unit to fast forward reverse to desired time 4 To turn OFF the ALARM press the TIMER button once Otherwise the ALARM will automatically turn off after 60 minutes if no button is pressed Cancelling the Cooking Ti...

Страница 17: ...time you press the PAUSE button the picture advances one frame Stopping playback Press the button at the location where you want to interrupt playback To resume playback at the position where the disc was stopped press the PLAY button If you press the button twice the unit s memory will be cleared and pressing the PLAY button will reset the disc to the beginning Skipping to a different Chapter Tra...

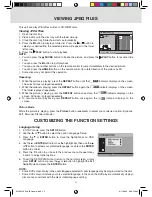
Страница 18: ... continues without changing the current subtitle This function can only be used for discs on which subtitles have been recorded in multiple languages On some DVDs subtitles are activated from the main menu of the DVD Press the DVD MENU button to activate the main menu Subtitle selection 1 While a DVD is playing press the SUBTITLE button to display the current language setting as shown in the examp...

Страница 19: ...ting a Specific Time You can move to a specific location by entering its corresponding time hours minutes seconds 1 Press the GOTO button twice for DVD once for CD a screen shown as right will be displayed on the screen 2 Enter the corresponding number buttons for the setting point you want 3 Press the ENTER button to confirm Playback starts from the selected location NOTE If the time numbers you ...

Страница 20: ...ck You can play the same track repeatedly While the disc is playing press the REPEAT button repeatedly until the indicator displays on the screen The current track is played repeatedly Repeating an Entire DISC While the disc is playing press the REPEAT button repeatedly until the indicator displays on the screen The entire disc is played repeatedly To Resume Normal Playback Press the REPEAT button...

Страница 21: ...e 3 Followabovestep2ofTitle ChapterProgrammedPlaybacktoprogram the new title and chapter 4 Press the PLAY button to start the programmed playback To Resume Normal Playback from Programmed Playback 1 Press the MEMORY button 2 Press the button to clear then press the button to clear all the items one by one 3 Press the PLAY button twice to resume normal playback NOTE Some discs may not permit memory...

Страница 22: ... REPEAT button once more the All indicator displays on the screen All tracks is played repeatedly 4 To resume normal playback press REPEAT button once again the indicator displays on the screen Picture Mode While the picture is playing press the Picture button repeatedly to select your preferred option Dynamic Soft Personal Standard Movie ROOT 634x476 2009 07 01 File Number CUSTOMIZING THE FUNCTIO...

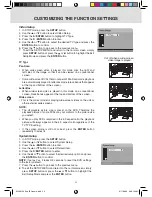
Страница 23: ...rn to the normal screen simply press SETUP button or press the or button to highlight the Exit Setup Mode and press the ENTER button TV Type Pan Scan When wide screen video is played this mode clips the right and left sides of the image so that it can be viewed on a conventional screen Some wide screen DVDs that do not permit Pan Scan mode playback are automatically played in letterbox mode black ...

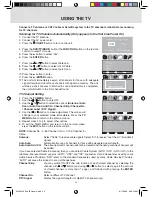
Страница 24: ...cted mode immediately Press the TV MENU button to return to the previous menu 5 Repeat steps 2 to 4 to adjust other options 6 To exit the MAIN MENU and return to the normal screen press the EXIT button on the remote control NOTE Channel No 2 69 Channel for Air 1 135 Channel for Cable Antenna Select Cable to receive cable signals Select Air to receive over the air broadcast signals Auto Scan Automa...

Страница 25: ... 5 Use the or button to select the number or letter Use the or button to move and edit the next character 6 Press the ENTER button to confirm 7 After editing the Channel and Channel Label will be shown on the screen when you press the DISPLAY button Watching Television Viewing a television station after the auto manual search for channels 1 Press the FUNCTION button to TV mode 2 Press the CH butto...

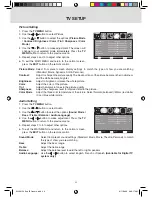
Страница 26: ...ee color temperature of the picture Select Normal balanced Warm red white Cool blue white mode MENU Return Adjust Select Picture Mode Standard Contrast 50 Brightness Sharpness Color Mode Normal 50 Color 50 50 Tint 0 Picture Audio Time Setup Parental TV TV setup Audio Setting 1 Press the TV MENU button 2 Use the or button to select Audio 3 Use the or button to select the options Sound Mode Bass Tre...

Страница 27: ...1 Press the TV MENU button 2 Use the or button to select Setup 3 Use the or button to select OSD Language 4 Use the or button to make adjustment 5 Press the TV MENU button to go back to previous menu 6 To exit theTV SETUP MENU and return to the normal screen press the EXIT button on the remote control Closed Caption 1 Press the TV MENU button 2 Use the or button to select Setup 3 Use the or button...

Страница 28: ...stment Press the TV MENU button to return to the previous menu 5 Repeat steps 2 to 4 to adjust other options 6 To exit the MAIN MENU and return to the normal screen press the EXIT button on the remote control NOTE If you forget the password enter 8888 to unlock parental control Parental Control 1 Press the TV MENU button 2 Use the or button to select Parental 3 Use the button to select Enter Passw...

Страница 29: ...Some material may not be suitable for children PG 13 Parents Strongly Cautioned Some material may be inappropriate for children under 13 R Restricted Under 17 requires accompanying parent or adult guard ian for viewing in movie theaters NC 17 No one 17 or under admitted in movie theaters X Adults Only Canadian English Ratings E Exempt C Children C8 Recommended for children age 8 and older G Genera...

Страница 30: ... remote control until the tuner starts searching for a station then release After tuning in a station the search stops The search may not stop at a station with a very weak signal 4 Press the TUNING buttons to tune in to a desired station 5 Press the MEMORY button twice on the remote control 6 Repeat steps 2 5 to store other stations FM Stereo Press the MTS button on the remote control until appea...

Страница 31: ...the disc The disc is scratched Severe hum or noise is heard Clean the disc The disc does not play There is no disc inside No Disc appears on the screen Insert the disc correctly with the label side facing up on the disc tray Clean the disc A non NTSC disc has been inserted The unit and disc region number are incompatible Condensation may have formed inside the unit due to a sudden change in temper...

Страница 32: ...micals Do NOT use compressed air to remove dust Important Note Before transporting the unit remove the disc from the disc compartment Cleaning the Disc A defective or soiled disc inserted into the unit can cause sound to drop out during playback Handle the disc by holding its inner and outer edges Do NOT touch the surface of the unlabeled side of the disc Do NOT stick paper or tape on the surface ...

Страница 33: ...CombinaciónparaCocina TV DVD con Pantalla LCD de 15 4 MANUAL DEL USUARIO KLV39123 Spanish IB Generic indd 1 8 11 2009 9 32 12 AM ...

Страница 34: ...VO DE DESCONEXIÓN Y DEBE ESTAR SIEMPRE DISPONIBLE PARA SU FUNCIONAMIENTO DURANTE SU USO PARA DESCONECTAR COMPLETAMENTE EL TOMACORRIENTE DE LA RED ELÉCTRICA EL TOMACORRIENTE DEBE ESTAR DESCONECTADO TOTALMENTE DEL ENCHUFE DE LA PARED CONECTADO A LA RED ELÉCTRICA CUIDADO EMISIÓN DE RADIACIÓN LÁSER INVISIBLE CUANDO LA UNIDAD ESTÁ ABIERTA EVITE EXPONERSE A ESTE RAYO Este aparato contiene un dispositivo...

Страница 35: ...o debe quedar impedida porque las aberturas de ventilación estén cubiertas con elementos tales como periódicos manteles cortinas etc No deben colocarse fuentes de llamas descubiertas como es el caso de velas encendidas sobre el aparato En cuanto a la ubicación No haga uso de la unidad en lugares con mucho calor frío polvo o humedad No ponga este aparato en lugares con poca ventilación No lo cubra ...

Страница 36: ...parato ha sido dañado de alguna forma tal como daño a la clavija o al cable de corriente cuando se ha derramado líquido o han caído objetos dentro del aparato el aparato ha sido expuesto a lluvia o humedad no funciona normalmente o ha sido tirado INFORMACION ADICIONAL DE SEGURIDAD El aparato no debe quedar expuesto a goteos o salpicaduras de líquidos y por lo tanto no se deben colocar sobre el apa...

Страница 37: ...ento 31 Especificaciones 31 Medidas de seguridad 1 2 Instrucciones de seguridad importantes 3 Tabla de contenidos 4 Formatos del disco 5 Accesorios 6 Control remoto 6 Guía de referencia para los controles 7 9 Instrucciones de montaje 10 11 Conexiones 12 13 Para conectar la antena del televisor 12 Para conectar la unidad a un televisor o a otro equipo de video 12 ConexióndelaantenadecuadroAM 12 Par...

Страница 38: ...ara audio Selección de idiomas para los subtítulos Proporción del tamaño de la pantalla Ángulos de cámara múltiples Indicador del código de región NOTA Cuando se reproduce un disco CD G Gráficos o CD EXTRA la porción de audio se reproducirá pero las imágenes gráficas no podrán verse Formatos del disco DVDs discos de 8 cm 12 cm CDs de audio discos de 8 cm 12 cm Compatible Títulos capítulos y pistas...

Страница 39: ...ben exponerse al calor excesivo como es caso de la luz solar fuegos o similares Las pilas agotadas pueden derramar el líquido que hay en su interior y dañar seriamente el control remoto ADVERTENCIA No arroje las pilas al fuego ya que pueden explotar o se puede derramar el líquido que hay en su interior Para instalar las pilas 1 Abra la tapa del compartimiento para pilas 2 Introduzca dos pilas tama...

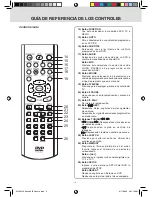
Страница 40: ...entación de video cuando en un disco de DVD hay grabadas escenas con ángulos de cámara múltiples 7 Botón DVD MENU Presione para ingresar al menú principal del DVD que está mirando 8 Botones CURSOR Use para destacar las selecciones en pantalla y para hacer ajustes en ciertas programaciones Botones CH CH Use para cambiar los canales de televisión Botón ENTER Confirma las selecciones en una pantalla ...

Страница 41: ...sa en la reproducción y avanza de cuadro 21 Botón PLAY Da inicio a la reproducción 22 Botón NEXT Selecciona títulos capítulos o pistas siguientes de un disco Selecciona las siguientes estaciones programadas en modo radio 23 Botones TUNING TUNING reconoce todas las estaciones de radio disponibles Reproducción rápida en sentido de retroceso Reproducción rápida en sentido de avance 24 Botón LAST CH P...

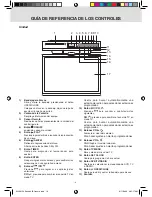
Страница 42: ...ar a capítulos pistas anteriores CH presione para cambiar el canal de TV en modo TV Úselos para buscar automáticamente una estación de radio o para seleccionar estaciones programadas 10 Botón CH Presione para avanzar a capítulos pistas siguientes CH presione para cambiar el canal de TV en modo TV Úselos para buscar automáticamente una estación de radio o para seleccionar estaciones programadas 11 ...

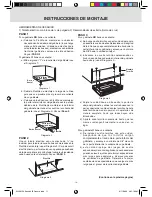
Страница 43: ...s allá de la parte inferior de la saliente de su gabinete b esta unidad incluye dos juegos de cuatro espaciadores de varias longitudes Los espaciadores pueden colocarse juntos para formar espaciadores más largos para adaptarse a diversos grosores de salientes de gabinete Determine la mejor combinación de espaciadores que sea igual o más larga que el grosor de la saliente del gabinete c Sujete la u...

Страница 44: ...ten usar la plantilla corte el área correspondiente en la plantilla pero NO corte o atraviese los huecos de los tornillos 2 Si su gabinete posee obstrucciones en la parte inferior del mismo lo que podría interferir con el montaje de la unidad elimine la obstrucción antes de montar la unidad o cambie la ubicación en la que va a montar la unidad 3 Se recomienda que use gafas de seguridad mientras ta...

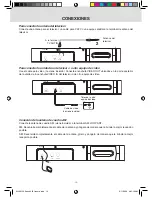
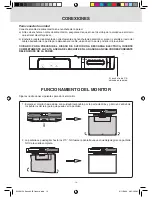
Страница 45: ... la antena gírelo y póngalo de manera que le brinde la mejor recepción posible Para conectar la unidad a un televisor o a otro equipo de video Use el cable para video no viene incluido Conecte el enchufe VIDEO OUT ubicados en la parte posterior de la unidad a los enchufe VIDEO IN del televisor o de otro equipo de video televisor u otro equipo de video cable de video no viene incluido antenna del t...

Страница 46: ...es de enchufar en cable de alimentación asegúrese de que el nivel de voltaje de la unidad sea el mismo que el nivel de voltaje local b Enchufe el cable de alimentación directamente en el enchufe de pared más cercano y enrolle el resto del cable alrededor de la perilla para almacenar el cable ubicado en la parte posterior de la unidad CUIDADO PARA PREVENIR EL RIESGO DE SUFRIR UNA DESCARGA ELÉCTRICA...

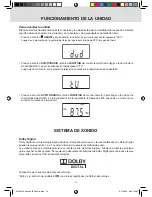
Страница 47: ...bajo la licencia de Dolby Laboratories Dolby y el símbolo de la doble D son marcas registradas de Dolby Laboratories Dolby Digital Dolby Digital es una tecnología desarrollada por Dolby Laboratories Los temas codificados con Dolby Digital pueden reproducir entre 1 a 5 1 canales discretos de excelente calidad de audio La unidad reconoce automáticamente la corriente de bits de Dolby Digital y brinda...

Страница 48: ...ara seleccionar los siguientes tiempos de programación 10 15 30 45 60 75 90 minutos Usted puede luego ajustar la sintonía fina de su tiempo utilizando los botones en la unidad Presione y sostenga los botones en la unidad para avanzar regresar rápidamente al tiempo deseado 4 Para apagar la ALARMA presione una vez el botón TIMER De lo contrario la ALARMA se apagará automáticamente después de 60 minu...

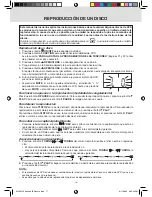
Страница 49: ...congelamiento Presione el botón PAUSE del control remoto Para reanudar la reproducción normal presione el botón PLAY Cada vez que presiona el botón PAUSE la imagen avanza un cuadro Para detener la reproducción Presione el botón STOP en la parte del disco donde desea interrumpir la reproducción Para reanudar la reproducción a partir de la parte donde se detuvo el disco presione el botón PLAY Si pre...

Страница 50: ...r el subtítulo actual Esta función sólo se puede usar en el caso de discos en los que se han grabado subtítulos en múltiples idiomas En el caso de algunos discos de DVD los subtítulos se activan desde el menú principal del DVD Presione el botón DVD MENU para activar el menú principal Selección de subtítulo 1 Mientras el disco de DVD está en reproducción presione el botón SUBTITLE para mostrar en p...

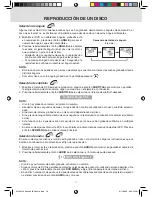
Страница 51: ...un tiempo específica Usted puede moverse a una ubicación específica ingresando su tiempo correspondiente horas minutos segundos 1 Presione el botón GOTO tdos veces para DVD una vez para CD una pantalla como la que se muestra a la derecha se visualizará en la pantalla 2 Ingrese los botones numéricos correspondientes para el punto de ajuste que usted quiere 3 Presione el botón ENTER para confirmar L...

Страница 52: ...está en reproducción presione repetidamente el botón REPEAT hasta que el indicador aparezca en la pantalla El título actual se reproducirá reiteradamente Usted puede reproducir reiteradamente una sola pista o todo el disco Para repetir una sola pista Usted puede reproducir reiteradamente la misma pista Mientras el disco está en reproducción presione reiteradamente el botón REPEAT hasta que el indi...

Страница 53: ...se indican más arriba para programar el título o capítulo nuevo Para reanudar la modalidad de reproducción normal desde la modalidad de reproducción programada 1 Presione el botón MEMORY 2 Presione el botón para borrar y luego presione el botón para borrar todos los elementos uno por uno 3 Presione el botón PLAY para reanudar la modalidad de reproducción normal NOTA Es posible que algunos discos n...

Страница 54: ...ón presione el botón REPEAT una vez más el indicador All el indicador se muestra en la pantalla Todas las pistas son reproducidas en forma repetida 4 Para reanudar la reproducción normal presione el botón REPEAT una vez nuevamente el indicador se muestra en la pantalla Modo Película Mientras la película está en reproducción presione el botó Picture repetidamente para seleccionar su opción preferid...

Страница 55: ...ha en una pantalla ancha NOTA El tamaño de la imagen que aparece en pantalla está programado en el disco de video de DVD Por consiguiente es posible que la imagen de reproducción de algunos discos de video de DVD no concuerde con el tamaño de la imagen que haya selecionado Cuando usted reproduce discos de video de DVD que estén grabados sólo en un tamaño de imagen de 4 3 la imagen de reproducción ...

Страница 56: ...nterior 5 Repita los pasos 2 al 4 para ajustar otras opciones 6 Para salir del MENÚ DE PRINCIPAL y regresar a la pantalla normal presione el botón EXIT del control remoto NOTA Número de canal canales 2 69 para Air y canales 1 135 para Cable Antenna selecciona Cable para recibir la señal del cable Seleccione Air para recibir señal aérea Auto Scan busca automáticamente todos los canales con potencia...

Страница 57: ... Select X Picture Audio Time Setup Parental TV Para mirar la televisión Para ver una estación de televisión una vez que se haya llevado a cabo la búsqueda manual automática de canales 1 Presione el botón FUNCTION hasta llegar a la modalidad de TV 2 Presione los botones CH para seleccionar un canal o bien presione los botones numéricos del control remoto para seleccionar el canal que desea ver O us...

Страница 58: ...e la imagen Selecciona modo Normal balanceado Cálido rojo blanco Frío azul blanco Programación del sonido 1 Presione el botón TV MENU 2 Use los botones o para seleccionar Audio 3 Use los botones o para seleccionar las opciones Sound Mode Bass Treble Balance Audio Language 4 Use los botones o para hacer ajustes Presione el botón TV MENU para regresar al menú anterior 5 Repita los pasos 2 al 4 para ...

Страница 59: ...ación Idioma en Pantalla 1 Presione el botón TV MENU 2 Use los botones o para seleccionar Setup 3 Use los botones o para seleccionar OSD Language 4 Use los botones o para hacer ajustes 5 Presione el botón TV MENU para regresar al menú anterior 6 Para salir del menú TV SETUP MENU y regresar a la pantalla normal presione el botón EXIT del control remoto Subtitulado 1 Presione el botón TV MENU 2 Use ...

Страница 60: ...nu Parental 4 Presione el botón para aceptar Presione el botón o para hacer ajustes Presione el botón TV MENU para regresar al menú anterior 5 Repita los pasos 2 y 4 para ajustar otras opciones 6 Para salir del MENÚ DE PRINCIPAL y regresar a la pantalla normal presione el botón EXIT del control remoto NOTA Si olvida la clave ingrese 8888 para destrabar control de padres Control Paterno 1 Presione ...

Страница 61: ...CES Apto todas las edades PG PARENTAL GUIDANCE SUGGESTED Algun material puede no ser apto para nlños PG 13 PARENTS STRONGLY CAUTIONED Algun material puede ser inapropiado para niños menores de 13 R RESTRICTED Menores de 17 requieren acompañamiento de padres o adulto a cargo en cines NC 17 Personas de 17 o menos no seran admitidas en cines X Adultos Solamente Ratings Canadienses Ingles E Exento C N...

Страница 62: ... botón MTS del control remoto hasta que aparezca en la pantalla del panel frontal El ruido de fondo disminuirá Para restaurar la recepción estereofónica presione el botón MTS del control remoto para seleccionar Para buscar automáticamente una estación Presione y mantenga presionado el botón CH CH del panel frontal o los botones TUNING del control remoto hasta que el sintonizador comience a buscar ...

Страница 63: ...uido muy fuerte Limpie el disco El disco no suena No hay disco dentro del equipo El indicado No Disc aparece en la pantalla Inserte el disco correctamente con el lado se reproduc ción hacia adelante Limpie el disco Se insertó un disco que no es NTSC El número de región de la unidad y del disco son incompatibles Puede haber condensación al interior del equipo producto de un cambio brusco de tempera...

Страница 64: ... CDs Limpieza del disco Si pone en el equipo un disco defectuoso o sucio esto puede provocar irregularidadesen el sonido durante la reproducción Al tomar el disco hágalo sosteniendo so borde interior y exterior NO toque la superficie del lado del disco que no tiene escritura NO pegue papeles ni cinta adhesiva en la superficie del disco NO exponga el disco directamente a los rayos del sol o al calo...

Отзывы: