20
DVUT 1000 PB EC
www.ventilation-system.com
2. Heat exchanger maintenance (once per year).
Some dust may accumulate on the heat exchanger even in case of regular maintenance of the filters. To maintain the high heat recovery
efficiency, regular cleaning is required. To clean the heat exchanger, remove it from the unit and clean the heat exchanger by using
compressed air or a vacuum cleaner. After cleaning, re-install the heat exchanger into the unit.
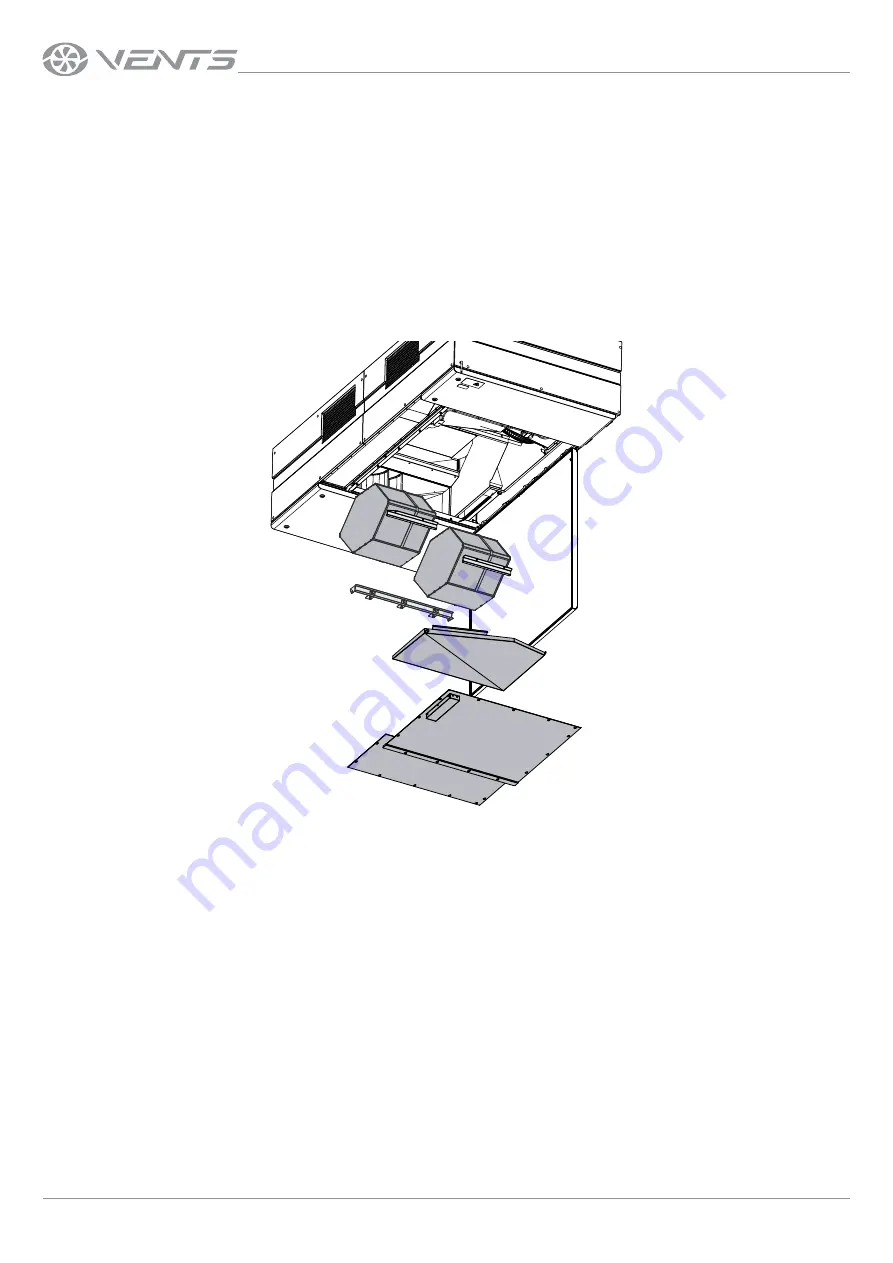
Heat exchanger removal:
1. Disconnect the unit from power mains.
2. Open the middle hinged door of the unit with the key.
3. Loosen the screws securing the protective plates. Then move the plates so that the screw caps match the holes, and remove the plates.
4. Unscrew the screws holding the drain pan and remove it.
5. Unscrew the beam screws and remove it.
6. Unscrew the screws on the shorter retaining plate, remove it and pull the first heat exchanger to remove it from the unit.
Then unscrew the screws on the second plate and remove the second heat exchanger.
7. After technical maintenance install the heat exchangers in the reverse order.
3. Fan maintenance (once per year).
Even in case of regular maintenance of the filters, some dust may accumulate inside the fans and reduce the fan performance and supply
air flow. Clean the fans with a soft cloth, brush, or using compressed air. Do not use water, aggressive solvents, or sharp objects as they
may damage the impeller.
4. Supply air flow control (twice per year).
The supply duct grille may get clogged with leaves and other objects reducing the unit performance and supply air delivery.
Check the supply grille twice per year and clean it as required.
5. Ductwork system maintenance (once in 5 years).
Even regular fulfilling of all the maintenance operations prescribed above may not completely prevent dirt accumulation in the air ducts,
which leads to air pollution and reduces the unit capacity. Duct maintenance means regular cleaning or replacement.
6. Control unit maintenance (if necessary).
The control unit is positioned inside the unit casing. To access the control unit, remove the fixing screws on the panel and remove the
control unit lid.


