


LW450 SETUP INSTRUCTIONS
Setup - 17
10. Install the left rear cab mount (B) onto the power
unit frame using 4) 3/8 x 1” flange bolts, flat
washers, and flange nuts. Install the left frame
insert panel (C) using the two front holes on the
cab mount. Tighten by hand until finger tight.
11.
B
C
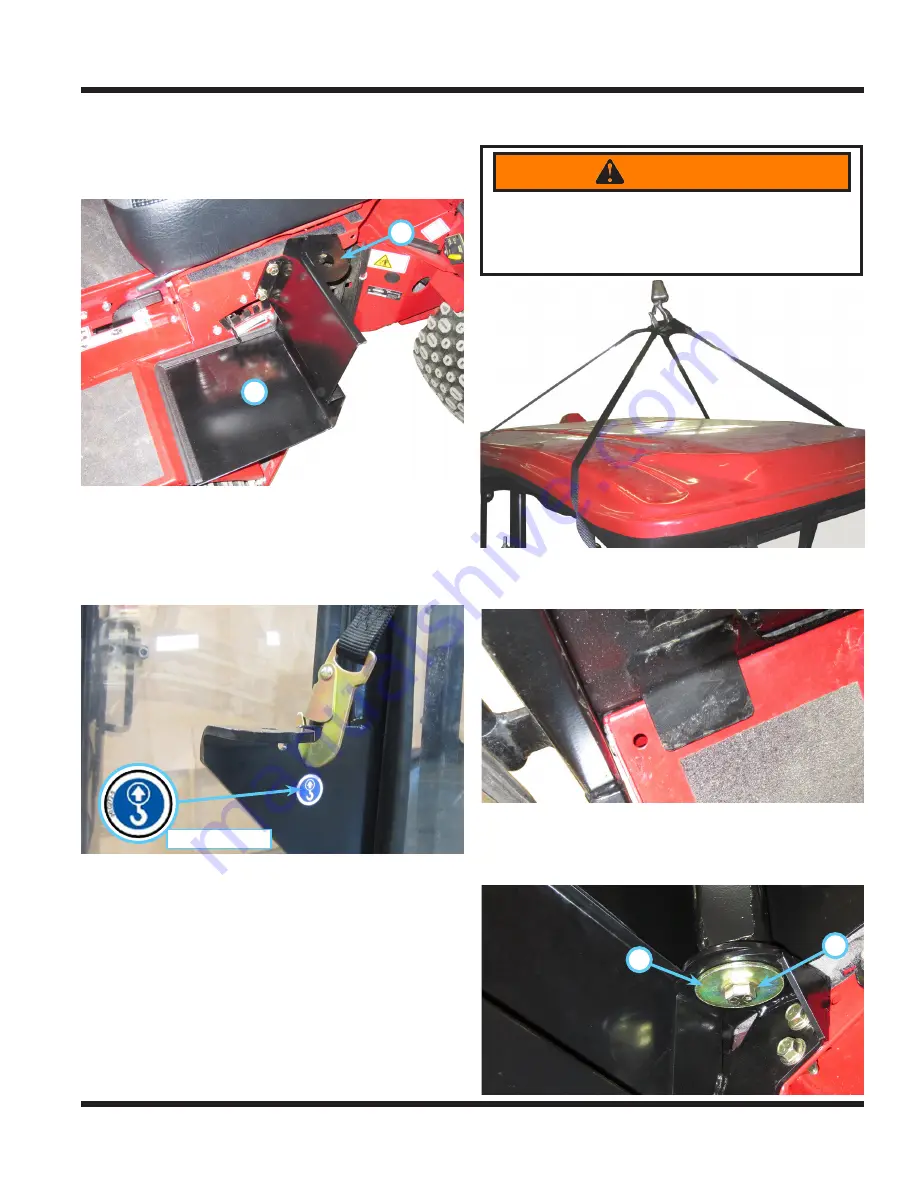
Unfasten the weather cab from the crate skid.
12. Attach the lift sling to a hoist and position above
the weather cab. Clip the 4) lift sling hooks to
the lift points at each corner of the cab. Position
the rear straps to go around the back of the cab
roof in line with the air vent covers.
Lift point decal
Lift point decals are located at each lift point for
easy identification.
13. Lift the weather cab and check to see if the cab
will clear the power unit steering column and
seat. If the hoist will not lift high enough to clear
the seat, remove the seat from the seat plate
before proceeding. If the cab will not clear the
steering column, tilt the steering column back as
far as possible and rotate the back panel of the
cab up while moving the back of the cab over
the steering column and into position.
14. Lift the weather cab and position it over the
power unit.
15.
WARNING
Use only the LW450 lift sling attached at all four
lift points to lift the cab.
Never walk or stand beneath the cab when it is
raised off the ground.
Lower the weather cab onto the power unit. The
front angles of the cab sit over the bend in the
power unit frame.
16. Place a 1/2” flat washer (D) and a 1/2” fender
washer (E) onto a 1/2 x 1-1/2” bolt and install up
through the left rear cab mount into the left rear
cab mounting post. Do not tighten.
D
E


