


www.ventev.com/infra
800.851.4965
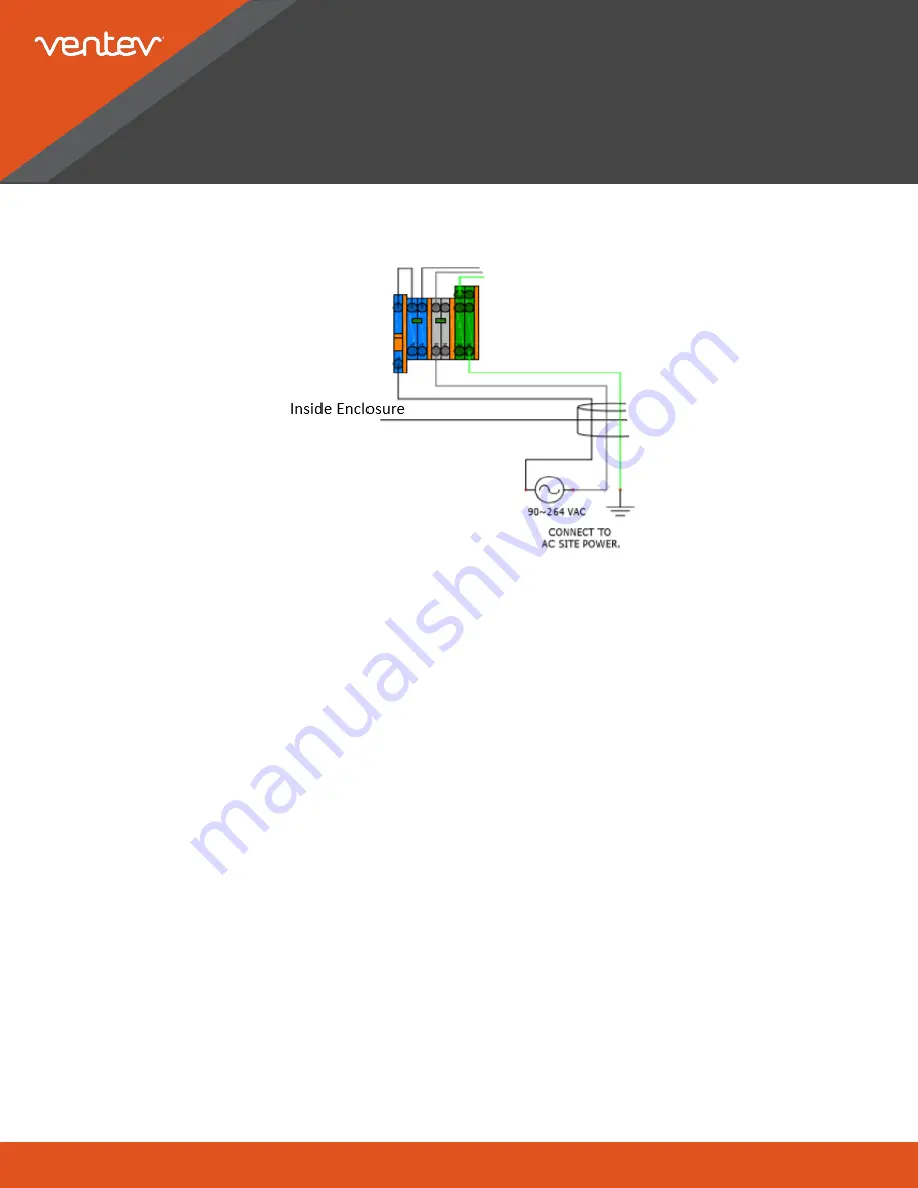
3. Verify that the AC power cable from the enclosure is properly connected to the source: AC LINE (black); AC
NEUTRAL (white); GND (green) are connected.
4. Verify the LED operation of POE1. A green LED means the injector is operational. If the LED is
nonoperational or red, then the PoE injector is not operational.
5. Verify that the 2.4 GHz antennas are connected to the ports on the top of the enclosure (MO1: Port A and
MO1: Port B) per the door diagram.
6. Verify that the 5.0 GHz antennas are connected to the ports on the bottom of the enclosure (MO1: Port C and
MO1: Port D) per the door diagram.
7. Verify the LED operation of MO1. A green LED means the radios are connected. An amber LED means the
radios are not connected. If the LED is nonoperational, then the PoE injector is not operational.
8. Connect a laptop to the Rajant PoE power supply (POE1:DATA IN) with an ethernet cable.
9. Open the control panel on the computer. Select NETWORK AND INTERNET -> CHANGE ADAPTER
OPTIONS.
10. Select the adapter being used from the file menu. Select PROPERTIES.
11. In the PROPERTIES menu, scroll down to the INTERNET PROTOCOL VERSION 4 (TCP/IPV4) item, select
it, then select properties.
NOTE: This window allows manual configuration of the network adapter's IP addresses.
12. Select "USE THE FOLLOWING IP ADDRESS".
13. Enter 10.26.50.2 under "IP ADDRESS". Do not use a 1 in the last octet.
14. Enter 255.0.0.0 under "SUBNET MASK". Press the "OK" button and then close the window.
15. Open the "RAJANT BC COMMANDER" application on the laptop. You should see all the breadcrumb radios
on the network in the "BREADCRUMB TABLE" tab.
Troubleshooting Guide for the
ES1-IS-2450 NEMA 4X Enclosure System for Rajant


