background image


VTSSD5 

V. 01 – 16/03/2018 

40 

©Velleman nv 

4.


Przegląd 


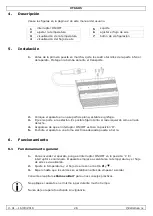
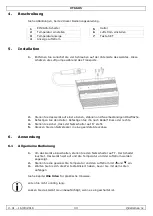
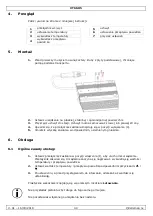
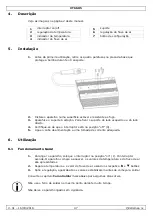
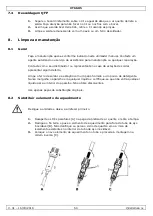
Patrz rysunki na stronie 2 niniejszej instrukcji. 


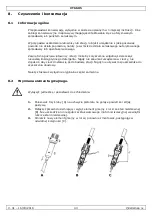
przełącznik wł./wył. 


uchwyt 


ustawienie temperatury 


ustawienie przepływu powietrza 


wyświetlacz temperatury 


przycisk ustawień 


wyświetlacz przepływu 
powietrza 


5.


Montaż 


1.


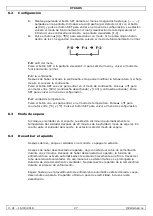
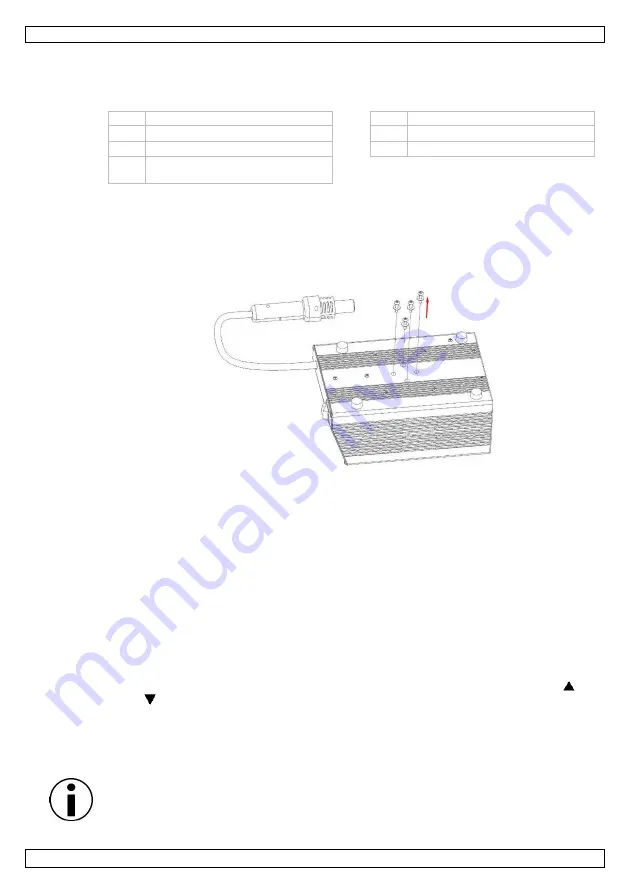
Przed pierwszym użyciem usunąć cztery śruby z płyty podstawowej, chroniące 
pompę podczas transportu. 


2.


Ustawić urządzenie na płaskiej, stabilnej i ognioodpornej powierzchni. 


3.


Przykręcić uchwyt do stacji. Uchwyt można zamocować z lewej lub prawej strony. 


4.


Upewnić się, że przełącznik zasilania znajduje się w pozycji wyłączenia (0). 


5.


Umieścić wtyczkę zasilania w odpowiednim, uziemionym gniazdku. 


6.


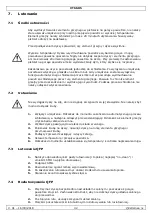
Obsługa 


6.1


Ogólne zasady obsługi 


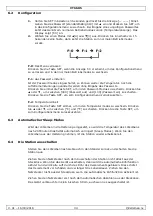
1.


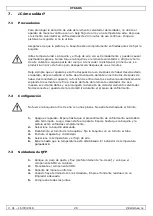
Ustawić przełącznik zasilania w pozycji włączenia (I), aby uruchomić urządzenie. 
Przełącznik zaświeci się. Urządzenie zaczyna się nagrzewać, wyświetlą się wartości 
temperatury i przepływu powietrza. 


2.


Ustawić wartość temperatury i przepływu powietrza odpowiednimi przyciskami 

 i 


3.


Po ustawieniu, a przed przystąpieniem do lutowania, odczekać aż wartości się 
ustabilizują. 


Praktyczne wskazówki znajdują się w poniższym rozdziale 

Lutowanie


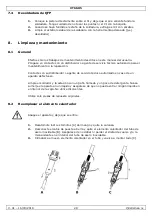
Nie przykładać pistoletu zbyt długo do tego samego miejsca. 
 
Nie pozostawiać włączonego urządzenia bez nadzoru. 


Содержание VTSSD5

Страница 1: ...VTSSD5 USER MANUAL 3 HANDLEIDING 10 MODE D EMPLOI 17 MANUAL DEL USUARIO 24 BEDIENUNGSANLEITUNG 31 INSTRUKCJA OBS UGI 38 MANUAL DO UTILIZADOR 45...

Страница 2: ...VTSSD5 V 01 16 03 2018 2 Velleman nv...

Страница 3: ...e using this appliance Indoor use only Do not crimp the power cord and protect it against damage Warning The supply cord cannot be replaced If the cord is damaged the appliance should be scrapped Make...

Страница 4: ...iron cool down naturally and do not immerse in water This device can be used by children aged from 8 years and above and persons with reduced physical sensory or mental capabilities or lack of experi...

Страница 5: ...he left or the right side 4 Make sure that the power switch is in the off position 0 5 Plug the power cord into a suitable earthed mains outlet 6 Operation 6 1 General Operation 1 To switch on the app...

Страница 6: ...ord mode disabled and 100 password enabled Press the SET button to return to the setup menu F 2 temperature unit Press the SET button once to enter temperature mode Press the or button to switch betwe...

Страница 7: ...Do not disconnect the mains plug during this cooling process 7 2 Setup Do not force the nozzle or pull its edges with pliers Do not over tighten the screw 1 Switch off the device Wait until the autom...

Страница 8: ...he unit in liquid or allow any liquid to enter the case of the station Never use any solvent to clean the case Use only original replacement parts 8 2 Replacing the Heating Element Switch off the unit...

Страница 9: ...event of damage or injury resulting from incorrect use of this device For more info concerning this product and the latest version of this manual please visit our website www velleman eu The informati...

Страница 10: ...itsluitend voor gebruik binnenshuis De voedingskabel mag niet beschadigd zijn of ingekort worden Waarschuwing De voedingskabel kan niet worden vervangen Als de kabel beschadigd is dan moet het toestel...

Страница 11: ...oor gebruik door kinderen vanaf 8 jaar door personen met fysieke zintuiglijke of verstandelijke beperkingen of door personen met gebrek aan ervaring en kennis op voorwaarde dat dit onder toezicht gebe...

Страница 12: ...ouder aan het toestel U kunt de houder zowel links als rechts bevestigen 4 Zorg ervoor dat de aan uit schakelaar op OFF staat 0 5 Steek de stekker in een geschikt geaard stopcontact 6 Gebruik 6 1 Alge...

Страница 13: ...of Druk op SET om naar het instelmenu terug te keren F 2 de temperatuureenheid instellen Druk nmaal op SET om het instelmenu voor de temperatuurcorrectie weer te geven Kies nu de eenheid C of F met o...

Страница 14: ...en wordt koude lucht door het verwarmingselement geblazen Dit beschermt het toestel tegen materi le schade en verlengt de levensduur Ontkoppel het toestel niet tijdens het afkoelingsproces 7 2 Setup...

Страница 15: ...t terug naar uw verdeler of servicedienst Reinig de soldeerbout en het toestel met een vochtige doek en een kleine hoeveelheid vloeibaar detergent Dompel het toestel nooit in een vloeistof onder en zo...

Страница 16: ...lleman nv is niet aansprakelijk voor schade of kwetsuren bij verkeerd gebruik van dit toestel Voor meer informatie over dit product en de laatste versie van deze handleiding zie www velleman eu De inf...

Страница 17: ...t avant d utiliser l appareil Utiliser cet appareil uniquement l int rieur Le c ble d alimentation ne peut pas tre serti ou endommag Avertissement Il est impossible de remplacer le c ble d alimentatio...

Страница 18: ...ne de mani re naturelle et ne jamais l immerger dans de l eau Cet appareil peut tre utilis par des enfants g s de 8 ans et plus et des personnes manquant d exp rience et de connaissances ou dont les c...

Страница 19: ...appareil Il est possible de le fixer gauche ou droite 4 S assurer que l interrupteur on off est sur OFF 0 5 Brancher l appareil sur une prise secteur appropri e avec mise la terre 6 Emploi 6 1 G n ral...

Страница 20: ...de passe activ avec ou Appuyer de nouveau sur SET pour revenir au mode de configuration F 2 unit de temp rature Appuyer une fois sur SET pour passer en mode de temp rature S lectionner l unit de temp...

Страница 21: ...dur e de vie Ne pas d brancher l appareil durant le refroidissement 7 2 Configuration Ne pas forcer l embout et ne tirer avec une pince Ne pas trop serrer la vis 1 teindre l appareil Attendre que le p...

Страница 22: ...infiltre l int rieur du bo tier Ne pas utiliser de solvants N utiliser que des pi ces de rechange d origine 8 2 Remplacer l l ment chauffant Eteindre l appareil et laisser le refroidir 1 Desserrer les...

Страница 23: ...uvant r sulter de l utilisation de cet appareil Pour plus d informations concernant cet article et la derni re version de ce mode d emploi consulter notre site www velleman eu Les sp cifications et le...

Страница 24: ...de usar el aparato Utilice el aparato s lo en interiores No aplaste el cable de alimentaci n y prot jalo contra posibles da os Advertencia No es posible reemplazar el cable de alimentaci n No utilice...

Страница 25: ...or Deje que la punta se enfr e de manera natural y nunca sum rjala en agua Este aparato no es apto para ni os menores de 8 a os ni para personas con capacidades f sicas sensoriales o mentales reducida...

Страница 26: ...estaci n Es posible fijarlo tanto al lado izquierdo como al lado derecho 4 Aseg rese de que el interruptor ON OFF est en la posici n O 5 Enchufe el aparato a una toma el ctrica adecuada puesta a tier...

Страница 27: ...Pulse SET para volver al men de configuraci n F 2 unidad de temperatura Pulse el bot n una vez para entrar en el modo de temperatura Pulse o para conmutar entre C y F Pulse el bot n SET para volver a...

Страница 28: ...i n de enfriamiento se activar autom ticamente soplando brevemente aire fr o a trav s del tubo del elemento calentador De esa manera se evitar n da os y se prolongar la duraci n de vida del elemento c...

Страница 29: ...eparaci n Contacte con su distribuidor o agente de servicio t cnico autorizado en caso de un aparato defectuoso Limpie el soldador y la estaci n con un pa o h medo y un poco de detergente Nunca sumerj...

Страница 30: ...Velleman NV no ser responsable de da os ni lesiones causados por un uso indebido de este aparato Para m s informaci n sobre este producto y la versi n m s reciente de este manual del usuario visite n...

Страница 31: ...ignet sich nur f r die Anwendung im Innenbereich Achten Sie darauf dass die Netzleitung nicht gequetscht werden kann Achtung Ein besch digtes Netzkabel kann nicht ausgetauscht werden Verwenden Sie das...

Страница 32: ...igen Oberfl che Lassen Sie die Spitze auf nat rlicher abk hlen und tauchen Sie den L tkolben nie in Wasser ein Dieses Ger t kann von Kindern ab 8 Jahren und dar ber sowie von Personen mit verringerten...

Страница 33: ...Sie den Halter Befestigen Sie ihn nach Bedarf links oder rechts 4 Stellen Sie sicher dass der Netzschalter auf O steht 5 Stecken Sie den Netzstecker in eine geerdete Steckdose 6 Anwendung 6 1 Allgemei...

Страница 34: ...die Taste SET um zum Konfigurationsmen zur ckzukehren F 2 Temperatureinheit Dr cken Sie die Taste SET einmal um in den Temperaturmodus zu wechseln Dr cken Sie oder um zwischen C und F zu schalten Dr c...

Страница 35: ...ies sch tzt das Hei ger t vor Sch den und verl ngert die Lebensdauer Ziehen Sie den Netzstecker nicht aus der Steckdose wenn die automatische K hlfunktion aktiviert ist 7 2 Konfiguration Wenden Sie be...

Страница 36: ...ndienst oder einer autorisierten Fachkraft zur ck Reinigen Sie den L tkolben und die Station mit einem feuchten Tuch und ein bisschen Reinigungsmittel Tauchen Sie das Ger t nie in Wasser oder eine and...

Страница 37: ...r t nur mit originellen Zubeh rteilen Velleman NV bernimmt keine Haftung f r Schaden oder Verletzungen bei falscher Anwendung dieses Ger tes Mehr Informationen zu diesem Produkt und die neueste Versio...

Страница 38: ...ymbolami bezpiecze stwa Wy cznie do u ytku wewn trz pomieszcze Nie zagina przewodu zasilaj cego i chroni przed uszkodzeniami Uwaga Przew d zasilaj cy nie podlega wymianie Je li przew d ulegnie uszkodz...

Страница 39: ...iniejszego urz dzenia mog korzysta dzieci powy ej 8 roku ycia i osoby o ograniczonych zdolno ciach fizycznych zmys owych b d umys owych jak r wnie osoby nieposiadaj ce do wiadczenia lub znajomo ci urz...

Страница 40: ...b prawej strony 4 Upewni si e prze cznik zasilania znajduje si w pozycji wy czenia 0 5 Umie ci wtyczk zasilania w odpowiednim uziemionym gniazdku 6 Obs uga 6 1 Og lne zasady obs ugi 1 Ustawi prze czni...

Страница 41: ...a wy czony a 100 tryb has a w czony Nacisn przycisk SET aby wr ci do menu ustawie F 2 jednostka temperatury Nacisn jednokrotnie przycisk SET aby wej w tryb temperatury Nacisn przycisk lub aby prze cza...

Страница 42: ...wyd u a jego ywotno Podczas procesu ch odzenia nie nale y od cza wtyczki zasilania 7 2 Ustawianie Nie wyci ga dyszy na si ani nie ci gn szczypcami za jej kraw dzie Nie nale y zbyt mocno dokr ca ruby 1...

Страница 43: ...stacji mo e by czyszczona wilgotn ciereczk z niewielk ilo ci p ynnego detergentu Nigdy nie zanurza urz dzenia w cieczy nie dopu ci aby ciecz dosta a si pod obudow stacji Nigdy nie u ywa rozpuszczalni...

Страница 44: ...enia lub urazy wynikaj ce z niew a ciwego korzystania z niniejszego urz dzenia Aby uzyska wi cej informacji dotycz cych produktu oraz najnowsz wersj niniejszej instrukcji nale y odwiedzi nasz stron in...

Страница 45: ...em interiores N o danifique o cabo de alimenta o e proteja o contra poss veis danos causados por uma qualquer superf cie afiada Aten o O cabo de alimenta o n o pode ser substitu do Se o cabo estiver...

Страница 46: ...or Deixe a ponta arrefecer naturalmente e numa a coloque debaixo de gua Este aparelho pode ser usado por crian as com idade igual ou superior a 8 anos e pessoas com capacidades f sicas mentais e senso...

Страница 47: ...do lado esquerdo ou do lado direito 4 Certifique se de que o interruptor est na posi o off 0 5 Ligue o cabo de alimenta o a uma tomada de corrente adequada 6 Utiliza o 6 1 Funcionamento Geral 1 Para...

Страница 48: ...ctivada Pressione o bot o SET para regressar ao menu deconfigura o F 2 unidade de temperatura Prima o bot o SET 2 uma vez para entrar no modo temperatura Seleccione a unidade de temperatura C ou F com...

Страница 49: ...o sistema de arrefecimento autom tico envia ar frio para os tubos de aquecimento durante alguns instantes Isto evita poss veis danos e prolonga a vida do aparelho N o desligue o cabo da corrente dura...

Страница 50: ...a esta o de soldar apresentar algum defeito Limpe o ferro de soldar e a esta o com um pano h mido e um pouco de detergente Nunca mergulhe o aparelho em qualquer l quido e certifique se que n o entra q...

Страница 51: ...riginais A Velleman NV n o ser respons vel por quaisquer danos ou les es causados pelo uso indevido do aparelho Para mais informa o sobre este produto e para aceder vers o mais recente deste manual do...

Страница 52: ...volledig terug te betalen In dat geval krijgt u een vervangend product of terugbetaling ter waarde van 100 van de aankoopsom bij ontdekking van een gebrek tot n jaar na aankoop en levering of een ver...

Страница 53: ...ci n expl cita de Velleman se calcula gastos de transporte de y a Velleman si el aparato ya no est cubierto por la garant a Cualquier art culo que tenga que ser reparado tendr que ser devuelto a su di...

Страница 54: ...uktu do i z serwisu wymienione wy ej warunki s bez uszczerbku dla wszystkich komercyjnych gwarancji Powy sze postanowienia mog podlega modyfikacji w zale no ci od wyrobu patrz art obs ugi Garantia de...

Отзывы:

Похожие инструкции для VTSSD5