


CAMIP4
Rev.
02
17/07/2009
© 2008
Velleman nv
4
the bottom hole (camera resting on top of the bracket), mount the sunshield
[4]
by using the top
hole and the included bolt and washer.
•
Point the camera towards the zone of interest and tighten the position bolt
[6]
.
•
Connect the power connector
[C]
to the 12VDC power supply (incl.).
•
Connect the BNC connector
[B]
to a monitor (not incl.) and/or to a computer network via the RJ45
connector
[A]
. If in doubt, contact your local network service provider.
6.
Software installation
•
The camera comes with a CD-ROM containing the CamView software. Insert the CDROM into a
suitable computer (refer to
§9
- Technical specifications).
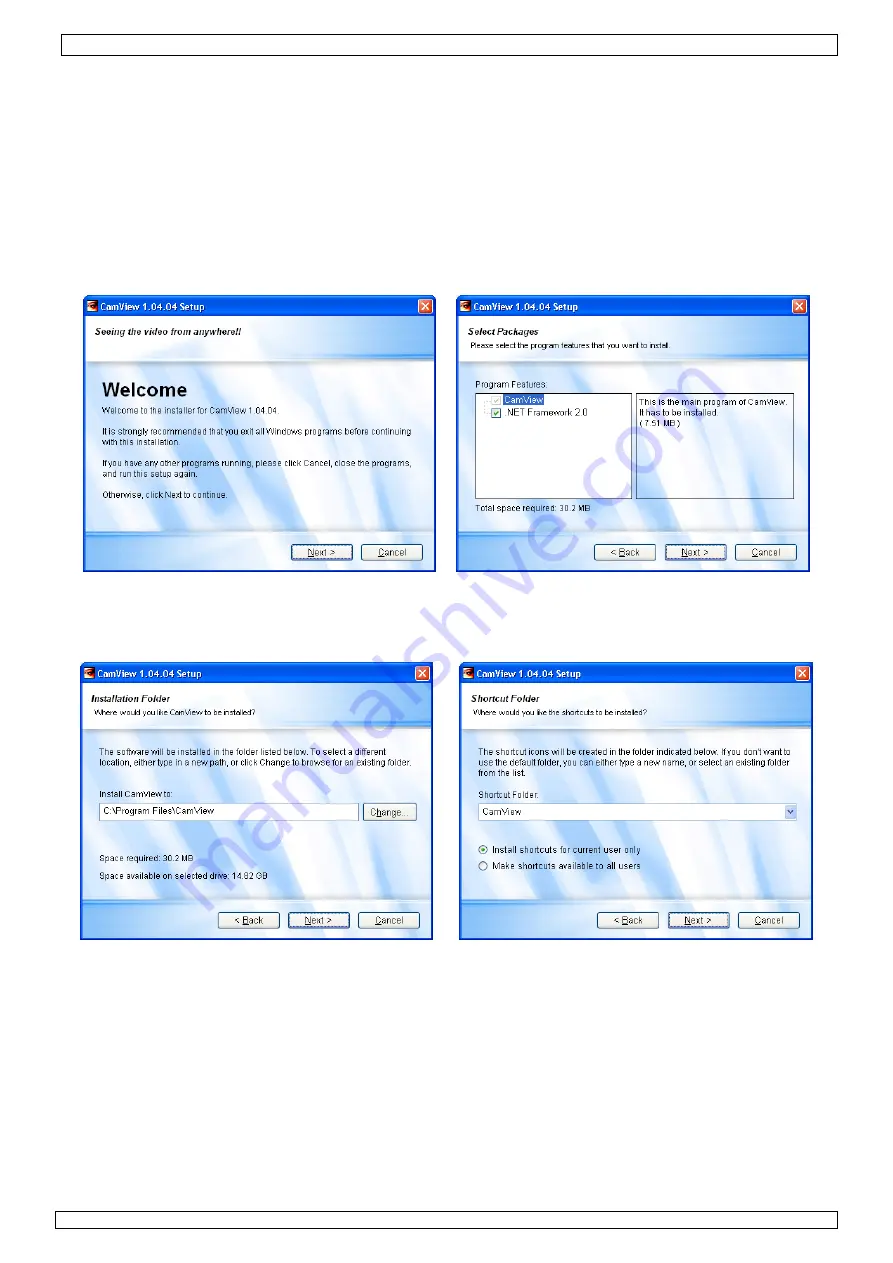
•
Locate the CamViewInstaller-V1.04.xx.exe (xx is de current version number) and double click on
it. The installation starts and the
welcome
screen is shown.
•
Click
Next >
. The
Select Packages
screen is shown.
•
If Framework 2.0 is already installed on the computer, uncheck the checkbox. If in doubt, leave it
checked, the computer will check.
•
Click
Next >
. The
Installation Folder
screen is shown.
•
Select the desired location with the
Change…
button and click
Next >
. The
Shortcut Folder
window appears.
•
Select the desired location from the dropdown menu, select whether to make shortcuts available
for all users or not and click
Next >
. The
Ready to Install
window appears.


