background image

Velbus Signum IoT Gateway (VMBSIG-20) install guide


April 2024 


Page 

15

 of 

19


Troubleshooting 

LED behaviour of the Signum Module 

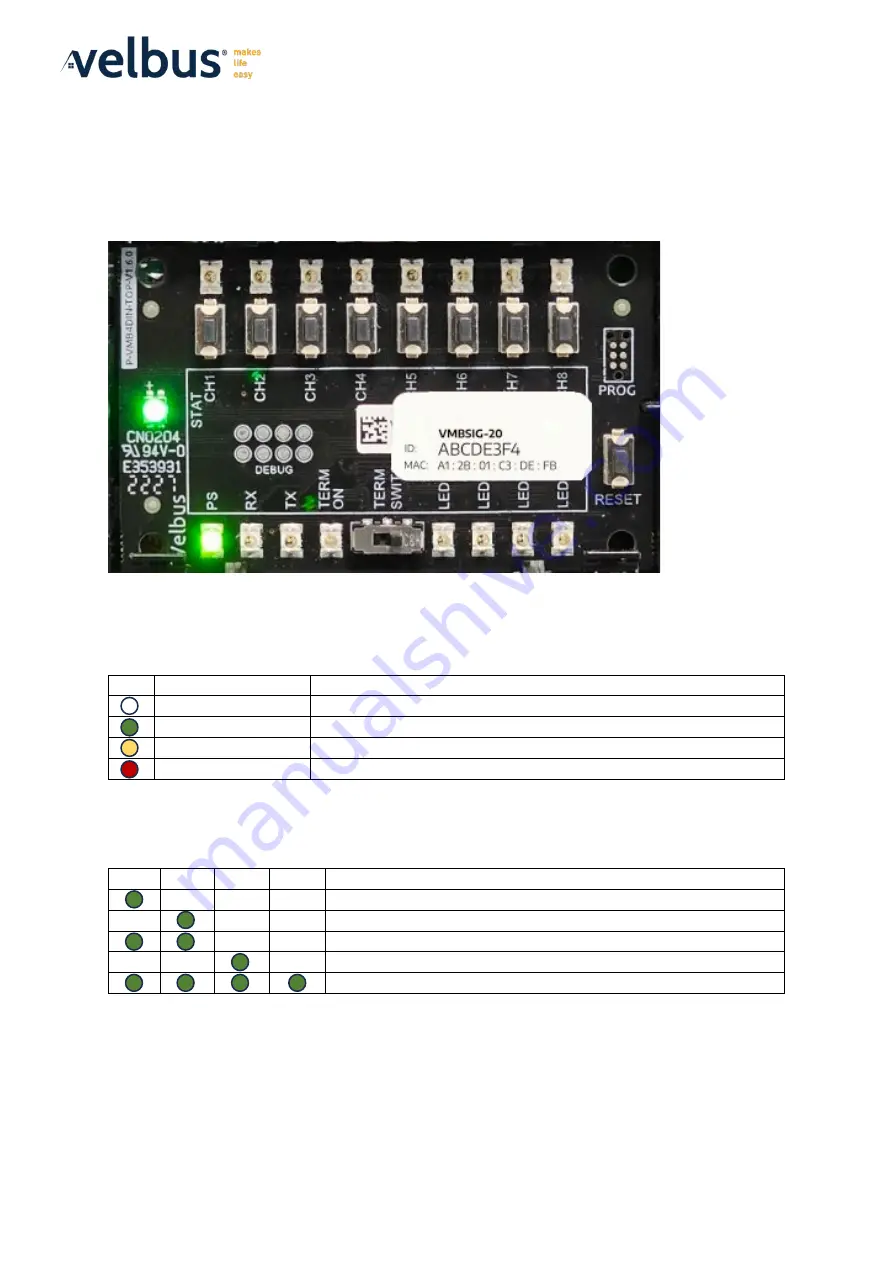
Troubleshooting your Signum IoT Gateway starts by analysing the LED’s on your module. 


Please check if the PS LED is on. If not, please check your connections and the power to the 

Signum. 

The STAT LED on middle left provides general information about the status of your Signum: 

LED  Colour 

Situation 


White flashing (1x) 

Your Signum is booting up – please wait a moment 


Green flashing (1x) 

Your Signum is operational and everything should work fine 


Yellow flashing (5x)  There is a warning, check the Signum web interface 


Red flashing (5x) 

Your Signum has encountered an error, check the error code 

 
There are also 4 LEDs on the bottom right of the module. If the Signum encounters an error, a 

specific combination of LED’s will be shown, helping you identify the problem: 

LED1  LED2  LED3  LED4  Situation 


Your Signum did not get an IP-address 


Your Signum cannot be scanned on the local network 


Your Signums web interface is not available 


Your Signums self-recovery service is not available 


Your Signum can’t communicate with the Compute Module 4 


If you should encounter one of these errors, please reset your Signum by pressing the RESET 

button and checking your connections. If the problem persists, please follow the steps to factory 

reset your Signum.  
If you still encounter problems after the factory reset, please create a support ticket via 

help.velbus.eu and prove us with your Signum ID and a brief description on what’s going on.


Содержание VMBSIG-20

Страница 1: ...ct your Signum module 2 Configure your Signum module 4 Via Velbuslink 4 Via the Signum app on your smartphone or tablet 7 Quickstart guide 8 Using Home Assisant 14 Setting up remote access in Home Ass...

Страница 2: ...ded Molex to Molex cable with the Molex connector on your Signum and connect with another Velbus module already installed If you have older Velbus modules without Molex connectors cut strip one end of...

Страница 3: ...rite down or take a picture of the information on your Signum you might need this information later 5 Verify that the PS LED on the bottom left is turned on 6 Press the RMT button CH1 on the top left...

Страница 4: ...d Home Assistant ensure your Velbus installation is set up completely This step is crucial as configuring Home Assistant should be the final step in your Velbus installation process Failure to set up...

Страница 5: ...resses If the installation has already been configured before uncheck the Auto assign addresses option 5 For a first time installation you can start with blank modules otherwise you select Read settin...

Страница 6: ...e April 2024 Page 6 of 19 7 In Velbuslink push the button Go to Signum in the top right corner This will open your default web browser to the local IP address of your Signum with the Quickstart guide...

Страница 7: ...om store apps details id be velbus SignumApp 2 Open de Velbus Signum app let it scan and your Signum should be shown If you cannot find your Signum check if you are connected to the same network as yo...

Страница 8: ...heck before starting the Quickstart Click Next If any of the checks are not green please wait a few more minutes your Signum might be booting up status LED on your module is white Also check your conn...

Страница 9: ...um IoT gateway Click Next 5 Select your preferred language at the bottom left and click Create my smart home You will be prompted to create a profile for your Home Assistant Fill in your name pick a u...

Страница 10: ...Click the map icon on the right to search for your location You can adjust your location by moving the pointer on the map until you are satisfied and click Next 7 Sharing your anonymized information...

Страница 11: ...ll scan your network for compatible devices and show them here Mind the Velbus Signum icon in the list You can click Finish and set these devices up later 9 Your will see your Home Assistant dashboard...

Страница 12: ...ill be asked to read your installation You can either scan your installation or upload a VelbusLink project file The latter is recommended if you have this available since it will be much faster then...

Страница 13: ...u will see your Velbus installation in Home Assistant Nothing to see there Please wait a few seconds as the integration might be loading If your dashboard stays empty go to Settings Devices choose Vel...

Страница 14: ...t come in handy Setting up remote access in Home Assistant If you want to access your Velbus installation outside your home network you can easily set this up by going to Settings Signum Cloud Activat...

Страница 15: ...ountered an error check the error code There are also 4 LEDs on the bottom right of the module If the Signum encounters an error a specific combination of LED s will be shown helping you identify the...

Страница 16: ...um to factory defaults This will delete all user accounts dashboards widgets settings and network settings without recovery option in the Signum The configuration in other modules in the Velbus instal...

Страница 17: ...he rescue URL in your browser local Navigate to YOURSIGNUMIPADDRESS health rescue in your favourite browser Change YOURSIGNUMIPADDRESS to the IP address of your Signum for example 192 168 1 12 You can...

Страница 18: ...the start of a 10 minute timer before the authentication service is suspended If you are too late the green LED is turned off again you can simply press it again to start a new 10 minute window 2 Ref...

Страница 19: ...9 4 When the countdown has reached zero the page is automatically refreshed bringing you back to the Signum Quickstart If the refresh is not automatic please manually browse to the following URL https...

Отзывы: