background image


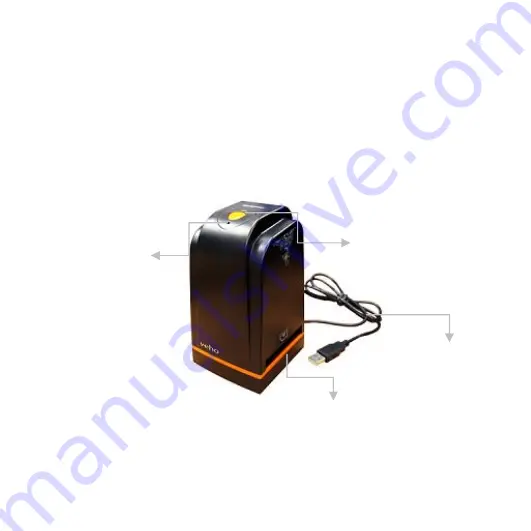
7. After completing the installation, the filmscanner is ready to start with “35mm 
FilmScanner” AP under program files. (XP/Vista) 


IV.


Use


FilmScan35


I


Copy


button


Power


staus


LED


USB


Cable

Film


Slot


-

14-


Содержание FilmScan35 I

Страница 1: ...FilmScan35 I User Manual...

Страница 2: ...I Unpack FilmScan35 I FilmScan35 I Negative Film Holder Slide Film Holder CD ROM Quick Installation Guide Clean brush USB cable 1...

Страница 3: ...d clean the glass surface periodically to produce a clear image Dust or dirt from the negative slide fils and cover trays may affect the scanned image qauality please make sure the materails are clean...

Страница 4: ...II Install film into the film holder Install the slide into holder 1 Open the slide holder as illustrated 2 Put slide into positive slide slot 3 Close the film holder 3...

Страница 5: ...Install the negative film into holder 1 Open the film holder as illustrated 2 Install film into negative film slot 3 Close the film holder 4...

Страница 6: ...ollow the serial numbers from left to right on top of film when install negative film into holder Figure 1 If the image is upside down see fig 2 the image can be corrected by Rotate function in AP aft...

Страница 7: ...cne 1 Turn on the computer 2 Insert the installation CD into the CD ROM drive and the installation CD menu will appear 3 When you see the following screen choose Installation x86 32bits NOTE 6 If inst...

Страница 8: ...4 Follow the on screen instructions XP Vista 7...

Страница 9: ...8...

Страница 10: ...9...

Страница 11: ...10...

Страница 12: ...5 After completing software installation please connect FilmScan35 I to PC The New Hardware Wizard will detect a new device 11...

Страница 13: ...6 Select Yes in XP or Locate and install driver software recommended in Vista OS 12...

Страница 14: ...13...

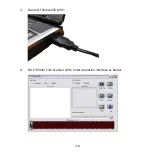
Страница 15: ...7 After completing the installation the filmscanner is ready to start with 35mm FilmScanner AP under program files XP Vista IV Use FilmScan35 I Copy button Power staus LED USB Cable Film Slot 14...

Страница 16: ...Start to use FilmScan35 I 1 Put Film into film slot 2 Insert the slot into FilmScan35 15...

Страница 17: ...3 Connect FilmScan35 to PC 4 Click 35mm Film Scanner AP to enter operation interface as below 16...

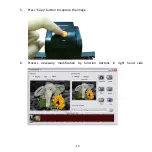
Страница 18: ...5 Press Copy button to capture the image 6 Process necessary modification by function buttons in right hand side 17...

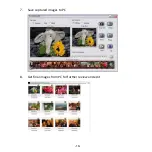
Страница 19: ...7 Save captured images to PC 8 Get final images from PC for further review and edit 18...

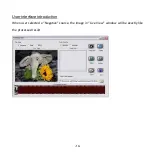
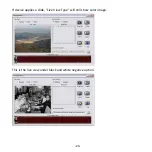
Страница 20: ...User interface introduction When user selected a Negative source the image in Live View window will be exactly like the processed result 19...

Страница 21: ...If device applies a slide Live View Type will still show color image This is the live view under black and white negative option 20...

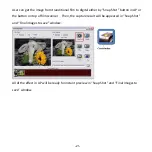
Страница 22: ...ther by Snap Shot button in AP or the button on top of filmscanner Then the capture result will be appeared in Snap Shot and Final images to save window All of the effect in AP will be ready for insta...

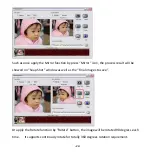
Страница 23: ...the process result will be showed on Snap Shot window as well as the Final images to save Or apply the Rotate function by Rotate button the image will be rotated 90 degress each time It supports conti...

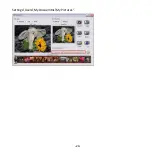
Страница 24: ...mage from captured pool just click the image in Final image to save again then the selected image can be deleted directly by applying Delete button After modification user can save the images to defau...

Страница 25: ...Settings Users My Docuemtns My Pictures 24...

Страница 26: ...mages by press directory button Another window will pop out for user to select required location Once press Save key all of captures images will be saved into defined location The final image saving w...

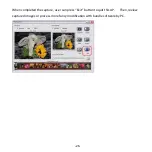
Страница 27: ...When completed the capture user can press Exit button to quit this AP Then review captured images or process more fancy modification with bundle software by PC 26...

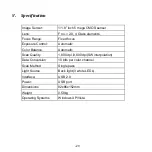
Страница 28: ...Exposure Control Automatic Color Balance Automatic Scan Quality 1 800 dpi 3 600 dpi SW interpolation Data Conversion 10 bits per color channel Scan Method Single pass Light Source Back light 3 white...

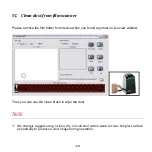
Страница 29: ...r from device when you found any dust on live view window Then you can use the clean brush to wipe the dust NOTE We strongly suggest using a clean dry non alcohol cotton swab to clean the glass surfac...

Отзывы: