background image


Troubleshooting

LED Diagnostics for Communications Between ProtoNode and Devices

22

LED Diagnostics for Communications Between ProtoNode and Devices

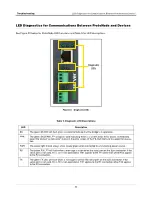
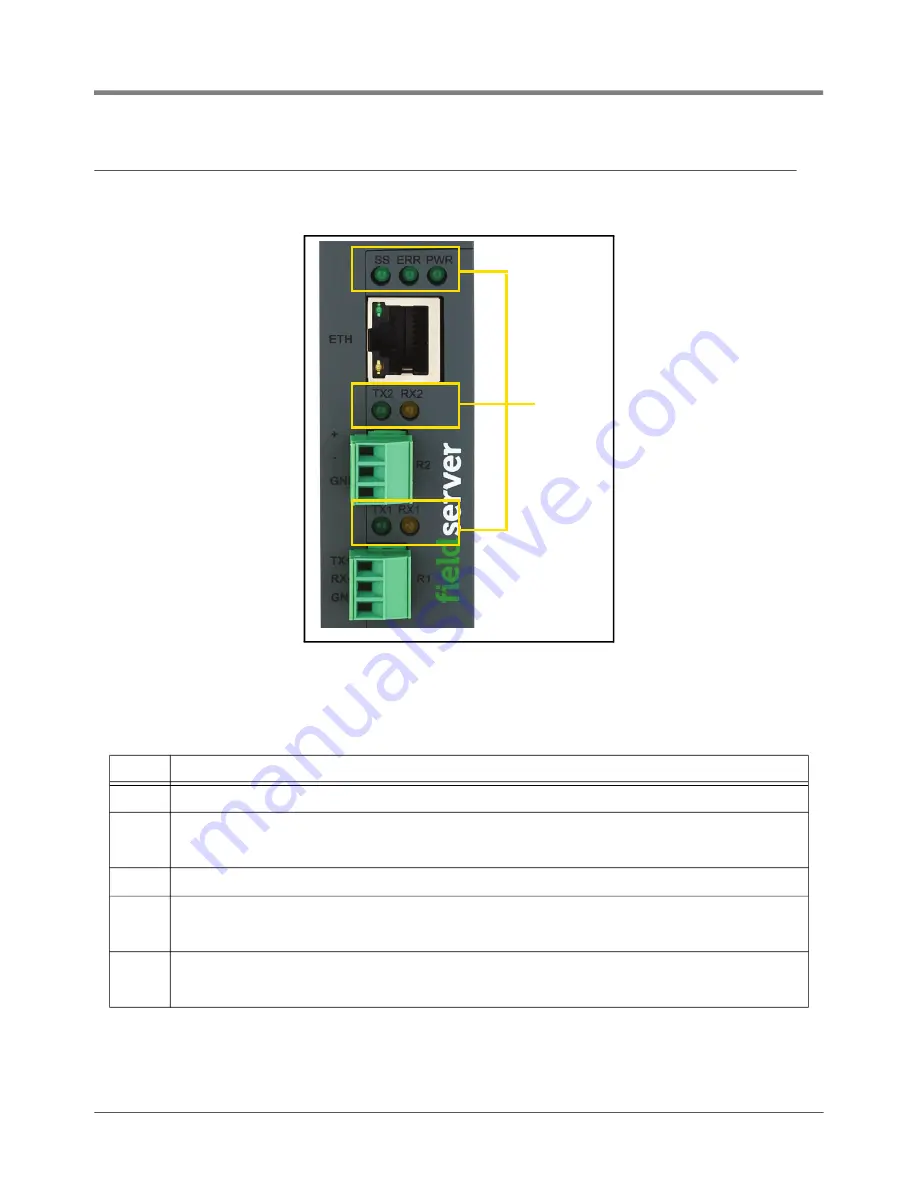
See Figure 22 below for ProtoNode LED Locations and Table 5 for LED descriptions.

Figure 22.   Diagnostic LEDs

Table 5. Diagnostic LED Descriptions

LED

Description

SS

The green SS LED will flash once a second to indicate that the bridge is in operation.

ERR

The green SYS ERR LED will go on solid indicating there is a system error. If this occurs, immediately 

report the related “system error” shown in the error screen of the FS-GUI interface to support for evalua

-

tion.

PWR

The power light should always show steady green when connected to a functioning power source.

RX

The yellow RX LED will flash when a message is received on the serial port on the 3-pin connector. If the 

serial port is not used, this LED is non-operational. RX1 applies to the R1 connection while RX2 applies 

to the R2 connection.

TX

The green TX LED will flash when a message is sent on the serial port on the 3-pin connector. If the 

serial port is not used, this LED is non-operational. TX1 applies to the R1 connection while TX2 applies 

to the R2 connection.

Diagnostic

LEDs

Содержание ProtoNode FPC-N54

Страница 1: ...Manual No 577014 491 Revision A ProtoNode FPC N54 Gateway Startup Guide...

Страница 2: ...ur Terms and Conditions VEEDER ROOT S PREFERRED CARRIER 1 Contact Veeder Root Customer Service at 800 873 3313 with the specific part numbers and quantities that were missing or received damaged 2 Fax...

Страница 3: ...he Connected PC 9 Setup Web Server Security Login to the FieldServer 10 Select the Security Mode 13 HTTPS with Own Trusted TLS Certificate 13 HTTPS with Default Untrusted Self Signed TLS Certificate o...

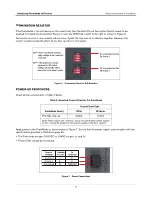
Страница 4: ...7 Figure 6 Termination Resistor DIP Switches 8 Figure 7 Power Connections 8 Figure 8 Ethernet Port Location 9 Figure 9 Web Server Security Window 10 Figure 10 Connection Not Private Warning 11 Figure...

Страница 5: ...us and SNMP A 2 Table A 3 Tank Veeder Root Interface Mappings to BACnet Modbus and SNMP A 2 Table A 4 Liquid_Sensor Veeder Root Interface Mappings to BACnet Modbus and SNMP A 3 Table A 5 Input Veeder...

Страница 6: ...ystems including Line Leak Detection This certification includes TLS 3xx and TLS4xx certification training In Station Diagnostics ISD PMC Technician Certification ISD PMC Contractors holding a valid I...

Страница 7: ...hich if not avoided could result in death or serious injury READ ALL RELATED MANUALS Knowledge of all related procedures before you begin work is important Read and understand all manuals thor oughly...

Страница 8: ...K 1 reg Fuel Volume 3655 Fuel Height 38 6 Ullage 100 6345 Temperature 61 9 Water Height 3 0 1 Warning s 0 Alarms s Print 0 Home Favorites Menu Actions Overview TANK 2 diesel Fuel Volume 1600 Fuel Heig...

Страница 9: ...n page 8 6 Connect a PC to the ProtoNode via Ethernet cable Connect the PC to the ProtoNode on page 9 7 Setup Web Server Security and login via web browser Setup Web Server Security on page 10 8 Use a...

Страница 10: ...Configuring Device Configurations The connected serial device MUST have the same baud rate data bits stop bits and parity settings as the ProtoNode To set the ProtoNode s COM settings see Select Field...

Страница 11: ...To switch the R1 port between RS 485 and RS 232 move the number 4 DIP switch to the left for RS 485 and to the right for RS 232 see Figure 3 Figure 3 R1 Port RS 485 RS 232 Selection DIP Switch NOTICE...

Страница 12: ...The bias resistor is 510 ohms which is in line with the BACnet spec It should only be enabled at one point on the bus for example on the field port were there are very weak bias resistors of 100k Sinc...

Страница 13: ...7 Ensure that the power supply used complies with the specifications provided in Table 6 on page 35 The ProtoNode accepts 9 30VDC or 24VAC on pins L and N Frame GND should be connected Figure 7 Power...

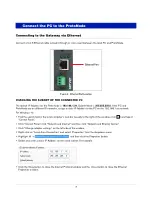
Страница 14: ...1 xxx network For Windows 10 Find the search field in the local computer s task bar usually to the right of the windows icon and type in Control Panel Click Control Panel click Network and Internet an...

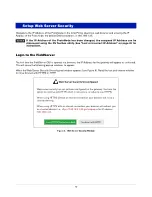
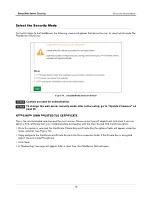
Страница 15: ...trusted This will cause the following pop up windows to appear When the Web Server Security Unconfigured window appears see Figure 9 Read the text and choose whether to move forward with HTTPS or HTTP...

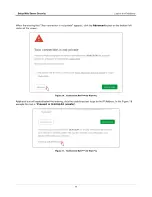
Страница 16: ...s click the Advanced button on the bottom left corner of the screen Figure 10 Connection Not Private Warning Additional text will expand below the warning click the underlined text to go to the IP Add...

Страница 17: ...re is also a QR code in the top right corner of the FieldServer label that shows the default unique password when scanned Figure 12 FieldServer Login A user has 5 attempts to login then there will be...

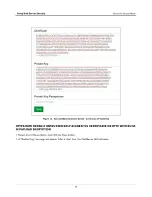
Страница 18: ...FICATE This is the recommended selection and the most secure Please contact your IT department to find out if you can obtain a TLS certificate from your company before proceeding with the Own Trusted...

Страница 19: ...Selection Screen Certificate Private Key HTTPS WITH DEFAULT UNTRUSTED SELF SIGNED TLS CERTIFICATE OR HTTP WITH BUILT IN PAYLOAD ENCRYPTION Select one of these options and click the Save button A Redi...

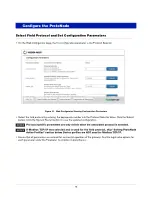
Страница 20: ...ck the Submit button Click the System Restart button to save the updated configuration Protocol specific parameters are only visible when the associated protocol is selected If Modbus TCP IP was selec...

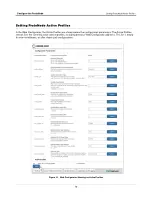
Страница 21: ...or the Active Profiles are shown below the configuration parameters The Active Profiles section lists the currently active device profiles including previous Web Configurator additions This list is em...

Страница 22: ...ctive profiles as shown in Figure 17 Figure 17 Web Configurator Showing no Active Profiles The System and Unknown Type points are automatically configured therefore no profile is required Refer to Tab...

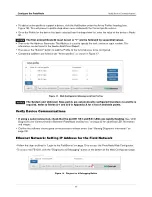
Страница 23: ...outer If the web page was open in a browser the browser will need to be pointed to the new IP Address of the FieldServer before the web page will be accessible again Unplug Ethernet cable from PC and...

Страница 24: ...Profiles Follow the steps outlined in Login to the FieldServer on page 10 to access the ProtoNode Web Configurator At the bottom left of the page click the Clear Profiles and Restart button Once rest...

Страница 25: ...Toolbox Utility and click Discover Now on the splash page Check for the IP Address of the desired gateway Figure 20 Checking for IP Address of the Desired Gateway Viewing Diagnostic Information Type...

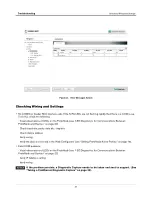
Страница 26: ...rotoNode and Devices on page 22 Check baud rate parity data bits stop bits Check device address Verify wiring Verify the device was listed in the Web Configurator see Setting ProtoNode Active Profiles...

Страница 27: ...mmediately report the related system error shown in the error screen of the FS GUI interface to support for evalua tion PWR The power light should always show steady green when connected to a function...

Страница 28: ...of the following methods Open the FieldServer FS GUI page and click on Diagnostics in the Navigation panel Open the FieldServer Toolbox software and click the diagnose icon of the desired device Figur...

Страница 29: ...r back to its factory released state see ENOTE FieldServer Next Gen Recovery Internet Browsers Supported The following web browsers are supported Chrome Rev 57 and higher Firefox Rev 35 and higher Mic...

Страница 30: ...t IP Address on page 20 3 Click on the Diagnostics Debugging button 4 In the Navigation Tree on the left hand side do the following a Click on Setup b Click on File Transfer c Click on the General tab...

Страница 31: ...laboratory which verifies that the product correctly implements the BACnet features claimed in the listing The mark is a symbol of a high quality BACnet product Figure 26 BTL Mark BACnet Testing Labor...

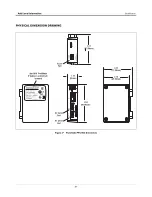
Страница 32: ...3 07 77 99mm 3 07 77 99mm 2 76 69 98mm 3 94 99 98mm Power Port 1 10 28mm Model No 330020 840 Serial No XXXXXXXXXXX Input 9 30VDC 12 24VAC 2 5W Default Password JU mUDiw9 Shipping IP 192 168 1 24 SO XX...

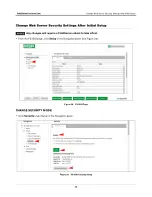
Страница 33: ...ity Settings After Initial Setup Any changes will require a FieldServer reboot to take effect From the FS GUI page click Setup in the Navigation panel see Figure 28 Figure 28 FS GUI Page CHANGE SECURI...

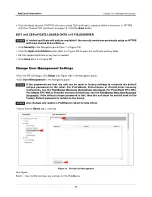
Страница 34: ...r Management Settings From the FS GUI page click Setup see Figure 28 in the Navigation panel Click User Management in the Navigation panel If the passwords are lost the unit can be reset to factory se...

Страница 35: ...button Item 3 in Figure 30 Figure 31 Create User Window Enter the new User fields Username Security Group and Password User details are hashed and salted The password must meet the minimum complexity...

Страница 36: ...l icon next to the desired user to open the User Edit window Item 1 in Figure 32 Figure 32 Setup Users Once the User Edit window opens Figure 33 change the User Security Group and or Password as neede...

Страница 37: ...Management Settings 32 DELETE USERS Click the Trash Can icon next to the desired user to delete the entry see Figure 34 Figure 34 Setup Users When the warning message appears click Confirm see Figure...

Страница 38: ...ure 36 FieldServer Password Update via FS GUI Change the general login password for the FieldServer as needed The password must meet the minimum complexity requirements An algorithm automatically chec...

Страница 39: ...6 click on Network Settings see Figure 37 Figure 37 Routing Settings Click the Add Rule button to add a new row and set a new Destination Network Netmask and Gateway IP Address as needed Set the Prior...

Страница 40: ...rature above 65 C it should be installed in a Restricted Access Area requiring a key or a special tool to gain access This device must not be connected to a LAN segment with outdoor wiring Table 6 Spe...

Страница 41: ...ion marks have been removed or altered This Limited Warranty also will not apply to interconnecting cables or wires consumables or to any damage resulting from battery leakage In all cases MSA Safety...

Страница 42: ...10004 1 3 6 1 4 1 6347 0 1 7 0 Too Many Tanks BI 5 10005 1 3 6 1 4 1 6347 0 1 8 0 System Security Warning BI 6 10006 1 3 6 1 4 1 6347 0 1 9 0 ROM Revision Warning BI 7 10007 1 3 6 1 4 1 6347 0 1 10 0...

Страница 43: ...I X022 30X43 30X44 FLOAT 1 3 6 1 4 1 6347 0 XX1 22 0 Tank X Tank Setup Warning BI X001 10X01 1 3 6 1 4 1 6347 0 XX1 23 0 Tank X Tank Leak Alarm BI X002 10X02 1 3 6 1 4 1 6347 0 XX1 24 0 Tank X High Wa...

Страница 44: ...t Normal BI X002 10X02 1 3 6 1 4 1 6347 0 XX1 2 0 Input X Input Alarm BI X003 10X03 1 3 6 1 4 1 6347 0 XX1 3 0 Input X Generator Off BI X004 10X04 1 3 6 1 4 1 6347 0 XX1 4 0 Input X Generator On BI X0...

Страница 45: ...hort Alarm BI X004 10X04 1 3 6 1 4 1 6347 0 XX1 4 0 Groundwater Sensor X Water Alarm BI X005 10X05 1 3 6 1 4 1 6347 0 XX1 5 0 Groundwater Sensor X Water Out Alarm BI X006 10X06 1 3 6 1 4 1 6347 0 XX1...

Страница 46: ...Vacuum Warning BI X016 10X16 1 3 6 1 4 1 6347 0 XX1 16 0 Smart Sensor X No Vacuum Warning BI X017 10X17 1 3 6 1 4 1 6347 0 XX1 17 0 Point Name BACnet Object Type BACnet Object ID Modbus Register SNMP...

Страница 47: ......
Отзывы: