DPLLD Transducer Installation
Red Jacket Standard Pumps (DPLLD w/SwiftCheck)
11
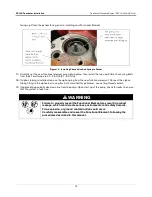
10. Thread the DPLLD transducer into the SwiftCheck valve (ref. Figure
5 as appropriate).
Seal the NPT threads only with a UL-Classified, nontoxic pipe sealant suitable for the
fuel involved (for high-alcohol fuel blend applications, Loctite 564 is recommended).
Apply sealant in a manner that prevents it from entering and contaminating hydraulic
cavities.
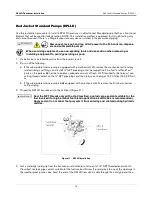
11. Get a watertight cord grip from the transducer installation kit and coat its 1/2” NPT threaded end with UL-
Classified, nontoxic pipe sealant suitable for the fuel involved. Screw the cord grip into one of the openings in
the weatherproof junction box. Feed the end of the DPLLD transducer cable through the cord grip and then
tighten the nut to ensure a watertight seal. Connect and seal the pressure transducer wires to the wires from
the TLS console as described in ‘Epoxy Sealing DPLLD Transducer Field Wiring Connections’ on page 21.
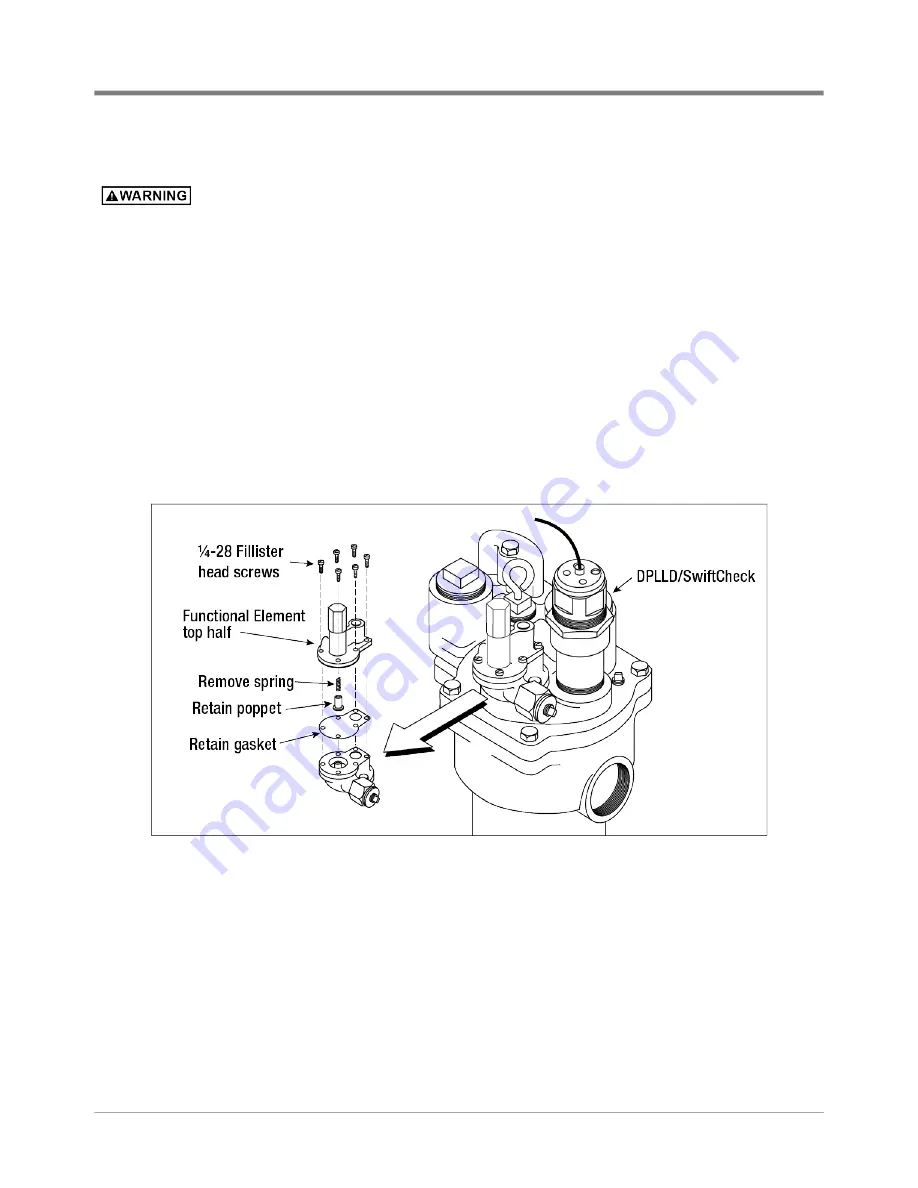
12. The DPLLD Swiftcheck valve eliminates the need for the pumps Functional Element relief valve function.
Remove the existing Functional Element from the packer and discard. Obtain a new Pump Service Kit (P/N
344-001-5) which includes the new Functional Element, Check Valve and Seals. Using the new Functional
Element, remove the 6 – ¼-28 Fillister Head Screws and set aside. Remove the top assembly of the
Functional Element from its body by pulling straight upward from to separate the top from the body. Gently
fold back/separate the diaphragm from the top and remove the poppet and the spring. Discard the spring but
reinstall the poppet (see Figure
6).
Figure 6. Modifying The Functional Element In Red Jacket Pumps


