Installing the Dektak 150 System
2-21
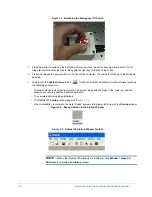
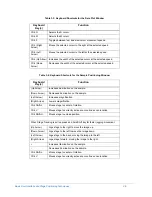
Figure 2-29: ReleasIng the Emergency Off Switch
4
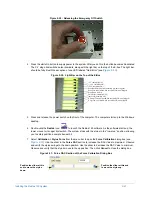
Press the white On button to supply power to the system. After you do this, the button becomes illuminated.
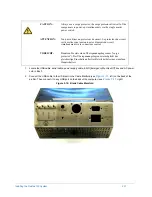
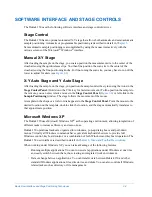
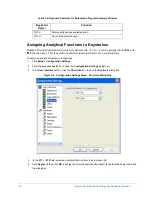
The X-Y stage limit switches also illuminate, along with the light bar on the top of the E-box. The light bar
should be fully lit with the exception of one LED labeled "Galil Error" (see
).
Figure 2-30: Light Bar on the Top of the E-Box
5
Press and release the power switch on the front of the computer. The computer starts up to the Windows
desktop.
6
Double-click the
Dektak
icon
to launch the Dektak 150 software. As the software starts up, the
tower moves to its upper limit switch. The system stops with the stylus in the “tower up” position, allowing
you to safely position a sample beneath it.
7
Select
Calibration > Stylus Force
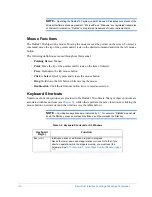
from the menu bar to open the
Force Calibration
dialog box (see
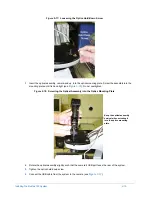
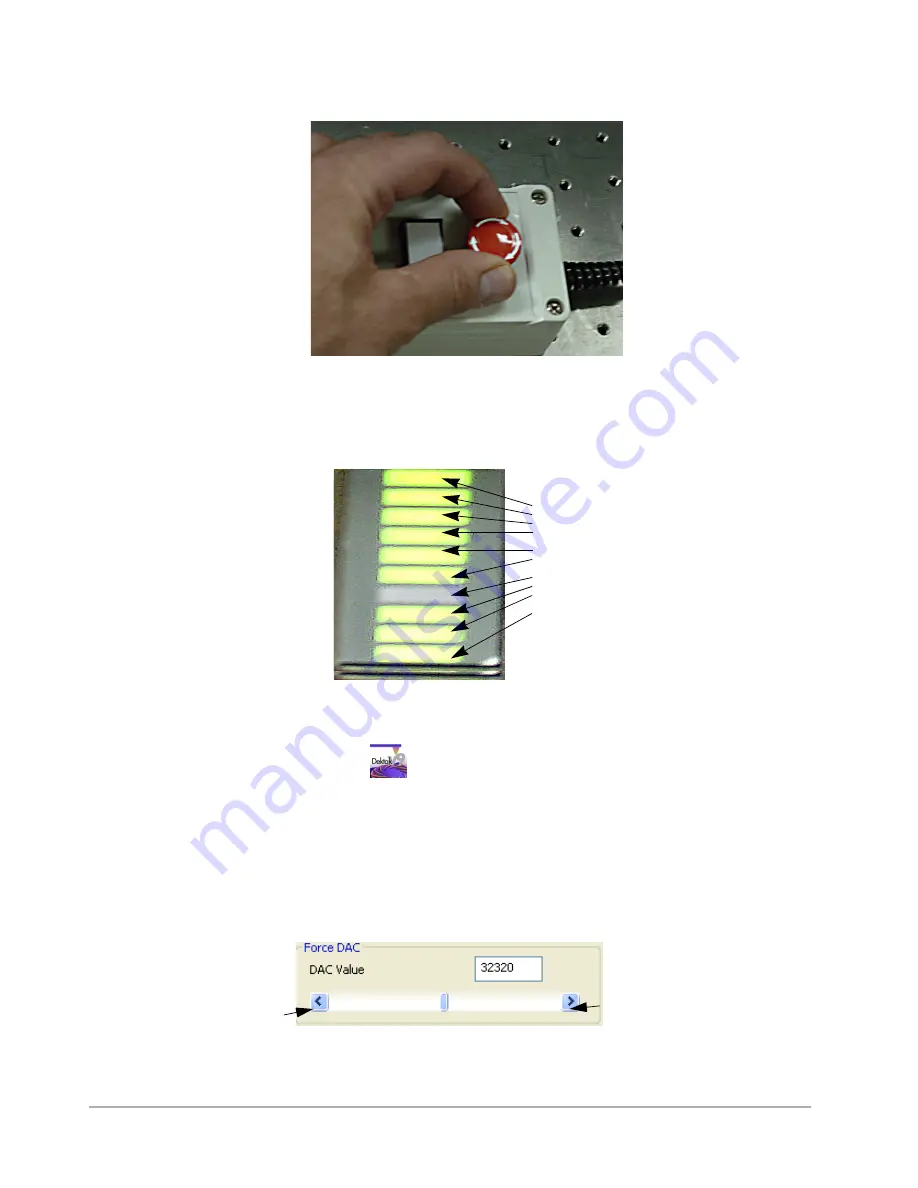
). Use the slider in the
Force DAC
section to increase the DAC Value to maximum. Observe
and verify the stylus swings to the down position. Use the slider to decrease the DAC Value to minimum.
Observe and verify that the stylus moves to the up position. Then click
Cancel
to close the dialog box.
Figure 2-31: Force DAC Section of the Force Calibration Dialog Box
+5 V (normally ON)
+/-12 V (normally ON)
+24 V (normally ON)
Scan Back Limit Switch (normally ON until tripped)
Scan Forward Limit Switch (normally ON until tripped)
Scan Home Switch
Galil Error (normally OFF)
(not used) (normally ON)
Z Down (Tower) Limit Switch (normally ON until tripped)
Z Up (Tower) Limit Switch (normally ON until tripped)
Position the slider at this end
to move the stylus up.
Position the slider at this
end to move the stylus
down.
Содержание Dektak 150
Страница 1: ......
Страница 2: ...P N 980 294 Standard P N 980 298 Cleanroom Revision A DEKTAK 150 SURFACE PROFILER USER S MANUAL ...
Страница 7: ......
Страница 17: ......
Страница 81: ......
Страница 105: ......
Страница 149: ......
Страница 191: ......
Страница 251: ......
Страница 257: ...A 6 Facilities Specifications Figure A 6 Dektak 150 without Enclosure Side View ...
Страница 258: ...Facilities Specifications A 7 Figure A 7 Dektak 150 Dimensions without Enclosure Top View ...
Страница 259: ...A 8 Facilities Specifications Figure A 8 Dektak 150 without Enclosure Center of Mass ...
Страница 273: ......
Страница 283: ......
Страница 320: ...3D Mapping Function E 37 Figure E 26 Database Options Button Figure E 27 Database Options Dialog Box ...
Страница 321: ......
Страница 331: ......
Страница 333: ......
Страница 336: ......
Страница 337: ......
Страница 349: ......


