VBox V@Home TV Gateway User Manual
6
. System Manage
0
.
32
6.2
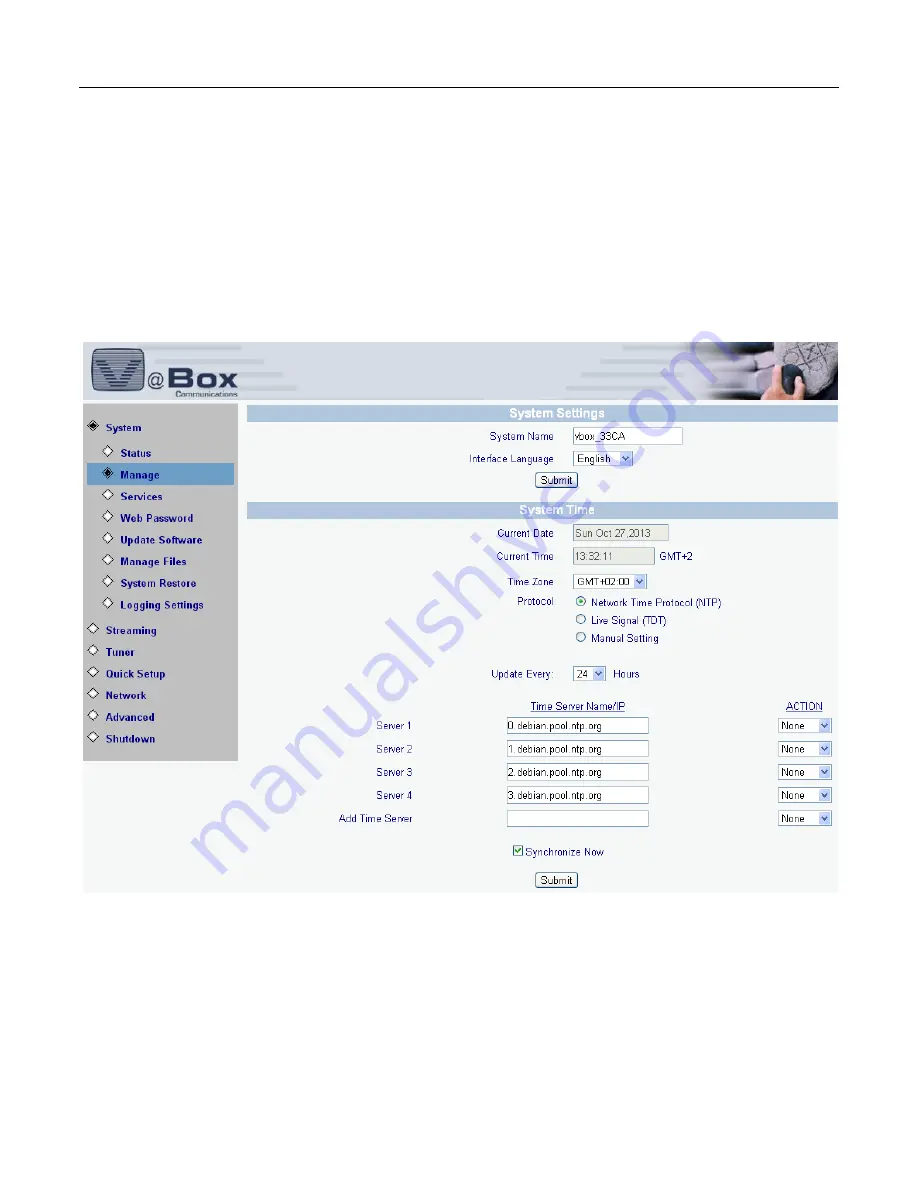
Manage System
Select System/Manage option. The following screen displays.
Figure 24 Manage
On this page you can see the name of your XTi-VBox TV Gatway device and select the language of this Web
interface. Under the System Time heading you can determine the device’s date and time settings.