background image

Содержание 956

Страница 1: ...buy your excess underutilized and idle equipment along with credit for buybacks and trade ins Custom engineering so your equipment works exactly as you specify Critical and expedited services Leasing Rentals Demos In stock Ready to ship TAR certified secure asset solutions Expert team I Trust guarantee I 100 satisfaction All trademarks brand names and brands appearing herein are the property of th...

Страница 2: ...ructions Manual No 6999 09 720 Revision c OCTOBER 1989 varian vacuum products division 956 PORTABLE TURBO LEAK DETECTOR i varian vacuum products divisionl121 hartwell avenuel1exingtonlmassachusens 02173 617 861 7200 505 872 0037 www idealvac com ...

Страница 3: ... ...

Страница 4: ...waii dial 408 496 2888 Order Entry National 1 800 8 VARIAN 1 800 882 7426 From Alaska and Hawaii dial 415 424 6910 Copyright C 1989 by Varian Associates Inc AU rights reserved including the right of reproduction in whole or in part In any fonn w hout pennission in wr ing from Varian Associates Lexington MA 02173 ...

Страница 5: ... 0 IJ ...

Страница 6: ...ives of Seller which are inconsistent or in conflict with the terms of this warranty shall not be binding upon Seller unless reduced to writing and approved by an officer of Seller Warranty Replacement and Adjustment All claims under warranty must be made promptly after occurrence of circumstances giving rise thereto and must be received within the applicable warranty period by Seller or its autho...

Страница 7: ... ...

Страница 8: ...t read and thoroughly understand operation maintenance manuals and any additional information provided by Varian Associates All warnings and cautions should be read carefully and strictly observed Consult local state and national agencies regarding specific requirements and regulations Address any safety operation and or maintenance questions to your nearest Varian office The fOllowing format is u...

Страница 9: ... ...

Страница 10: ...ngestion may produce serious side effects Prolonged or continued contact with the skin will result in absorption through the skin and moderate toxicity Always ensure that cleaning operations are carried out in large well ventilated rooms and wear eyeshields gloves and protective clothing WARNING Liquid nitrogen when used with the optional cold trap can cause severe frostbite or blindness if splash...

Страница 11: ... I ...

Страница 12: ...l cause damage Note During reassembly always use Loctite PST teflon impregnated pipe thread compound on pipe threads Note Where applicable inspect for any damage to retaining rings and O rings Remove them carefully with your fingers Do not use any metal tools for this task This prevents scratching of any sealing surfaces Note To clean O rings wipe them with a clean lint free cloth or paper If vacu...

Страница 13: ... ...

Страница 14: ...urbo Pump 2 8 2 4 4 Turbo V 80 Controller 2 9 2 5 Optional Equipment 2 1 3 2 5 1 Remote Controller Option 2 13 2 6 Electronics 2 13 2 6 1 Accessory Output Connectors 2 13 2 6 2 Connector Jll Serial Interface RS232C 2 17 2 6 3 RS232C Interface 2 18 2 6 4 ConnectorJ12 Remote Box 2 25 2 6 5 Connector J13 Option Control 2 26 2 6 6 Connector J14 Phone Jack 2 26 2 7 Front Panel Controls 2 27 2 8 Menu De...

Страница 15: ...5 2 3 Weekly 5 3 5 2 4 Semi Annually 5 4 5 3 Unscheduled Maintenance 5 8 5 3 1 Purging Gas Ballasting the Forepump or Rough Pump 5 9 5 3 2 System Thermocouple Gauge TC2 Cleaning Replacement 5 10 5 3 3 Test Port Thermocouple Gauge TC1 Cleaning Replacement 5 10 5 3 4 Ion Source Replacement 5 11 5 3 5 Disassembly Cleaning of the Spectrometer Tube 5 11 5 3 6 Cleaning the Spectrometer Tube 5 14 5 3 7 A...

Страница 16: ... 7 Ion gauge pressure wait 6 3 8 Ion gauge time out 6 3 9 Filament 1 burned out 6 3 1 0 Filament 2 burned out 6 3 11 Test port over pressure 6 3 12 Xfer pressure wait 6 3 13 Gain too high 6 3 14 Gain too small 6 3 15 No helium peak 6 3 16 Too many peaks 6 4 Detailed Troubleshooting 6 4 1 Leak Symptoms 6 4 2 Leak checking the Leak Detector small leaks 6 4 3 Leak checking the Leak Detector large lea...

Страница 17: ... 1 7 4 Part Number Column 7 1 7 5 Description Column 7 1 7 6 Abbreviations 7 1 7 7 Units Per Assembly Column 7 1 7 8 Illustrations 7 2 7 9 How To Use This Parts List 7 2 7 10 How To Order Parts 7 2 7 11 Factory Installed Options 7 2 SECTION V1I1 GLOSSARY OF TERMS 8 1 SECTION IX SCHEMATIC DIAGRAMS 9 1 iv 6999 09 720 ...

Страница 18: ...g basic module with 1 2 cfm fore 2 2 pump module and small cart 2 2 Varian 956 Leak Detector showing basic module 1 2 cfm fore pump 2 3 7 cfm roughing pump module and large cart 2 3 Varian 956 Leak Detector 2 4 2 4 Varian 956 Leak Detector Vacuum System 2 6 2 5 Cutaway view of 956 spectrometer Tube 2 7 2 6 Control Panel Turbo Pump Controller 2 10 2 7 Location of Turbo Pump Controller 2 10 2 8 Remo...

Страница 19: ...Screws for Vacuum System Exploded view of the main components of the vacuum system Calibrated Leak Exploded View Exploded view of vacuum manifold Exploded view of test port Turbo Pump Cleaning Procedure Turbo Pump Grease Ports Exploded view of isolation valve Ion source connector Voltages at preamplifier connector 5 4 5 7 5 13 5 18 5 19 5 20 5 22 5 23 5 27 5 29 5 30 6 12 6 12 6999 09 720 ...

Страница 20: ...2 2 Voltage information and reference levels 2 18 2 3 Command Mode codes 2 21 2 4 Commands versus keystrokes 2 22 2 5 Byte definitions 2 23 2 6 List of Menus 2 27 4 1 Valve Truth Table 4 8 4 2 List of Menus 4 22 5 1 Maintenance actions to perform 5 1 6 1 Troubleshooting symptoms 6 1 6999 09 720 vii ...

Страница 21: ...List ofTables viii This page intentionally left blank 6999 09 720 ...

Страница 22: ... DETECTOR TO SYSTEM ll COUPLING KIT I _ 956 BASIC UNIT 0991 K7954 301 FOREPUMP MODULE Figure I II Using the 956 to Test Vacuum Systems Figure 1 12 is a schematic representation of a typical intermediate vacuum system of which the 956 Leak Detector is a vital part 1 8 VACUUM INSULATING ANNULljS HELIUM SPRAY HELIUM SPRAY MECHANICA 0 VACUUM PUMP 956 BASIC UNIT OPTIONAL CONNECTION WITHOUT FOREPUMP MOD...

Страница 23: ... evacuated glass envelope is depicted in Figure 1 8 Figure 1 9 is a compressor from an automotive air conditioner being leak tested utilizing a Power Probe The part is pressurized with helium The Bomb Parts method of leak checking is demonstrated in Figure 1 10 a sealed Bourdon tube pressure gauge part under test Figure 1 9 Utilization ofa Power Probe 6999 09 720 Figure 1 10 A Bourdon gauge pre bo...

Страница 24: ...remaining long enough to be detected Tablesareavailablefrom Varian showing the relationshipbetween actual leakrates andindicated leak rates for various internal volumes and pressurizing times This method is commonly used to detect leaks in small electronic packages 1 7 APPLICATIONS The Varian 956 mass spectrometer leakdetectors have a variety of applications and detection para meters Typical uses ...

Страница 25: ...jet of helium to locate individual leaks or surrounded by helium hooded for an overall leak check I UM HIU SPII 110 AY II EST II IT 0 LEAl DIrICTOII Figure 1 2 Test piece evacuated tracergas sprayprobe used to locate leak 2 TEST PIECE PRESSURIZED FIGURE 1 4 A Varian power probe is connected to the leak detector Theobjecttobetestedisfilledwithhelium althedesiredtestpressureandtheprobe ismoved overi...

Страница 26: ...NS MORE OR LESS THAN 90 TO PREAMPLIFIE t I t HEAVIER IONS LIGHTER IONS Ir t J O HELIUM IONS PASS THROUGH SLIT AND ARE COLLECTED 4 FACTS ABOUT LEAK RATES Figure 1 1 Magnetic separation principle a Visualizing leaks in everyday terms 10 5 std cc sec approximately 1 std cc day 10 7 std cc sec approximately 3 std cc year b Audible or visual detection ofleaks bubbles rising in water 10 3 std cc sec or ...

Страница 27: ...e it is the lightest of the inert gases and as such readily penetrates small leaks In addition its minute presence in the atmosphere 5 PPM or 4 miliiTorr absolute ease in being detected by a Simple mass spectrometer has a mass of4 so that adjacent peaks of 3 and 6are easily separated bythis technique and relatively low cost make it particularly suited to this application 1 PRINCIPLES OF MASS SPECT...

Страница 28: ... for leaks in enclosures either systems or containers The more commonly used methods along with their ranges of accuracy are listed below 1 WATER IMMERSION AIR BUBBLE OBSERVATION This method is accurateto approximately 1O std cclsec andcan be more sensitive if internal pressure is increased or vacuum is created above water This method is limited because ofdifficulty in differ entiating between lea...

Страница 29: ...ksfrom 2 x 0 10 std cc sec to 0 std cc sec Typical user industries are Vacuum or pressure chamber manufacturers Beverage canning industry Hermetically sealed instrument manufacturers Research and development laboratories Refrigeration equipment manufacturers Health care industries such as cardiac pacemaker manufacturers and pharmaceuticals The list goes on and on as does the need for leak testing ...

Страница 30: ...to Calibration Gross Leak large rough pumps etc make this portable leakdetectoracompletely integrated pack age Foruniqueapplicationsandforthe expertuser critical system parametersareprogrammabieto make the 956 portable leak detector fit any leak detection application Figures2 1 and2 2 showthephysicaldimensionsofthe two modelsolthe leakdetector bothfrontand side views Figure 2 3 shows the cabinet e...

Страница 31: ..._ _ BASIC MODULE 2 62 66 5 17 62 447 5 27 00 685 8 FORE PUMP MODULE ROUGH PUMP MODULE II J 1111111 r rrlT 24 00 609 6 45 25 1149 4 I 45 75 1162 0 Figure 2 2 Varian 956 Leak Detector showing basic module 1 2 cfm fore pump 7 cfm roughing pump module and large carl o en CD 6 g g g ...

Страница 32: ... Figure 2 4 consists of a turbomolecular pump one or two mechanical pumps a spectrometer tube valves and interconnecting pipes The system servesthree functions it maintainsthe required vacuum in the spectrometertube itconnects the customers partor system to the spectrometertube and it removes helium after a test Additionally Contraflow TM an innovation of Varian is utilized 2 4 1 Mechanical Pumps ...

Страница 33: ...ocus with respect to the grounded exit slit When the filament is electrically heated electron emission with helpof the enhancement magnets di vides the electrons into the ion chamber Electrons colliding with molecules produce positive ions These ions areforced through the bonomofthe ion chamber the grounded potential exitslit andenter the analyzing magnetic field This magnetic field separates and ...

Страница 34: ...brake to speed up the high to low frequency change and an opto coupled Input Output for easy interfacing with a computer The controller is equipped with the following protective features a line fuse and a pump circuit fuse Input Output voltage A B Inputs thermal protection on the power transformer thermal protection on the power board heat sink thermal protection on the pump motor short circuit pr...

Страница 35: ...res otherwise itgoes off 5 A Brake circuitwhich when the frequency is required to decrease the BRAKEcircuit connects a load R56 R57 across the power board DC voltage to absorb the energy fed back to the controller from the pump The load is removed when the low frequency is reached 6 AStarting Timercircuitwhich when the controller is started applies its output frequency at its maximum value Immedia...

Страница 36: ...r denoting quantitatively the presence of helium in the spectrometer tube and controls all valve sequencing Thenewandautomaticfeaturesofthe9561eakdetectorareaccomplishedbythemicroprocessor This automatic distribution of internal signals not only enhances the leak detector s wide range of testing parameters but gives greater flexibility and reliability to the user The microprocessor also stores key...

Страница 37: ... 28 27 29 30 29 31 32 31 Connector J10 contains several optically isolated channels for inputs and outputs J1 0 also contains an analog recorder output 0 to 10v not optically isolated Power to drive the optical isolation must be supplied by the customer if ground isolation is required If ground isolation is not required then connector J10 has 5 volts at 100 milliamperes available to supply power t...

Страница 38: ...o LOW when the leak detector is in the Test mode and either ion gauge or extended rough cycle is activated It will remain HI in all other modes SPARE 1 Wake Up output will go LOWwhen the system is started by using the automatic power up wake up feature described in Menu 16 System Wake Up The outputwill go HI only ifthe SCRAM key is used to powerdown otherwise it remains LOW This outputcan be used ...

Страница 39: ...spects of Encryption In natural language wordsare theprimitive building blocks and sentences are thebasicstructuresthat convey commands express ideas and generate questions Dialog is best interpreted in terms of sentences not words such sentences or messages are the basic structures that convey instruc tions or information in the RS232 communications link A message is defined as a sequence ofbytes...

Страница 40: ...requests that leak rate information be sent back 1 3h IOOh I3dh I EOT one by1e signifying the end of the message being transmitted EOT 3dh The EOT byte must be received on or before the 16th by1e to avoid a message length error Table 2 3 Command Mode Codes COMMAND BODY HEX ASCII START 65 41 A VENT 66 42 B HOLD 67 43 C SCRAM 68 44 0 ZERO 69 45 E STD LEAK 70 46 F CALIBRATE 71 47 G 6999 09 720 2 21 ...

Страница 41: ...formation and Reject and Error Status Leak Rate byte 0 byte 1 byte 2 byte 3 Status 1 byte 4 most significant by1e of mantissa in ASCII second most significant by1e of mantissa in ASCII least significant byte of mantissa in ASCII exponent in ASCII 7 6 5 4 3 2 1 0 Lb ent 1 hold 1 roughing 1 Section II Description extended roughing 1 Status 2 byte 5 7 6 6999 09 720 L _ _ _ _ _ _ _ _ test 1 L _ _ _ _ ...

Страница 42: ...gnificant byte of number in ASCII 43 3 Floating Point Format byte 0 most significant byte in ASCII byte 1 second most significant byte in ASCII byte 2 least significant byte inASCl1 byte 3 absolute value of exponent in ASCII 2 6 4 Connector J 12 Remote Box Section II Description The Remote Box connector is a four pin modularconnector which uses straight through pin to pin wired cable The cable can...

Страница 43: ...peration LIN Linear Display LOG Display VOLUME INCREASE Key Range Display VOLUME DECREASE Key Ranging Key NEXT Key Key 48 Character Message SMALLER LEAK Display two rows Key Key Figure 2 9 Front Panel Controls 956 Leak Detector 2 8 MENU DESCRIPTIONS Table 2 6 lists all of the menus used in the microprocessorforthe 956 Leak Detector Each menu with its options and SUb options is described in detail ...

Страница 44: ...lay 3 2 UNPACKING INSTRUCTIONS To unpack the leakdetectorand remove itfrom the skid proceed as follows 1 2 3 Carefully remove the outer shipping con tainer SAVE IT AS EVIDENCE IF DAM AGED Carefullycutthe strapping holding the leak detector on the skid Remove any loose boxes or packages and put them aside DO NOT MISPLACE THEM 4 Carefully remove the front 1 1 2 x 2 1 2 inch brace by removing thetwo ...

Страница 45: ...e proper initial charge of oil However the oil level should be checked afterthe leakdetector is started and the pump s have been running for at leastten minutes On the frontofeach ofthe roughing and fore pumps is anoil level sightglass The oil level should be in the middle of the glass when the pump is not running 2 OPERATION The leak detector is now ready for operation Referto Section IVof this m...

Страница 46: ...relays TO Rough Pump L o o To Rough Pump Valve I V11 0 Q 0 View from inside of cart power enclosure Circuit Breaker for Rough Pump Valve V11 To Leak Detecto Power Cord 0 e 1 1 CIt Q 0 8 Y II I Jl 0 T e _01 1 _1 1 AII OITICTOJl e 0 e 0 Q 0 r I Rough Pump Circuit Breaker Main Power Circuit Breaker View from rear of leak detector Figure 3 2 Leak Detector Installation Connections 6999 09 720 3 3 ...

Страница 47: ... ment ALWAYS raise the jam nut up against the bottom of the cart frame to lock the leveling adjustment 3 7 STORAGE If the leak detector will not be used immediately it can be stored as received without special precau tions Adry relatively dust free area is preferred The required environmental conditions for storage are 3 4 0 to 95 relative humidity non condensing 3Qoto 15 rF ambient temperature 69...

Страница 48: ... 3 operation is described in para 4 3 3 All levels of operation have access to operating control keys Only the highersecurity levels allow a greater degree of programmability 4 2 STARTUP AND SHUTDOWN PROCEDURES 4 2 1 Startup After unpacking the leakdetector it is good practice to lelthe instrument remain at room temperature overnight especially if it has been stored below 40 F 4 4 C for an extende...

Страница 49: ...M SHUT DOWN PUSH SCRAM TO RESTART 2 To shut the unit down from any menu or option proceed as follows 3 Press the OPTION key to get out of the Menu mode Press and hold the SCRAM key as described in a previous paragraph 4 Do not shut off the MAIN POWER switch until SYSTEM SHUT DOWN is displayed 4 2 3 Moving the Leak Detector Varian recommends pressing and holding the SCRAM key for more than 1 2 seco...

Страница 50: ... in a later paragraph AUDIO Pressing the AUDIO key will turn on or off the audible tone Audio ON is indicated by a steadily lit red indicator next to the AUDIO key Volume Up volume Down These two triangularkeys to the left of the AUDIO key increase or decrease the volume level of the audible tone The upper triangular key increases the volume the lower key decreases the volume AUTO MAN Pressing the...

Страница 51: ...o light indications are described in Menu 5 GROSS LEAK Message displayed Gross leak only If the gross leak option is installed pressing this key once will prevent the 956 leak detector from enteringthe FINETESTmodethusenablingtesting inthe GROSS LEAKmodeonly Pressingthis key asecond time will allowthe 956 toproceed into the FINE TEST mode This keyis notoperational ifthe Gross Leak option is not in...

Страница 52: ...Exponent value Accepts the value Exits the Program mode If there are other changes then there is no need to exit the program mode for each change 2 To disable the CALkey so thatcalibration is notperformed althe wrong time due to an acciden tal key press proceed as follows Key Press OPTION 2 ENTER ENTER ENTER OPTION Explanation To enter the Program mode Menu number for the calibration option Select...

Страница 53: ... To exit Program mode 4 3 3 Operation Using Leyel3 Keys Level 3 is intended for the service technician who requires manual control of various valves pumps andvoltagestoisolateandcorrectproblems Asinallcontrolequipment manualoverrideis necessary to isolate problem areas Therefore care should be taken when under manual controls To enter Level 3 security the password must be entered into Menu 20 Opti...

Страница 54: ...sthatvalve states or individual valvecontrols be manipulatedfrom the shut down state using the SCRAM key All menu items that can be controlled under level 3 are listed under Security Control descriptions Calibration procedures for the 956 are described in Section V paragraph 5 4 4 4 SYSTEM VALVE OPERATION See Figure 4 1 and Table 4 1 4 4 1 Valve Designations and Functions V1 V2 V3 V4 V5 V6 V7 Roug...

Страница 55: ...56 Vacuum System Table 4 1 Valve Truth Table VALVE MODE Hold Rou h down Gross Leak mall ulr4l Large Pump VI Roughing C 0 C C V2 Test 0 C 0 0 V3 Vent C C C C V4 Turbo VENT C C C C VS Standard Leak C C C C V6 Isolation 0 0 0 0 V7 Gross Leak C NA C 0 VII Rough PuIr4l C NA 0 0 C Closed E Either Open or Closed O apen 4 8 Fine Leak Vent 0 C 0 0 C 0 C C C C 0 0 C C C C 6999 09 720 ...

Страница 56: ... V11 Rough Pump V3 Vent 6999 09 720 V6 Isolation V5 Calibrated Leak Wim Rough vacuum Atmosphere High vacuum Figure 4 2 Vacuum system in the system Ready Vent mode Section IV Operation V4 Turbo Vent 4 9 ...

Страница 57: ...IV Operation 4 10 V3 Vern I 1 1 V6 Isolation V5 Calibrated Leak kg l Rough vacuum Atmosphere o Unknown vacuum High vacuum V4 Turbo Vern Figure 4 3 Roughing the testport using the internal pump only 6999 09 720 ...

Страница 58: ...Vent 4 V11 Rough Pump 1 Gross Metering manual i 1 Section IV Operation V4 Turbo z Vent V5 Calibrated Leak NfMRough vacuum Atmosphere Unknown vacuum High vacuum Figure 4 4 Roughing the testport with the externalpump 6999 09 720 4 11 ...

Страница 59: ... Operation 4 12 V3 Vent V6 Isolation V5 Calibrated Leak 8lFJ n o f J V4 TUrbo Vent Rough vacuum Atmosphere Unknown vacuum High vacuum Figure 4 5 Roughing the Calibrated Leak with internal leak option 6999 09 720 ...

Страница 60: ...ump 6999 09 720 V12 Gross Leak Metering manual V6 Isolation V5 Calibrated Leak Inm Rough vacuum Atmosphere High vacuum Figure 4 6 Calibrated leak open vacuum system in the Test mode Section IV Operation V4 Turbo Vent 4 13 ...

Страница 61: ... Vent V11 Rough Pump V12 Gross Leak Metering manual V6 Isolation V5 Calibrated Leak HiM Rough vacuum Atmosphere D Unknown vacuum High vacuum Figure 4 7 Vacuum system in the Gross Leak Test mode 4 14 6999 09 720 V4 Turbo Vent ...

Страница 62: ...Rough Pump 6999 09 720 r r I I 1 I 1 1 V12 Gross Leak Metering manual V6 Isolation V5 Calibrated Leak Section IV Operation li l Rough vacuum Atmosphere High vacuum Figure 4 8 Vacuum system in the Fine Test mode 4 15 ...

Страница 63: ...p c I i 1 I 1 V6 Isolation V1 Roughing V2 V12 Gross Leak Metering manual Test V5 Calibrated Leak I n H Rough vacuum Atmosphere D Unknown vacuum High vacuum V4 Turbo Vent Figure 4 9 Vacuum system in the System Ready or Hold mode 4 16 6999 09 720 ...

Страница 64: ...on the range of the leak detector Valve V11 remains open orcloseddepending on the menu selection forflow split V11 opensforflow split and remains closed if flow split is not selected 5 The FINE LEAK TEST mode can be entered only from the ROUGH OUTTEST PORT mode ifthe grossleakoption is notinstalled the FINE LEAKmodecanbeenteredfrom thegross leak mode only ifthe grossleakispresent In this mode allv...

Страница 65: ...e pressure in the GROSS LEAK mode c Anyfailure occurswith the ion source turbo pump ormechanical pumpwhich will send the system into the HOLD mode d The AUTO SEQUENCER cycle is terminated in which case the system goes into the HOLD mode if the test sample failS and to the VENT mode if the test sample passes 2 The VENT key vents the test port terminating the cycle from any vacuum state 3 The AUDIO ...

Страница 66: ... the menu setup will zero the background or return it to the previous value when the key is pressed again The CAL key if enabled through menu selection will automatically calibrate the system The leakdetectormustbein theTESTmode orthe commandwill beignored The calibrate function first autozeroes the vacuum system turns on the standard leak scans the spectrometer tube voltages to find the helium pe...

Страница 67: ...or choices backward or forward 4 The SCRAM key is usedto backup one level ofthe menus Forexample ifpressed atthe sub menu level 2 the display will then show the level 1menu title 5 PressingtheOPTION keycausesthe9561eakdetectortoenterthe PROGRAMMABLE mode Pressing it again causes the leakdetectorto terminate the mode and retum to operating the unit 6 Digits 1through 9 When the OPTION keyisfirst pre...

Страница 68: ...es such as names job number fields etc This is accomplished bypressing the NEXTand PREVIOUS keys to scroll through the set of available characters When the proper character is displayed press ENTER Entryofup to 22 characters ispossible for names The lastentry should be period or decimal point to indicate the end of the message field All menutitlesareidentifiedbynumberswhichcorrespondto availablefu...

Страница 69: ...Zeroing Calibration StandardLeak Log Linear Select Audio Controls Xfer to Fine Test Reject Setpt Controls Keyboard Controls Display Controls Display Units Sequencer Menu 1 Zeroing Meny No 12 13 14 15 16 17 18 19 20 21 22 23 Option 1 Auto Zero Leak Rate 0 1 Disable 2 EnableD Option 2 Last Zero Background 1 Disable D 2 Enable Options Control Recorder Output Control Serial Port Control Date and Time ...

Страница 70: ...e Calib Key D 2 Enable for Int Leak 3 Enable for Ext Leak 4 Full Auto Tune Password not presently available Option 2 Manual Calibrate 1 Ion Voltage 2 Emission Current 3 Calibration Gain 4 Response Time Option 1 Auto Calibrate 210Vt0320V 0 2 mA to 2 mAl 0 8 to 7 0 05 sec to 10 sec This menu definescalibration techniques available to the operator IfOption 1 1 is selected pressing the CAL key will pr...

Страница 71: ... Option 2 2 controls the ion source emission current Using the NEXT and PREVIOUS keys the emission current can be increased ordecreasedfrom approximatelyO 2 mAto 2 mAo This adjustment is also a peaking function of the helium signal This current should be kept as low as possible so that the life ofthe ion source filament can begreatly increased Typical emission currents are between 0 2 mA to 1 mA t...

Страница 72: ...udioison enabledbytheAUD10key the setpointcannotbearmedbypressing the AUDIO SET PTS key Ifarmed and the leak rate is greaterthan the setpoint the AUDIO on lightwill goe from the flashing state to the solidly lit state Turning off the audio does not disarm the set point itturns off the AUDIO ON and the sound only Option 2 allows the operator to adjust the volume level that can be applied when the l...

Страница 73: ...scale for a decreasing signal Menu 8 Keyboard Controls Option 1 Option 2 Active Keys Control 1 Front Panel 1 Disable 2 EnableD 2 Parallel Port 1 Disable 2 Enable Key Press Beep 1 Disable 2 Enable D D Options 1 1 and 1 2 select the location s of the source of the input commands Option 1 1 1 disables the START VENT AUTO MAN AUDIO ON OFF ZERO CAL LEAK SCALE AUDIO SET PT keys and the GROSS LEAK Gross ...

Страница 74: ...d 3 Options 1 1 through 1 4applytothe information thatcan be displayed on the second line ofthe alpha numeric display Option 1 1 allows the operator to keep the second line blank when the leak detector is in the TEST mode except for the leak rate units so that the display does not distract the operator with too much information Option 1 2 allows the operator to display the leak rate value to two d...

Страница 75: ...e appropriate units for the leak rate output Option 1 6 allows the operator to enter a constant multiplier for units not commonly used When this option is selected the words other units will appear on the second line olthe alpha numeric display Options 2 1 through 2 3 allow the operator to display the pressure in the units selected Options 3 1 through 3 3 allow the operator to select the pumping s...

Страница 76: ...ENT key is pressed Option 2 allows the operator to set the maximum rough out time If the rough out time expires the system reverts to the HOLD mode and rejects the sample Pressing the VENT key terminates the cycle Option 3allows the operatorto setthe maximum time in testbefore making the set pointcomparison This is to allow the signal to settle down Menu 12 Options Control Option 1 Gross Leak 1 No...

Страница 77: ...ded Option 2 1 allows the operator to output the leak rate signal to the recorder output Option 2 2 allows the operator to output the last reported ion gauge pressure measurement to the recorder output This allows the operatorto monitorlong term system pressure performance Pressure range is from 760 Torr to 1 x 10 Torr If the filament is off then the pressure is measured from the system thermocoup...

Страница 78: ...atortoviewandsetthecurrenttlmeInhours minutes andseconds Twodigits each forhours minutes andsecondsmustbecompletelyenteredtobeacceptedbytheleakdetector This allows the software to tum on the instrument at the required time etc Option 3 allows the operator to selectAM or PM If a 12 hourformatis selected Option 4 allows the operatorto select the 12 hour or the 24 hourtimekeeping format Menu 16 Syste...

Страница 79: ...n In Menu 2 Option 2 4 Once thevalue appears on the display ItIsreduced to 0atthe rate chosen In this menu Ifthe leakdetectorIs In the MANUALmode the zero will be adjusted tothe decade selected If the leak detectorIs In the AUTO mode the zero will be In the most sensitive range possible Option 1 enables or disables the sniffer zero control Option 2 allows the rate at which the display Is zeroed In...

Страница 80: ...uch that the valve can be controlled by a logic signal available atpins 11 and 12 01connector J13 Option 3 1 applies aloglcOslgnal atplns 11 and 12 ofconnectorJ13 such that the valve can remain open in the Fine Test ranges This is an open collector output capable 01 sinking 5 mAthrough 4 7K see schematics When ENABLE is selected the software gain is automatically applied to compen sate lor the dec...

Страница 81: ...smenu isdividedinto sixlevelsofsecurity levels 1 2 and3 are intendedforcustomeruse while levels 4 5 and 6are considered for Varian use only LevelS security is for factory setup while level 4 Is for the Varian salesperson to enter service information Into Menu 19 Levels 4 5 and 6will not be described any further J When theleakdetectorisShipped thepasswordforLevels1 2 and3aresetto1000 Afterverificat...

Страница 82: ...Option 1 1 Ion Voltage Menu 22 Option 1 2 Repeller Voltage Menu 22 Option 1 3 Variable Focus Menu 22 Option 1 4 Emission Current Menu 22 Option 1 5 Calibration Gain Menu 22 Option 1 6 System TC Gain Menu 22 Option 1 7 Test Port TC Gain Menu 22 Option 1 8 Ion Gauge Gain Menu 22 Option 1 9 Temperature Sensor Gain Menu 22 Option 1 11 Gross LeakTransfer Set Point Menu 22 Option 1 12 Fine LeakTransfer ...

Страница 83: ...e set of system parameters Initially the password forthis level is 1000 but should be changed to adifferent unique four digit number such as the last four digits ofthesupervisor s Social Security number for example Menu 20 Option 4 sets the leakdetectorto Level3 security This level is intended for in house service personnel The system parameterslisted in the previous table can be changed under Lev...

Страница 84: ...rent 0 2 mA to 2 mAl 5 Calibration Gain 0 8 to 7 6 System TC Gain 1 00 to 2 00 7 Test Port TC Gain 1 00 to 2 00 8 Ion Gauge Gain 0 80 to 2 00 9 Temp Sensor Gain 0 80 to 2 00 10 Ejector Stage Gain 0 80 to 2 00 11 Gross Leak Transfer Set POint O l Torr to 500 Torr 12 Fine Leak Transfer Set POint 20 mTorr to 200 mTorr 13 Diff Pump Voltage 40 00 V to 68 00 V 14 Zero Offset 0 mV to 255 mV Option 2 Pump...

Страница 85: ...Valve 2 Open Valve 6 Isolation Valve V6 1 Close Valve 2 Open Valve 7 Gross Lk Valve V7 1 Close Valve 2 Open Valve 8 Ext Rough Valve V11 1 Close Valve 2 Open Valve Other Controls 1 Filament Select 1 Filament 1 2 Filament 2 2 Emission Level 1 Off 2 Low 3 High 3 Ion Gauge 1 Disable 2 Enable 4 D P High Power 1 Disable 2 Enable Menu 23 Service Initialization Option 1 System Initialization 1 Reset Optio...

Страница 86: ... Not Initialize 2 Initialize 3 Turbo Maintenance 1 Do Not Initialize 2 Initialize 2 Total Run Times 1 System Power 1 Do Not Initialize 2 Initialize 2 Fore pump 1 Do Not Initialize 2 Initialize 3 Diff Turbo Pump 1 Do Not Initialize 2 Initialize 4 Rough Pump 1 Do Not Initialize 2 Initialize 3 On Off Cycles 1 System Power 1 Do Not Initialize 2 Initialize 2 Fore Pump 1 Do Not Initialize 2 Initialize 3...

Страница 87: ... Initialize 6 RoughNent Valve 1 Do Not Initialize 2 Initialize 7 Ion Sources Used 1 Do Not Initialize 2 Initialize 4 Temperature Cycles 1 Diff fTurbo Overht Cnt 1 Do Not Initialize 2 Initialize 2 Maximum Temp Reached 1 Do Not Initialize 2 Initialize 6999 09 720 ...

Страница 88: ...in9 out pte TLIf e lor 15 SfC b PAI sure Of 15 nconds Ire up 1 15 U1l1 No 1 No DiSPlay Spec n oe pr SlUf too hIQI I System shut NO prI lUfI 01 o Ion oaUO pr uure III aroc allow 30 monutft max 101 preuur 10 01 09 I 30 rninut DiSPlay Spec lUbe pressure nol 0JICIin0 S 1tem shu OCJMI No 5 minules u Yft Yft NO pressure 2 10 Meuurt pr url In IOn Gauge ModI lot 10 seconds No ...

Страница 89: ... Display Roughing out test port and test port pressure if the menu is set to display pressure no emit a _ 1 double beep and Ignore command Go to AA Go to r __________ CC Stay in Rough Down mode no yes Enable leak rate display Display Test Go to SS no yes Go to DO yes no no Go to FF ...

Страница 90: ...tay in Rough Down FF mode I Dlspay Extended Rough and set valves for extended rough and back up DP for 10 sec Seek the most sensitive _ nge in Fine Leak using mantissa value no Stay In the range selected Wait for next command or event 8 C mantissa C O 8 ...

Страница 91: ...cted Gross Leak range Show Leak Rate Wait for next command or event no 88 Auto Mode Stay in Gross Leak yes no no Seek the most sensitive range in Gross Leak using mantissa value 9 8 mantissa 8 yes Proceed to Fine Leak Go to DO ...

Страница 92: ... 1 I J I j I I I II 1 h j I HI 1 11 r L 1 I ...

Страница 93: ...tages filament etc Puts system in HOLD mode closes isolation valve Displays Cooling down DPlTurOo yes Back up one more level no ignore key press n_o_ Wait for next command or event yes Close ail valves Display System shut down Go into Sleep mode Wait for next command or event ...

Страница 94: ...hen the V ENT key is pressed the leak detector will yes Ignore key press n_o_ Go to VENT mode Display System Vented yes Go to HOLD mode display System Hold Set display andVO Walt fOl next command or event ...

Страница 95: ... ...

Страница 96: ... Table 5 1 Maintenance actions to perform AREA OF ACTION FREQUENCY PARA MAINTENANCE TO PERFORM OF ACTION REF PAGE Calibration Sensitivity check Daily 5 2 1 5 2 Forepump and Check for proper Weekly 5 2 3 5 3 roughpump oil level level and condition Forepump Flush and oil change Semi Annually 5 2 4 a 5 4 Roughpump Flush and oil change Semi Annually 5 2 4 b 5 6 Turbo pump Cleaning Annually 5 3 16 5 27...

Страница 97: ...ector 2 With the test port plugged press the START button and allow the leak detector to reach the TEST mode 3 Turn on the calibrated leak by pressing the LEAK button Check that the leak detector is sensitive to helium if not refer to Troubleshooting Not Sensitive to Helium 4 Press the CAL button if the calibration gain Menu 22 Option 1 5 is greaterthan 3 aftercali bration sensitivity may be impro...

Страница 98: ...e oil An oil change is therefore in order proceed as discussed in the following paragraphs c Eorepump Oil Change Varian recommends thattheforepumpflush and oil change be performed semi annually orwhenever the vacuum system mustbe cleaned and accessibility to the Forepump is easiest The following steps describe the proper method of changing the oil in the Forepump Tools and supplies required Standa...

Страница 99: ... Add fresh oil through the fill port Check that the oil level is in the center of the sight glass 7 Replace the fill plug and turn on the leak detector 8 Checkthe oil level in the forepump sight glass the oil must be visible in the middle of the glass when the pump is running 5 2 4 Semi annually a Fore pump flush and oil change See Figure 5 1 Perform the fore pump flush and oil change in accordanc...

Страница 100: ... Remove the flexible metal hose from the fore pump by removing the K F clamp WARNING Hotoil will burn the skin Service in this areamustbe performed by authorized person nelonly Stand back from fore pump before starting it CAUTION Do not leave the fore pump on after the oil has stopped flowing Damage to the fore pump can occur if it is allowed to operate with no oil 9 Place a suitable drain pan und...

Страница 101: ...e obtained Flushing of the rough pump should precede adding newoil When the weekly oil levelcheck isperformed lookfora milkycolorintheoil Thisisan indication ofdirtyoil and thatitshould be changed With the tools and supplies listed below perform the rough pump flush and oil change in accordance with the steps indicated in para 5 2 Tools and supplies required Slotted screwdriver 4 to 6 Nut driver S...

Страница 102: ... 6999 09 720 Section V Maintenance Repair and Calibration v Figure 5 2 Rough Pump Flush and Oil Change GAS BALLAST V ALVE SIGHT GLASS 3 5 7 ...

Страница 103: ...ump 8 Replace the drain plug 3 then fill the pump through the fill hole on top of the pump 9 Install and tighten the valve to the pump inlet Use a 6 mm Allen wrench to tighten the screw thus providing a vacuum tight seal 10 Check for Proper level of oil in sight glass window filled half way Proper color of oil Clean oil is light amber in color Leaks at drain plug or anywhere on or about the rough ...

Страница 104: ...f the valves on the each pump 3 Run the leakdetectorfor30minutes then close thegas ballastvalve 1 Thisprocedure should evaporate mostof the moisture which is mixed with the oil This may produce undesirable oil vapors in a closed room exhaust these vapors outdoors if possible If it does not evaporate the moisture change the oil 4 Check for the presence of froth or foam on top of the pump oil as vie...

Страница 105: ... detector and turn it on Wait ten minutes for it to warm up CLEANING REPLACEMENT OF THE SYSTEM THERMOCOUPLE GAUGE IS COMPLETE 5 3 3 Test Port Thermocoyple Gayge lTC1 Cleaning Replacement Tools and supplies required Freon TF Methanol O ring Parker part no 2 110 Put the leak detector in the VENT mode 2 Remove the top cover and side panels olthe leakdetectorto gain access to the bottom of the test po...

Страница 106: ...mmends that the spectrometer tube also be disassembled and cleaned 3 Place the locating pin of the new ion source approximately in the center of the guide hole as shown in Figure 5 3 4 Ensure that pins 1 and 8 are parallel to the sidewall of the spectrometer tube 5 Secure the flange cap evenly and firmly by tightening the four Phillips head screws 6 Re attach the spectrometer tube 7 Turn on the le...

Страница 107: ...elative position 10 Carefully remove the ground slitplate 7 from the ion source cavity with a long screw holding screwdriver Varian recommends installing anewground slitplate seepara 5 3 6forcleaning instructions if a new plate is not available 11 Remove the four Phillipshead screws 8 thatholdtheflangecap 9 ontothepreamplifier 1 0 12 Firmly but gently separate the flange cap 9 from the preamplifie...

Страница 108: ...6999 09 720 3 4 5 I I Locating Pin I 6 I Guide Hole l 7 16 Hidden 2 c 15 13 Section V Maintenance Repair and Calibration 8 9 10 11 0 16 17 o 0 17 DETAIL A Figure 5 3 Spectrometer Tube Exploded View 5 13 ...

Страница 109: ... new ground slitplate however for maximum reliability in the opera tion of the leak detector 2 Wipe the internalsurfaces ofthe spectrometertube bodywithaclothdampenedwith Freon TF Repeat with methanol 3 Inspectthe preamplifier Wipe oily surfaces with aclean lint free cloth dampened with Freon TF Repeat with methanol 4 Carefully clean the analyzing magnet assembly Use a small stiff bristled brush t...

Страница 110: ...atthe arrow Is In thesame direction as the arrows on the spectrometertube body and enhancement magnets seeFigureS 3 Again wipe the a ring and mating surfaceswith aclean lint freecloth and tighten the flangecap 5 evenly and firmly 5 Wipe a new mounting a ring 2 and mating surfaces with a clean lint free cloth Hold the spectrometer tube with one hand and install four Allen screws 1 Tighten the screw...

Страница 111: ... carefully with a 91 64 inch Allen wrench without moving the magnet 8 Record the filament bias Ion Voltage Menu 22 Option 1 1 the repeller voltage Menu 22 Option 1 2 and the focus Menu22 Option 1 3 With the calibrated leakon watch the leak rate meter and maximize the signal by adjusting these parameters This step may be unnec essary ifthe magnetwas replaced without removing the spectrometertube or...

Страница 112: ... from main unit Place on clean workbench for further disassembly 18 Use atleastone C clamp to secure the vacuum system framevertically to the end ofthe bench for easy maintenance and disassembly 19 Varian recommends thatthe fore pump be flushed and charged with new oil atthis time due to its easy access See para 5 2 20 An exploded view of the main components of the vacuum system the turbo pump the...

Страница 113: ...Section V Maintenance Repair and Calibration I I I I i i I Figure 5 4 Mounting Screws for Vacuum System 5 18 6999 09 720 ...

Страница 114: ... 6999 09 720 Section V Maintenance Repair and Calibration I I 1 Figure 5 5 Exploded view ofthe main components of the vacuum system 5 19 ...

Страница 115: ... small O ring 5 5 Uft out the coil 6 6 Unscrew the valve actuator 7 using a screwdriver 7 Remove the valve plunger and spring 8 8 Uft out anddiscardthe valve bodyO ring 9 DO NOTSCRATCHTHESEALING SURFACE To clean the calibrated leak refer to CLEANING THE VACUUM MANIFOLD DISASSEMBLY OF THE CALIBRATED LEAK IS COMPLETE 5 20 6999 09 720 ...

Страница 116: ...parate the valve spring 6 and valve seat 7 6 Remove valve body O ring 8 DO NOT USE A SHARP METAL TOOL it may damage the sealing surface 7 Place all valve parts on individual clean lint free cloths Make sure that valve parts are not interchanged even though some parts are similar 8 Repeat steps2 through 8 for all four valves rough test vent gross leak iffitted and the vent valve on the turbo pump 9...

Страница 117: ...Section V Maintenance Repair and Calibration __ 5 1 6 y 7 1 1 1 8 13 Figure 5 7 Exploded View of Vacuum Manifold 5 22 6999 09 720 ...

Страница 118: ...flange DISASSEMBLY OF THE VACUUM MANIFOLD IS COMPLETE 5 3 12 Cleaning the Vacyum Manifold Tools and supplies required FreonTF Methanol Clean lint free cloths or Kimwipes Heatgun Varian recommends thatwhen the turbo pump becomes slightly contaminated and takes too long to pump down to the required vacuum it should be cleaned para 5 3 16 to remove contaminantsfrom its internal surfaces and re Iubric...

Страница 119: ...o both the roughing pump optional and the foreline pump should be cleaned by rinsing either Freon or methanol inside the tube and then thorougly air dried with aheatgun CLEANING OF VACUUM MANIFOLD IS COMPLETE 5 3 13 Assembly of Vacuum Manifold Tools and supplies required Screwdriver Spanner Commercial Spare parts kit 956 9901 CAUTION Do not use Freon TF or other solvents on O rings To do so causes...

Страница 120: ...uum manifold 1 with the valve spring 6 and valve seat 7 in place as shown in Figure 5 6 Tighten the valve bodywith the spanner or with a screwdriver for the smaller valves d Place the coil 4 on the valve actuator 5 add the washer 3 then tighten the coil holding nut 2 snugly on the top of the valve ASSEMBLY OF THE VACUUM MANIFOLD IS COMPLETE 5 3 14 Assembly of Calibrated Leak Figure 5 6 Tools and s...

Страница 121: ...in connector at the turbo pump 7 Replace the fan assemblyandthe shroudasan assemblyand secure itwith three no 6 32 nuts on the inside of the frame 8 Plug in the fan connector 9 Plug in the power supply to its appropriate socket near the front of the leak detector 10 Attach the flexible metal hoses withtheirKFclamps O ringsand retainers from theforepump and rough pump to the vacuum manifold 11 Re i...

Страница 122: ...pplies required Allen wrench 5 32 inch Large clean container Approved hazardous waste container FreonTF Clean lint free cloths 1 Preparealarge verycleancontainer large enough toputtheturbopumpinasshown in Figure 5 9 and fill it with CLEAN Freon TF CAUTION In the following steps use only Freon TF any other solvent could damage the pump ce i l Figure 5 9 Turbo Pump Cleaning Procedure 6999 09 720 15 ...

Страница 123: ... pump from the Freon and place itupsidedown ona clean surface to drain anddry 7 After it is dry re install the pump on the vacuum system 8 To disassemblethe top cover 1 Figure5 5 neartheisolationvalve withoutdisassemblingthe entire valve a Remove cover 1 by removing four screws 2 with a 5 32 inch Allen wrench Be careful not to drop or lose the valve core 4 or the valve core spring 3 b Remove the v...

Страница 124: ...ten the top grease port 5 Repeat steps 3 and 4 in the bottom grease port 6 Reset the turbo timer to 1500 hours referto description of Menu 21 in Section IV 7 Start up the leak detector 8 Run the leakdetector at slow speed 1 O grange in TEST mode for 24 hours before shutting system off NOTE Pump may require several starts after it has been re lubricated _ 5 3 18 pisassembly olthe Isolatjon Valve Fi...

Страница 125: ...MBLY OF THE ISOLATION VALVE IS COMPLETE 5 3 19 Assembly of the Isolation valye 1 Place a new O ring 4 in the cover 7 2 Place the valve plunger 5 with its spring 6 in the solenoid actuatorassembly Make surethe compressed end of the spring is facing up 3 Carefully center the valve plunger 5 then screw the solenoid base assembly into the cover 7 4 Install the coil 2 and secure it with the retaining c...

Страница 126: ...eak detector experiences difficulty in transferring to the TEST mode calibrating this thermocouple can help With the test port plugged and the leak detector in the TEST mode refer to Menu 22 Option 1 7 to adjust the test port thermocouple gain to show a 1 to 5 mTorrpressure reading Furtheraccuracy can be achieved with a calibrated thermocouple in the test port such as the Varian 810 gauge controll...

Страница 127: ...0 mTorr and resetthe display back to show leak rate If the turbo pump speed has been changed the calibration gain must be reset to agree with the value of the calibrated leak 5 4 6 Turbo Speed vs Sensitivity 1 Manually zero the leak detector in all ranges 2 Place acapillary leakin the test port or ahelium permeation leakthat is in the high 7 range If using a capillary leak apply enough helium to a...

Страница 128: ...er board waveform with the pumpdisconnected connectorJ7 must be disconnected otherwise resistors R54 through R57 and transistor Q13 might be damaged Thethermalprotectiononthepumpconnectormustthenbeshort clrcuIted Controller Hjgh and Low Freqyency Adjystments Twotrimmers P1 andP2 enabletheusertocalibratethe high andlowfrequenciesIndependentfyfrom the rearpanel The high frequencycan be adjustedwithi...

Страница 129: ... to the board verify that TP2 goes Low after approximately 2 seconds set Aon the ON position checkthat pin 4 of U10goes Low relay RL1Is energized TP6 goes Low the Starting Timeroutputremains Lowlorapprox 1second and TP15 remainsatO 6 Vlorapprox 1 second Check the OvertoadJThermai ProtectlonlOvervoltage ResetlAutoreset circuits verify that the output OVERLOAD light lights when the thermal protectio...

Страница 130: ...er between the plus terminal of the power board bridge and the common terminal TP COM connect a 1 kohm resistor between the minus terminal of the power board bridge and the collector of 05 verify that the voltage across the resistor is a pulse of approximately 12V and a duty cycle of 1 3 repeat the above procedure for as through 011 Check the Power Board to check power transistors use adigital mul...

Страница 131: ...Section V Maintenance Repair and Calibration 5 36 This page intentionally left blank 6999 09 720 ...

Страница 132: ... always apply helium SPARINGLY starting at the highest points first since helium rises Use only enough helium to reach the leaks do not flood the area Ifdrafts such as from afan existin the area apply heliumdownstream from the source first or deflect the draft until leak checks are completed If vent grooves exist at flanges or other assembled seals apply helium to these points ratherthat ageneral ...

Страница 133: ...t power enclosure is on and that the ON OFF switch on the basic module is on Check that all circuit boards are properly plugged in Press the circuit breaker to reset Make sure the turbo pump controller is plugged in Check that power is applied to the plug for the turbo pump power supply Fuse Fl or F2 blown Relay RL1 defective Power board defective U1 or US defective U2 U3 or US defective Ul defect...

Страница 134: ...roper op eration Any leakorbreakin the vacuum integ rity will be a cause for abnormal operation Remove test piece plug test port try again Check for a leak at an inlet line in the vacuum manifold Look for the severe darkening ofthe forepump oil thepresenceoffoamorfrothon topofthe oil or apungent odor The above conditions accompanied byaread ing of approximately 100 miliiTorr on the Test Port Press...

Страница 135: ...ump the spec trometer tube down within 15 seconds afterthe isolation valve V6 opens Powerwill notbe applied to the turbo pump until this condition clears Corrective Action Proceed as follows Press the SCRAM button twice to reset the leakdetectorand to allow further roughing of the spectrometer tube Repeat the step again 2 Check the system thermocouple connector to verify a good electrical connecti...

Страница 136: ... pressure reported by the thermocouple does not drop within 5 minutes the turbo pump is shut off and cooled down to prevent possible damage Corrective Action Check for leaks in the vacuum system between the test valve and the spectrome ter tube see para 6 4 1 6 3 5 System pre sSure wait This message occurs when the system pressure thermocouple report pressure higher than the set point after the tu...

Страница 137: ...ontinuity of the ion source 2 Remove the connector from the top ofthe ion source and check forcontinuity between pins 1 and 8 filament 1 and between pins 5 and 6 filament 2 of the ion source If there is no continuity between either of the pins change the ion source as described in Section V 6 3 11 Test Port over pressure This error message occurs when the leakdetectoris in the TEST mode and indica...

Страница 138: ...aments to determine if sensitivity improves Refer to Menu 22 Option 4 1 3 Check that the valves are operating properly especially the ejector bypass valve V4 and the isolation valve V6 Refer to para 6 4 4 for valve checks 4 Clean the vacuum system especially the spectrometer tube Section V 6 3 14 Gain too small sensitivity too high This error message is displayed when the calibration gain required...

Страница 139: ...burst 3 DiHiculty in transferring into the TEST mode or failure to transfer into the FINE LEAK mode when the test port is plugged 4 Inconsistent reading of leak rate meter especially during leak checking 6 4 2 Leak Checking the Leak Detector small leaks Sometimes a small leak will cause inconsistent operation of the leak rate meter but will still allow the leakdetectortotransfer intothe TESTmode I...

Страница 140: ...ption 3 1 6 putthe leak detector in the HOLD state 3 Verify proper valve operation by listening for an audible click when the valves are actuated Startwith the valves that are likelyto cause aproblem and always finish with the VENT valve 4 If any valve fails to operate properly measure the D C voltage from each coil lead to ground while the leads remain connected to the coil Voltages should be as ...

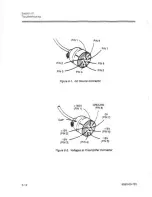
Страница 141: ...from the ion source check for continuity between pins 4 and 5 of filament 2 and pins 1 and 8 of filament 1 Continuity verifies that the filaments are not open 6 Check pins 2 3 6 and 7 in the ion source corresponding to the pins shown on the connector Figure6 1 Checkthat the pinsare electricallyisolatedfrom groundaswell as from each other 7 Visually inspect the ion source and replace it if electric...

Страница 142: ... white and blackwires while the connector is plugged intothe thermocouple The voltage should read approximately 0 3 volt If not refer to para 6 5 Electronic Troubleshooting No voltage to thermocouple gauge 4 Measurethe voltage across the red and green wireswhile theconnectorispluggedinto the thermocouple The voltage should read 7to 11 mv With the meterstill connected vent the test port the metersh...

Страница 143: ...g 6 12 PIN 1 PIN 8 PIN 7 PIN 2 PIN 6 PIN 3 PIN 4 Figure 6 1 Ion Source Connector CAP 15V PIN 2 15V PIN 3 160V PIN 1 PIN 4 GROUND PIN 8 OV PIN 7 15V fI _ PIN 6 15V PIN 5 Figure 6 2 Voltages at Preamplifier Connector 6999 09 720 ...

Страница 144: ...S TROUBLESHOOTING When an electronic problem exists Varian recommends thatthe service technician replace the circuit board ratherthan the individual components on the board This section will aid the service technician in isolating the particular board SYMPTOM No voltage to thermocouple gauge should measure approximately 0 3V between the white and black wires while the connector is connected to the...

Страница 145: ...connectors to the display are properly connected and undamaged heck that circuit boards are properly plugged that circuit breakers are reset Check t at turbo pump is plugged in er supply board The GOINO Odiagram see Section IV shows the steps automatically aken by the microprocessor when the ART button on the control panel is pressed GO NO GO dia rams for the leak detector in each several modes ST...

Страница 146: ...lifiercable orcon nector Checkthatallconnectors are properlyplugged into the Backplane board Checkthatcircuitboards are properlyplugged in Replace power supply board or CPU board Check that both connectors to the display are properly connected and undamaged Checkthatcircuitboards are properly plugged in Check that circuit breakers are reset Check that turbo pump is plugged in Replace power supply ...

Страница 147: ... of the four following problems 1 The test valve orthe Isolation valve did notopen 2 there Is aleakbetween the spectrometer tube and the turbo pump 3 the thermocouple Is bumed out or 4 asignal measurement problem exists from the thermocouple Afterthe problem Is found andfixed and Ifpowerto the unitIs nottumedoff pressingthe SCRAMkey twice will restart the system by roughing out the vacuum lines th...

Страница 148: ...MN Numbers listed in this column reflect the Varian part number for the assembly or part for ordering purposes The three digit class code 956 are an integral part of the part number for parts normally furnished with the Leak Detector The class code 0991 applies only to optional parts available forthe 956 Leak Detector If the part is available commercially the word Coml will appear in this column 7...

Страница 149: ...d the index number in the parts list to determine the part number and description 7 10 HOW TO ORDER PARTS a Determine the complete part numbers descriptions and quantities of parts required from the appropriate parts lists Include the class code number for example 0981 before each part number b Call the National Order Entry toll free telephone number listed inside the title page of this instructio...

Страница 150: ... Section VII Parts List diagnostic codes are displayed The Accessory Output option listed above is required with this module Gross Leak Valve Option Part No 956 0920 6999 09 720 7 3 ...

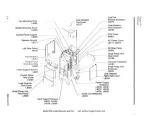
Страница 151: ...mall Pump Unit L8155 Front Bracket t j Rear Cover L8 265 1 1 L8186 Control Panel cJ Door Assembly f 1 Od Drain ExtenSion L8093 I o L8181 Panel Support Bracket i II At c u p Unit L8281 J L8283 Control Panel 7 Jl Leak Detector Rear Cover 1 Right Side Cover L8293 L8292 Leak Detector Front Cover L8286 Small Pump Unit Front Cover L8288 Card Cage Enclosure L8231 L8234 L8239 L8248 Power Supply Enclosure ...

Страница 152: ...L8234 L8239 L8248 J Trim Molding L8122 Leak Detector ToPcover L8277 Test Port Bracket Assembly L8275 Leak Detector Unit Enclosure L8285 CPU Panel K8301 AC Power Cover L8117 L8270 AC Rear Panel L8302 Small Pump Unit RearCover L8186 Oil Drain Extension L8181 Small Pump Unit Enclosure L8283 Leak Detector Right Side Cover r L8292 Axle Cover _ L8139 Power Supply Enclosure L8235 L8236 L8237 L8238 L8295 ...

Страница 153: ...1 3 1 3 1 2 2 1 1 1 DESCRIPTION LOCATION O Ring Ion Source Analyzing Magnets Preamplifier O Ring Spectrometer Tube Mounting O Ring Foreline TC Gauge Gross Leak O Ring Foreline Flange O Ring Test Port NW 16 Center Ring NW 25 Center Ring Imperial 1 4 Viton sleeve Gross Leak Option O Ring Gross Leak Calibrated Leak and Vent O Ring Calibrated Leak O Ring Rough and Test O Ring Valve O Ring Isolation Va...

Страница 154: ... to an audible note whose frequency is a function of the leak size BACKGROUND An output signal of the leak detector due to entrapment of the tracer gas or other substance to which the detecting elementresponds in the vacuum system which cannot be quickly removed bypumping A virtual leak of the tracer gas BACKGROUND SIGNAL The steady or fluctuating output signal of the leak detector caused by the p...

Страница 155: ...INE VALVE Avacuum valve placed in the foreline to permit isolation of the diffusion pump from its fore pump FOREPUMP The pump which produces the necessary fore vacuum for a pump which is incapable of discharging gases at atmospheric pressure Sometimes called the backing pump GROSS LEAK A leakage rate more than 10 4 std cc sec HELIUM BOMBING A method of testing for leaks in which hermetically seale...

Страница 156: ... The controlled circumstances under which a test is conducted PRESSURE TESTING A leaktesting procedure in which tracer gas is introduced underpressure into oraround the enclosure under examination and detected as it is emitted from a leak PROBE A tube having a fine opening at one end used for directing or collecting a stream of tracer gas PROBE TEST Aleaktest inwhich the tracer gas is applied by m...

Страница 157: ...ures 2 Adevice that permits a tracer gas to be introduced into a leak detector or leak testing system at a known rate to facilitate tuning and calibration of the leak detector Also known as a cali brated leak TORR Pressure unit used to replace the term millimeterof mercury mm of Hg The Torris defined as 11760 of a standard atmosphere or 1 013 250 dynes em TURBOMOLECULAR TURBO PUMP A high speed up ...

Страница 158: ...ic Diagram Power Supply Schematic Diagram Auxiliary Power Supply Assembly Printed Circuit Board with parts list Auxiliary Power Supply Printed Circuit Diagram Backplane Printed Circuit Board Power Supply Schematic Diagram Control Panel Assembly with parts list Control Panel Printed Circuit Board Schematic Diagram Control Panel Keyboard Schematic Diagram Main Power Panel Schematic Diagram Cart AC P...

Страница 159: ...tD I L8312301 I P J 2 FRONT PANEL BOARD FRONT PANEL DISPLAY 1L8032301 1 1L8079301 1 P J 1 p J 4 1 L8311301 1 P J 3 PARALLEL I O P J 47 p J 10 CPU BOARD PINS 34 35 REMOTE CONTROL REMO CONTR TE OL AY 1 1 1L8020301 I 1 CPU TO RECOROER BOARD DrSPL 2 ROM RAM CLOCK NOT SUPPLIED IL8035301 1 IL834230 3 DISCRETE LOGIC FREQ GENERATORS 4 5 ADDR ICS DECODERS HUS T COMPUTER 6 HELIUM SIG INTEGRATE P J 11 7 D A ...

Страница 160: ...Do NOTASSEMBLE W3 U2 SASSEMI3LED W Ttt 1 SCC r ET ITEM lIfo U70 V2 G v 3 A ND V C4 ARE A SSE MBLED WITH OO ETS ITEM 5 El DO f J011 SSeMf lE R3 I 38 Rq l fiN D c 4 O USE ITEM 11 1 TOI lOLJIVT 1 lZ ON THE ICC 801lRD f CLEAl l Y P1fil J REV IN INDELIBLE BLACK INK 111 EA SHOWN ZJ Sn lpeTIN ITE M 127 O I 4 ON 80Tti F ilJDS LDE SETwEEN 1 I s9 3 t f C9 ON SOLDERS DE IPARTS LIST IS ON A DETACHED DOCUMENT ...

Страница 161: ... l ooK CPU l OtHROL JjUS BUS us us q u u I I 111 I i I I I I CO I OIUf PLO MAIN PCB o n C n o 1 0 I L8022 I H ...

Страница 162: ......

Страница 163: ... I 21 HCPl2731 I I IiCPL173 I 21 7J1 I 21 l 2 HCPL273 I IN ESS OTHEAWlSE SPEClftEl FABf IJCAT I N ACCOROAICE IIITti VAilUN F t BRICAnO PROCEtUlES 8000 ANJ OII IIlI SOIl SEE HEE 1 I 1 I 15 RN6 i v DUT CT ET T2 AE CT ET T3 I RNS 3 I I II INa S RNa 9 1 RNa I I I I I I 110 STAAT UT TEST CAl3 T JIO o _ llliL IN 005 10 0 VARIAN VACI JI M PMOUCrS 0 V SIaN l NTOtHNI 1011187 u NttETTE R suo 10 818 I II 117...

Страница 164: ...5V 15 0 RI69 1 00K 7 OP07 47 UF R170 15V 4531 CIOl 7 CIO R175 PRESSURE_ l r J 750 Ai7S R179 1 0011 47 5K 7501 o UBO 5 I V L 7 C133 7 RI77 10 0K J 5V U 3AtlOP 15V ell R174 10 OK CI09 OWl m l u s pecifie d all u isto s ar t 4w U 2 S Dol for l191t l l gna 3 SYllbol for enllog gnd BUS5 5V ARE NI 5 1 ARE N2 ARE N3 5 1 RE N4 y ol for power gnd it m tIOfES 1 Unle Pl cifled 011 r u htors are 1 410 Il 790S...

Страница 165: ...o the six secondary windings on transformer TX1 Winding N5 on transformer TX1 provides a supply voltage to regulator VR1 which controls the 9Voutput A 15 volt supply is provided by winding N6 This voltage is also controlled by a three terminal regulator VR2 A 15 volt supply is provided by winding N7 A three terminal regulator VR3 controls this output Ground for all three of these power supplies ar...

Страница 166: ... I FILTER DWFUSION FILAM NI 5 VOLT 24 VOLTS CURRLNI PUMP POWER REGULATOR REGULATOI REGULA TOR AUX NOT GROLJNDI 1 POWER REGULATOR I SUPPLY I VOLTS FILAMENT BIAS VOLTAGI LREGULATORI p6Cw I I VARIABLE FOCUS VOL1ALI Te 1 SUPPRESSOR POWER VOLTAGE REPELLER VOL TAGE FIXED ION FOCUS CHAMBER VOLTAGE VOLTAGE Figure 1 Power Supply Block Diagram ...

Страница 167: ...drops to a low value the pulse width modulator is turned oH by the output of U34 The 5 volt supply also supplies the input to the two three terminal regulators VR4 and VR5 which in turn power thermocouples TC1 and TC2 which provide 150 ma currents to the test port thermocouple and system thermocouple respectively Auxiliarv Supply The auxiliary power supply provides the high voltages to operate the...

Страница 168: ...at is the primary current in transformer TX9 is controlled by an inner loop and the voltage across the filament element is controlled by the outer voltage loop This voltage regulator in turn is controlled by the current command from the frequency to voltage converter Emission current from the filament element is measured across resistors 848 and 849 Switch 03 is turned on if high emission current ...

Страница 169: ...l is used to control the phase angle controller pin 6 of U6 The power delivered to the diffusion pump heater coil is commanded by a frequency modulated signal applied to the control loop through optocoupler U1 This signal is converted to an analog command voltage by the frequency to voltage converter U2 An open heater element condition is detemnined by a low voltage condition across the power tria...

Страница 170: ...U 1 00 j J 392K 20UF 50 e l SO OOOPF 475K 1 CIS I IN 005 I 11141 48 I 4 75K 11 LM324N I OOM I I 230V L 339N 1 21K I I OOM L ct 2 It I 047l1F I LL OPEN EATEFI ELEMENT SENSOR 0047UF I D P HEATER COIL TPI5 I 0 1 POWER RE ATDA Df f LT Si lC CIJ OP J LT F TN uw 023 109 0 T L8025 IF I I I 0 ...

Страница 171: ......

Страница 172: ...9 i 1114148 7SK TPJ CR46 R1635 NOTE RPO RI71 CH3 l a7K OOPF R166 10 OK 2 j RHO I OOK cln O 7Uf A174 4 75 8 Lel52 8 L6353 ClOg 1 200UF r4 NOTE 1 CO P TO Ql tIT ON HEATSIt IK rHEA ALLOY 6021 OR EGutv LT3 7AT 2 A217 I 11216 6 9 Tet PWII R 2 LT311lT I 6 2 2 A2 8 V T 6 9 FiE T f khI f l e RAl on 1106373 f Ii UNLESS 0111ERIHSE SPECIFIED FABRICATE IN ACCOROANCE ITH VARIAN FABRICATION PflOCEOURES 9000 ANO...

Страница 173: ...SLACK INK IN AREA S IIOMV I J OJ I 0 c 3 C tl 0 c W w 30 n C I 5 J 4 1 I NOTES Ii COMP TO 8 MOUNT Orr PC CARD PARTS LIST fs ON A DETACHED DOCUMENT i D I o 1 DoO lf _ OHO d t 10 3 I C fC to I o on A_a tO I IMI Mi l 10 1 87 rYt f 0 O POWER SUPPLY Alix ASSY NOT or S SI I r AC II A G so c o u r O c t u_ is JU r 2 1 VAC PROD I0 I L802630 1 IC D 1I SION on OOlAW NO n i J I 2 I 1 c B A ...

Страница 174: ......

Страница 175: ...FIL saECT MAIN PC TOP CONN ALDIO DIS I 011 DIS I OIS 9 01 11 INTJ t I BAC HAIN PC TOP COHN 00 DIS oI DIS u OU_ 4 DIS e1 DIS JII DISJOI REPELlBl PLAT r _L_IDNJiUI8 1 MAIN PC BOTTOI4 CONN EMIS Jt J J RC VMII J TR SAC 8lU t mL IIIC JON TelTjI1 VSIIC E ECT YLVSRC 2 V T9M9JIII JITN T5MSJ JON JOn SOU TCJ BU TCJ JII JmoI II HJAJIII TCJ JII9J1Tl TC 2 P1IR fITIf FlL nI ICH J IW BER m PUrr IOH JIAJtUl SERV ...

Страница 176: ...A55 1 REV IN N E U 3 l E 6i Jrr J INK IN t lREA 5HOW tJ PARTS LIST PI L LB03Z30 1 O S C U THIS N T U5 OT U S S E O l tO R C LL S OGt5 0 00 5 0 IN C U PARTS L IST IS Ot t A DETACHED DOCUMENT _ _ _ _ _ w _ I _ _ __ __ _ _ _ _ _ O W N I 1 I 1 IO 8 tl7 C C O I BIo J J tc CONTROL p wn 155 7 FTJI NOI OT WI H snc r c ANO SCAlE nN otc u O O_ xu o oS VAC PROD D L8032 301 C DI SIOf sIn OII NO NO 1 G c B A ...

Страница 177: ......

Страница 178: ...ORMATION OF VARIA ASSOCIATES A REFERENCE DESIGNATIONS FABRICATE IN ACCORDANCE WITH V ARIAN EXCEPT AS AUTHORI2EO BY VAAl I N SEPAFI t TE WRITING THIS DOCUMENT A A UNUS 0 FABRICATION PROCEDURES BODO AND OR WWSOO2 AND ITS INFORMATION SH t LL NOT SE COPIED USED OR DISCLOSED TO OTt lEAS AND SHALL IlE RETURNED TO VARI UPON REQUEST W DRAWN DATE VARIAN VACUUM PROOUCTS DIVISION 6 ANTONINI 10 1 B7 121 Hartw...

Страница 179: ... 5 FANS 1 2 P3i FANS 3 4 6 1 2 3 4 DO NOT SCALE THIS PRINT UNLESS OTHERWISE SPECIFIED BREAK ALL SHARP EDGES DIMENSIONS ARE IN INCHES TO POWEA SUPPLY 2 TO BACKPLANE TO J36 I COMPUTER GENERATED DRAWING THIS DOClJHENT CONTAINS PROPRIETARY INFORMATION OF VARIAN ASSOCIATES EXCEPT AS t lJTHORIZED BY VARIAN IN A SEPARATE WRITING THIS OOCUHENT o I C B UNLESS OTHERWISE SPECIFIED FABRICATE IN ACCORDANCE WIT...

Страница 180: ...L 2 N 2 CB3 P2 L 17 TB3 15 18 1 4 RY4 19 3 2 3 4 4 13 8 RP 10 LD VII TB4 6 1 5 9 G G G G 9 5 12 6 Cart AC Power Assembly Schematic Diagram 1 2 CB5 1 4 20 RY5 3 22 20 r 1 I l __ 1 0 1 I E J36 81 A I I _ J ...

Страница 181: ...quipment Have surplus equipment taking up shelf space We ll give it a new home Learn more Visit us at artisantg com for more info on price quotes drivers technical specifications manuals and documentation Artisan Scientific Corporation dba Artisan Technology Group is not an affiliate representative or authorized distributor for any manufacturer listed herein We re here to make your life easier How...

Отзывы: