background image


FOGBANK™ Vapor Tank Kit 


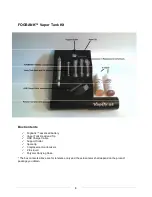
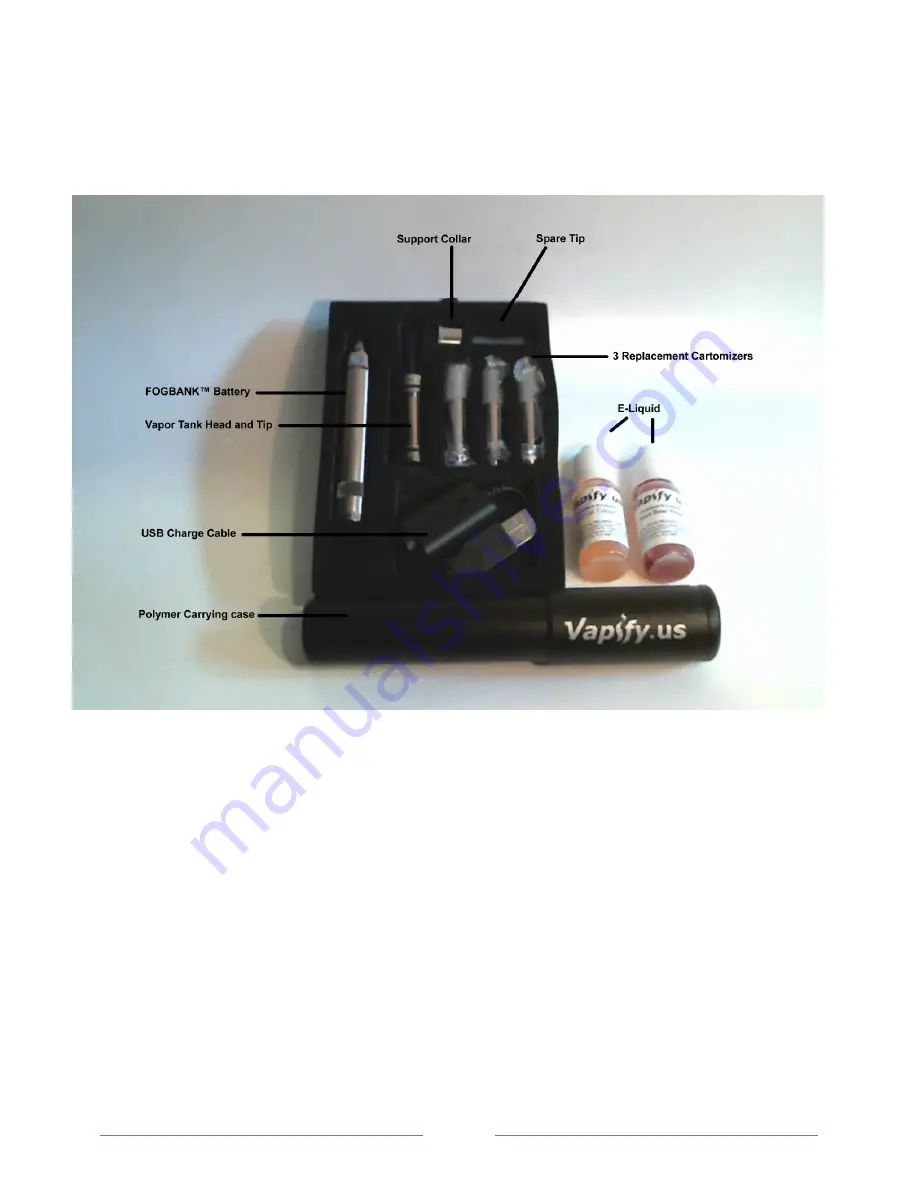
Box Contents 


  Fogbank™ advanced battery


  Vapor Tank Head and Tip


  USB Charge Cable


  Support Collar


  Spare tip


  3 replacement cartomizers


  2 E-Liquid


  Polymer Carrying Case


* The box contents above are for reference only and the actual items shall depend on the product 
package you obtain.   

Содержание Fogbank

Страница 1: ...v1 3 ...

Страница 2: ...k of heart disease high blood pressure diabetes or taking medicine for depression or asthma If you have a demonstrated allergy or sensitivity to nicotine or any combination of inhalants consult your physician before using this product This product is sold purely for recreational purposes it is not a smoking cessation product and has not been tested as such You must be over the legal age in your st...

Страница 3: ...nced battery Vapor Tank Head and Tip USB Charge Cable Support Collar Spare tip 3 replacement cartomizers 2 E Liquid Polymer Carrying Case The box contents above are for reference only and the actual items shall depend on the product package you obtain ...

Страница 4: ...nts Fogbank advanced battery CE5 Head and Tip USB Charge Cable 3 replacement coils 2 E Liquid Polymer Carrying Case The box contents above are for reference only and the actual items shall depend on the product package you obtain ...

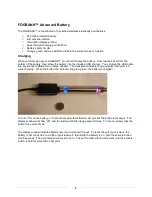
Страница 5: ...rge adapter The transparent indicator ring and button will glow red while charging When the button and indicator ring glow green the battery is charged To turn off or on the battery or to prevent accidental activation simply click the button three times The display window will show off and the button will blink orange several times To turn on simply click the button three more times The display wi...

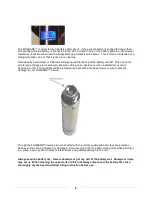
Страница 6: ...e when riding on an airplane or when a cartomizer or coil is beginning to fail The liquid should be promptly wiped out with a dry paper towel or q tip to prevent damage to your FOGBANK device Though the FOGBANK devices are constructed with the utmost quality and care they are precision devices so they can be stressed or damaged Store the unit in the included carrying case when placing it in a purs...

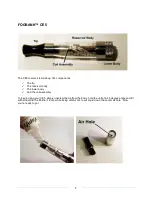
Страница 7: ...ervoir body The lower body And the coil assembly To begin using your CE5 simply unscrew the tip from the body hold the unit at a 45 degree angle and fill with e liquid to the fill line 1 6ml while being careful not to put liquid down the center air hole Now you re ready to go ...

Страница 8: ...ry The coil can now be removed and replaced by unscrewing it from the lower body While assembling and disassembling the CE5 unit be sure to inspect the components and o rings for any damage A damaged unit can result in leakage or premature failure Replace the CE5 unit if any body components are damaged or worn To re assemble gently screw the components together When attaching the clear body to the...

Страница 9: ...he Vapor Tank is made up of 4 components The tip Vapor Tank Body The cartomizer Stabilizing collar The vapor tank design provides maximum vapor and airflow and is the go to choice for advanced e cig users For users that wish to use a more convenient design please check out the FOGBANK CE5 ...

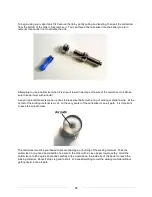
Страница 10: ...stainless steel barrel with a ring of wicking material inside At the center of the wicking material is a coil At the very center of the cartomizer is an air path It is important to keep the air path clear The cartomizer must be pre loaded to prevent damage or burning of the wicking material Take the cartomizer in one hand and a bottle of e liquid in the other with a clean paper towel nearby Hold t...

Страница 11: ... a mess Next wipe the outside of the cartomizer with a paper towel and blow on the top of the cartomizer This action will force the e liquid down the wicking material into the cartomizer Putting your finger over the bottom hole of the air path while making sure not to block the side vents of the cartomizer barrel helps speed this process ...

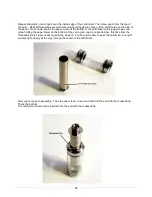
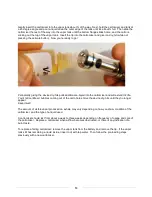
Страница 12: ...th a paper towel and while holding the paper towel on the bottom of the carto give one more gentle blow this time from the threaded side to clear out any liquid in the air path You should be able to point the cartomizer at a light and see light clearly all the way through the center of the cartomizer Now you re ready to assemble Take the vapor tank in one hand and find the end with the recessed li...

Страница 13: ...omizer and will extend it s life You ll notice little air bubbles coming out of the carto holes Give the device dry hits until they no longer appear Keep it wet The amount of visible vapor produced on exhale may vary depending on how you draw condition of the cartomizer and the type of e liquid used A cartomizer should last from about a week to three weeks depending on frequency of usage and care ...

Страница 14: ...s properly seated Be careful not to over tighten The CE5 makes a gurgling sound during use Though a small amount of crackle is normal during usage if the device makes a gurgling sound it is likely flooded or has e liquid in the air path Disconnect the CE5 head Take a twisted up paper towel and place it against the bottom contact and air path of the CE5 Gently blow from the tip Repeat until liquid ...

Страница 15: ...acuum may be created in the tank from usage in low temperature conditions or with thicker e liquid preventing e liquid flow to the cartomizer Remove the tip from the vapor tank and slide up the tank on the cartomizer as you would to fill it Slide the tank back into it s normal position replace the tip and give dry hits as described above until bubbles no longer appear The unit produces a burned of...

Отзывы: