Vantron
| Embedded in your success, Embedded in your better life
World-leading provider of embedded/IoT products and solutions
TMC series | Quick Installation Guide
1.
COMPONENT CHECKLIST
Check if all components are available:
•
Touchscreen monitor
•
Power adapter & power cable
•
Touch USB cable
•
HDMI cable & VGA cable
•
DP cable (Optional, applicable only to TMC215 and TMC270)
Note:
Actual accessories might vary slightly from the list above as the customer
order might differ from the standard configuration options.
2.
INSTALLATION OF THE TOUCHSCREEN MONITOR
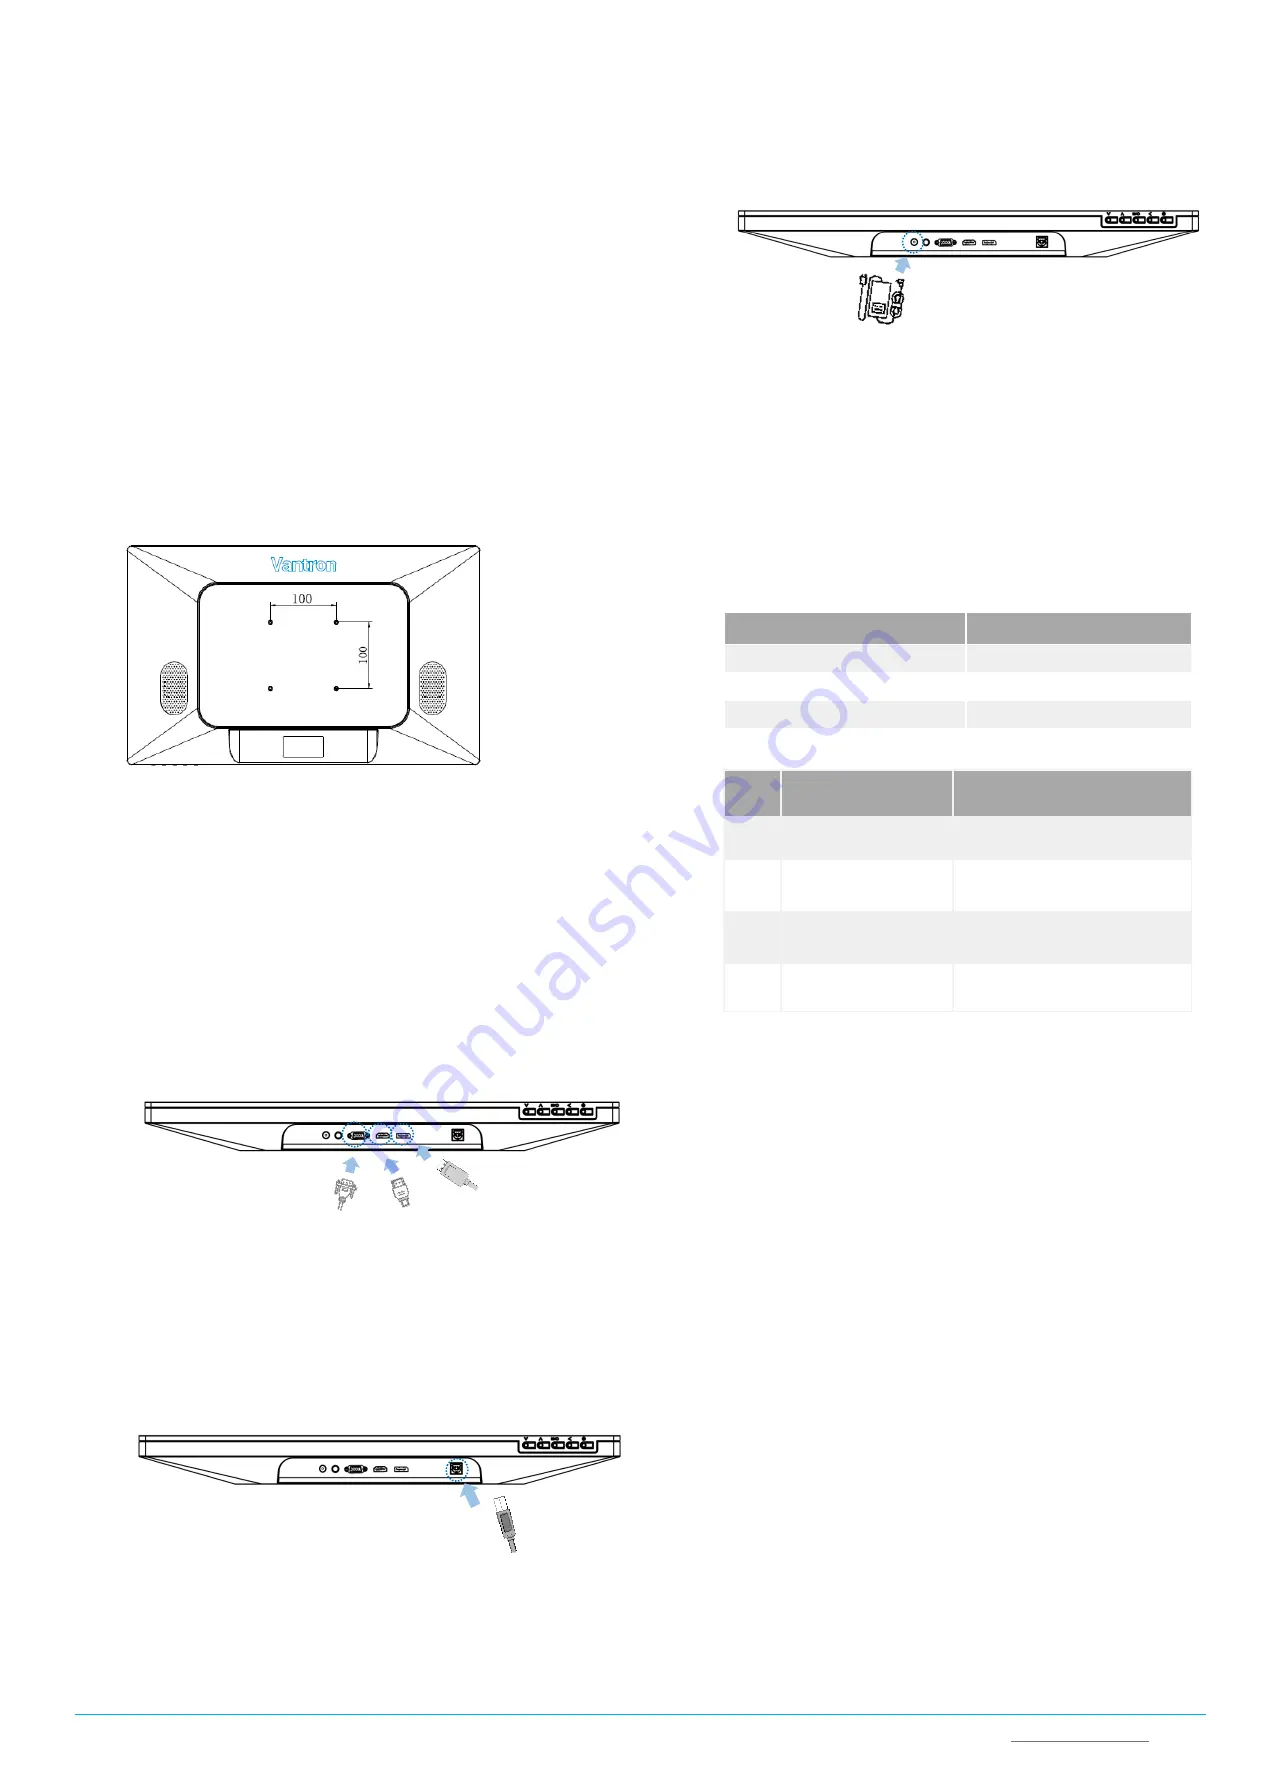
Vantron TMC series
desktop/wall-mountable touchscreen monitors
are
designed to be mounted onto a variety of stands, arms, walls or medical charts
with VESA patterns (75mm x 75mm and 100mm x 100mm) on the back.
Drawing for illustration only.
The VESA pattern on TMC156 is 75mm x 75mm.
Screw specifications:
•
M4 screws
•
Thread depth: 8mm
3.
WIRING
1.
Connect the video input interface of the touchscreen monitor and the video
source with an HDMI/VGA/DP cable;
Note:
The DP port is exclusive for TMC215 & TMC270. The display cable
shall vary with the display interface, and adapter connectors are
sometimes needed.
2.
Connect the USB port of the touchscreen monitor and the PC/master device
(e.g., Vantron IBOX3588) with the touch USB cable to enable the touch control;
3.
Plug in the audio cable, if needed;
Note:
The audio interface is implemented as per the requirement of the
customer.
4.
Connect a 12V DC power supply to the power jack of the device, and the
LED indicator will turn solid red and enter the sleep mode;
5.
Wait about 2-3 seconds and the LED indicator will turn solid green if the
PC/master device connected to functions properly;
6.
Use the OSD control buttons at the bottom of the monitor to power off
the device or change the display settings.
4.
LED INDICATOR AND OSD CONTROL
The relationship between the power indicator and the touchscreen monitor
status is as follows:
Indicator status
Touchscreen monitor status
OFF
OFF
Solid red
SLEEP
Solid green
WORKING
OSD control buttons function as follows:
Key
OSD panel not displayed
OSD panel displayed
Menu
OSD menu
Enter the submenu of a selected
parameter
Up
OSD Contrast submenu
(Increase brightness)
Increase value of selected parameter/
Move to next menu upwardly
Down OSD Brightness submenu
(Decrease brightness)
Decrease value of selected parameter/
Move to next menu downwardly
Back
NA
Return to previous OSD menu
5.
TROUBLESHOOTING
Please refer to the following solutions/suggestions in case you encounter a
trouble during use of the touchscreen monitor.
If the problem is not covered here or the problem persists after
troubleshooting, please contact your sales representative.
1.
The touch screen does NOT respond when the device is powered on.
-
Check if the DC power adapter is properly connected and functions well.
2.
The screen is dim.
-
Use the OSD control buttons to adjust the brightness or contrast of the
display.
3.
The touchscreen monitor does NOT wake up automatically and the power
indicator is red.
-
Tap the screen and wait for the monitor to respond. If it fails, press the
power button, or re-connect the power supply, and wait a few seconds till
the indicator turns green.
4.
The image is NOT properly displayed.
-
Adjust the resolution/timing mode of the PC/master device to be within
the allowable ranges specified for the touchscreen monitor. Or, adjust the
display parameters manually with the OSD control buttons.
VGA
HDMI
DP


