© October 2021 Van Essen Instruments. All rights reserved.
www.vanessen.com
Deployment
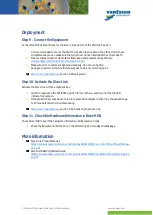
Step 9 Connect the Equipment
Connect the DXT Cable and Diver to the Diver-Link and mount the Well Top Fixation.
It is recommended to mount the Well Top Fixation to the cable in the office. Under these
circumstances you can make sure that your Diver will be installed at the correct depth.
Please consider depth of water-table fluctuation and pressure range of Diver:
www.vanessen.com/calculator-tools/cable-length
Make sure all connectors are tightened properly, do not over-tighten.
Keep good record of which hardware set goes to which monitoring point.
, section 2.6 Deployment.
Step 10 Activate the Diver-Link
Activate the Diver-Link with the magnetic key.
Hold the magnet on the ACTIVATE position for more than 1 second; until the top LED
indicator turns green.
If the activation process does not return 4 green LED indicators, then retry the activation up
to 2 times before further troubleshooting.
, section 2.6.1 Activating the Diver-Link.
Step 11 Check the Hardware Information in Diver-HUB
Check Diver-HUB to see if the hardware information is displayed correctly.
Check the Equipment information on the Monitoring Points widget details page.
More information
Diver-Link Product Manual:
https://www.vanessen.com/wp-content/uploads/2019/09/Diver-Link-DN4xx-ProductManual-
en-1.pdf
Diver-HUB Getting Started Guide:
https://www.vanessen.com/wp-content/uploads/2019/09/Diver-HUB-Getting-Started-Guide-
en.pdf


