


Flame effect / Light bulb replacement
Caution! Bulbs will become very hot; allow at least 10 minuets for bulbs to be cool before touching
The flame effect on this electric stove heater is created by two 40 watt light bulbs with an E12 (small) socket
base. Only use this type of light bulb. To service light bulbs, unplug power cord from outlet, locate access panel
on back of stove. Remove screws and panel. Light bulbs may come loose or may be damaged during
shipping. If flame effect does not work properly, check to be certain that both bulbs are finger tight and are in
working order. Replace light bulbs as needed. Replace access panel. Do not operate with out access panel in
place. Do not remove back cover of heater; no serviceable parts.
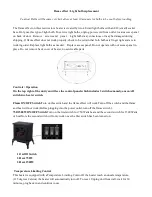
Controls / Operation
On the top right of the unit you will see the control panel,which includes 3 switches;namely,one on/off
switch,two heater switch.
Flame ON/OFF Switch:
Turn on this switch and the flame effect will work.Turn off the switch and the flame
and heat will not work.(Before plugging into the power outlet,turn off the flame switch).
750/1500W ON/OFF Switch:
Turn on the first switch for 750 Watts heat and the second switch for 1500 Watts
of heat.Note the second switch will only work once the first switch has been turned on.
1.On/Off Switch
2.Heat 750W
3.Heat 1500W
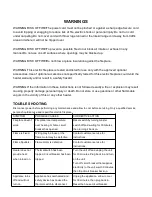
Temperature Limiting Control
This heater is equipped with a Temperature Limiting Control.If the heater reach an unsafe temperature,
(115 degrees Celsius) the heater will automatically turn off. To reset: Unplug unit from wall, wait for 30
minutes, plug back in and continue to use.