EDIT
Turn the PARA knob or tap the footswitch to switch the patch.
Press the PARA button or EDIT button to enter the EDIT menu.
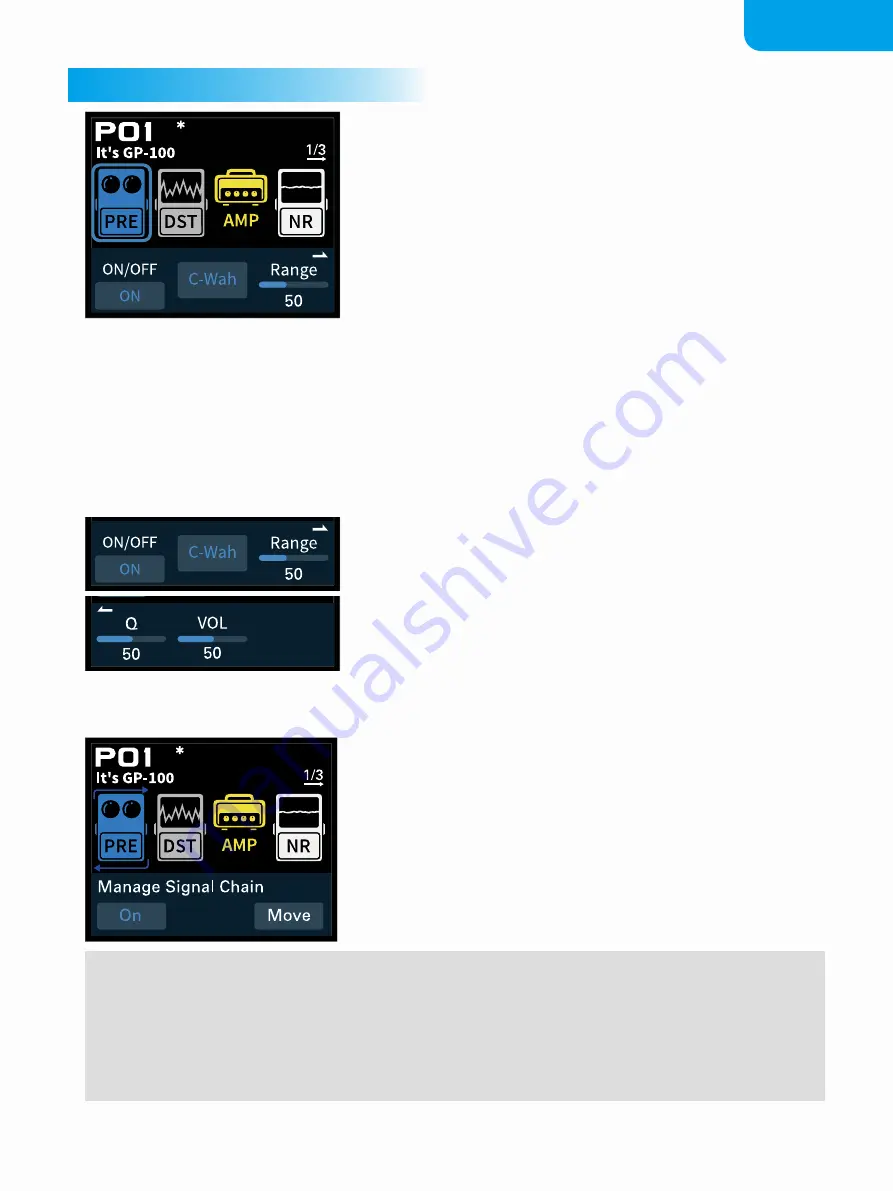
This menu is made of ten icon squares representing GP-100’s
nine e ects modules.
The default signal chain is ordered like this:
PRE (Pre-e ects) - DST (Overdrive/Distortion) - AMP (Amp
simulator) - NR (Noise reducer) - CAB (Cabinet simulator) - EQ
(Equalization) - MOD (Modulation) - DLY (Delay) - RVB
(Reverb).
7
You can arrange the e ect modules however you want.
When you open any e ect module, the corresponding icon lights up to indicate the current e ect
module is selected.
In the EDIT Menu, turn the PARA knob to select the e ect module you want to edit. The editable
parameters of the currently selected e ect module are displayed at the bottom of the screen;
di erent e ect modules have di erent parameters. You can use the three Quick adjust knobs to
adjust the parameters located directly above the knobs. A page number will appear at the top right
of the screen.
Some e ects have several parameters, but only three
parameters appear per page. Press the PARA knob button to
turn the page to view the other available parameters.
Press and hold the PARA button in the EDIT Menu to change
the position of the e ect module.
Change E ect Module Position
·
Turn the PARA button to select the e ect module you want to move
·
Turn the Quick adjust knob 1 to control the selected module on/o
·
Turn Quick adjust knob 3 to move the selected module.
·
Press the PARA button to return to the EDIT menu.
NOTE
Remember that turning the modules on/o and adjusting parameters will change the current patch. If you
switch patches or turn GP-100 o before saving your changes, the changes will be lost. Make sure to press
the SAVE button to save your settings.
Reminder: In some extreme cases the signal processor may become overloaded and display a “System
Overload” caution.
Содержание GP-100
Страница 1: ...USER S MANUAL For Firmware V1 5 ...


