Valencia Euro EDPR60SS Скачать руководство пользователя страница 6

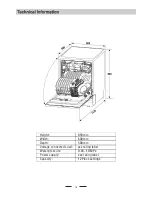
Before using your dishwasher for the first time:

3

A

. Fill the rinse aid disp ense r

B

. Fill i n detergent

The rinse aid is released d uring the final rinse to prevent water from forming droplets on your dishes, which can leave
spots and streaks. It also improves drying by allowing water to roll off the dishes. Your dishwasher is designed to
use liquid rinse aids. The rinse aid dispenser is located inside the door next to the detergent dispenser. To fill the
dispenser, open the cap and pour the rinse aid into the dispenser until the level indicator turns c ompletely bla ck.
The volume of the rins e aid container is about 110ml.

Rinse Aid Dispenser

Function of Rinse Aid

Rinse aid is automatically added during the last rinse, ensuring thorough rinsing, and spot and streak free drying.

Attention!

Only use branded rinse aid for dishwasher. Never fill the rinse aid dis penser with any o ther substances

(e.g. Dishwasher cleaning agent, liquid detergent). This would damage the appliance.

To open the dispenser, turn the cap to the "open" (left) arrow and lift it out.
Pour the rinse aid into the dispe nser, be ing careful not to overfill.
Replace the cap by inserting it aligned with "open" arrow and turning it to the closed (right) arrow.

1

2
3

As the rinse ai d diminis hes, the siz e of the b lack dot
on the rinse ai d level indica tor changes, as illustrate d below.

Full
3 / 4 full
1 / 2 full
1 / 4 full - Should re fill t o eli min ate spott ing
Empty

When to Refill the Rinse Aid Dispenser

If there is no rinse-aid warning light in the control panel, you c an estimate the amount f rom the c olo ur
of the optical l evel indi cator C loca ted next to the cap. When the rinse-aid container is full, the whole
indicator will be dark .A s the rinse-a id diminishes, th e size of the dark dot decr eases. You shou ld never let
the rinse aid level fall 1 / 4 full.

during the n ext wash.

Don't forget to replace the cap before you close dishwasher door.

Clean u p any rinse aid spilled while durin g filling with an abso rbent cloth to avoid excessive foamin g

" "

Содержание EDPR60SS

Страница 1: ...EDPR60SS EDPR60WH...

Страница 2: ...s then stop Turn off the appliance using the ON OFF button Switch on the appliance Press the On Off button to switch on the appliance Open the door Electric indicator on control panel if provided For...

Страница 3: ...for the help of professional technicians Dishwasher Features 2 Attention before or after loading the Dishwasher Baskets 6 Filtering System 11 Caring for the Dishwasher 12 A Fill the Rinse Aid Dispens...

Страница 4: ...st not be excessively or dangerously bent or flattened Do not tamper with controls Do not operate your dishwasher unless all enclosure panels are properly in place Open the door very carefully if the...

Страница 5: ...performance from your dishwasher read all operating instructions IMPORTANT IMPORTANT 1 7 2 3 6 4 5 1 1 Power indicator light To show the power supply 2 Power switch To turn on off the power supply St...

Страница 6: ...g Dishwasher cleaning agent liquid detergent This would damage the appliance To open the dispenser turn the cap to the open left arrow and lift it out Pour the rinse aid into the dispenser being caref...

Страница 7: ...d can achieve the same results that can otherwise only be achieved using intensive programs Detergent tablets of different brands dissolve at different speeds For this reason some detergent tablets ca...

Страница 8: ...marking indicates the dosing levels as illustrated on the right The place of main wash cycle detergent placed The place of pre wash cycle detergent placed Please observe the manufacturers dosing and...

Страница 9: ...s glasses pans etc With the opening facing downwards so that water cannot collect in the container or a deep base Use a mild detergent that is described as kind to dishes If necessary seek further inf...

Страница 10: ...es cups bowls upside down The upper rack is for more delicate and lighter dishware such as glasses coffee tea cups saucers plates bowls and shallow pans provided these are not too dirty Note Your dish...

Страница 11: ...dles down But place knives and other potentially dangerous utensils are placed handles up 2 4 5 2 5 4 2 3 2 1 1 1 1 1 5 55 4 5 55 4 3 2 3 3 2 3 4 5 5 5 1 1 1 1 1 5 4 2 2 3 3 3 3 3 3 2 3 2 2 1 4 4 4 4...

Страница 12: ...HZ the specification of the socket is 10A 250VAC Make sure that the water supply is turned on to full pressure Close the door press the ON OFF button and the ON OFF light will turn on Press the progra...

Страница 13: ...ght will stop blinking and the buzzer will mooing every minute unless you close the door After you close the door the machine will keep on working after 10 seconds during a wash cycle Premise A cycle...

Страница 14: ...ter2 Fine filter 3 2 3 1 Filter assembly The filter efficiently For best performance and results the filter must be cleaned regularly this reason it is a good idea to remove the larger food particles...

Страница 15: ...semble the filter parts as shown in the figures on the last page and reinsert the entire assembly in the dishwasher positioning it in its seat and pressing downwards The entire filter assembly should...

Страница 16: ...ent This appliance is equipped with a cord having an equipment earthing conductor and an earthing plug The plug must be plugged into an appropriate outlet that is installed and earthed in accordance w...

Страница 17: ...inimum diameter of 4 cm or let it run into the sink making sure to avoid bending or crimping Use the special plastic support that comes with the appliance The free end of the hose must be at a height...

Страница 18: ...uced 1 The dishwasher is level and fixed properly 2 The inlet valve is open 3 There is a leakage at the connections of the conducts 4 The wires are tightly connected 5 The power is switched on 6 The i...

Страница 19: ...re obstructing the sp ay arm r Interrupt the programme and rearrange the items of crockery This has no influence on the dishwasher function if in doubt contact a suitably qualified plumber Detergent w...

Страница 20: ...leaning performance Choose a program with a long washing time Water drainage is more difficult with these items Cutlery or dishes of this type are not suitable for washing in the dishwasher The progra...

Страница 21: ...18 Height 850mm Width 600mm Depth 580mm Voltage connected Load see rating label Water pressure 0 04 1 0MPa Power supply see rating label Capacity 12 Place settings...

Отзывы: