


XM Radio controls
XM Radio Input Settings
You can adjust the input sound level of your satellite receiver. The sound level adjustment allows you to balance the
volume control with other sources connected to your head unit (such as CD player, FM radio, etc), and eliminate possible
distortions caused by high input levels.
17
@
@
To adjust the sound level, first you must select a source that is not connected to the SoundLinQ2 unit, such as CD
player or FM radio. Set the volume to a comfortable level while listening to this source.
@
Change the source to SAT1 or SAT2 and select a satellite channel to listen to.
@
Change the source to SAT3.
@
Press and hold the button labeled SAT Lev Adj or number 5 on the Radio with its own LCD. You will hear a short
beep, and should then hear sound coming from the satellite receiver source.
@
Now you will adjust the sound level to match the volume of the source you selected in step 1. To adjust the sound
level, press either the TYPE < or TYPE > button.
@
Once the sound level matches the volume of your source from step 1, press the SAT Lev Adj (or number 5 on the
Radio with its own LCD) again to store the desired sound level in memory.
@
Deactivate SETTINGS MODE
Activate SETTINGS MODE
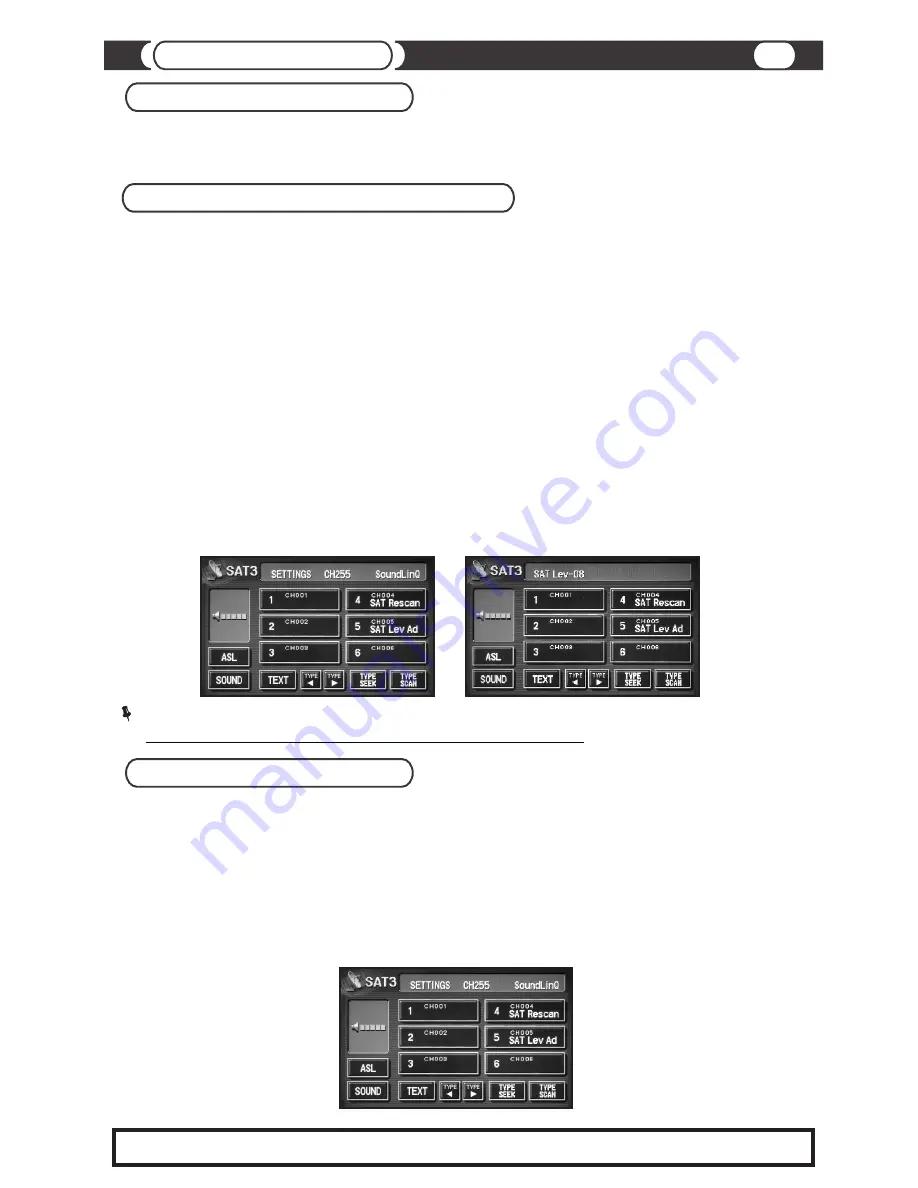
Satellite Sound Level Adjustment
Remember, a high sound level may result in noticeable sound distortion...
NOTE:
SAT3 - SETTINGS MODE
4
SAT Rescan
CH 004
In order for SounlinQ2 to work faster, we have created a new feature “Channel List”.
SoundlinQ2 goes out of our facility preprogrammed with the recent “Channel List”.
If in any case XM Radio adds/removes a channel, you need to use [RESCAN] feature to update your “Channel List”.
1.
Make sure you are in the “Good Reception Area”.
2.
Activate SETTINGS MODE.
3.
Push and hold [RESCAN] to hear long beep. (“Channel List” erased)
4.
Go to SAT1.
5.
“Updated” is flashing, make sure to let the “Channel List” To update before you can use your Radio again.
6.
Deactivate SETTINGS MODE.
SETTINGS MODE (”SAT Rescan”)
Channel List Update
*Make sure to follow the instructions above to perform “Channel List” update, because incorrect steps can bring unit to improper operations.
Activate / Deactivate SETTINGS MODE
@
Go to SAT 3
@
Tune to channel 255
@
Press [Type Scan] 8 times to hear long beep.
@
Using AM or AM/SAT button reselect sources to cycles to SAT 3
SETTINGS MODE (SAT Level Adjustment)


