- 26 -
3.4. Configure VoIP lines
3.4.1. Configure VoIP Provider
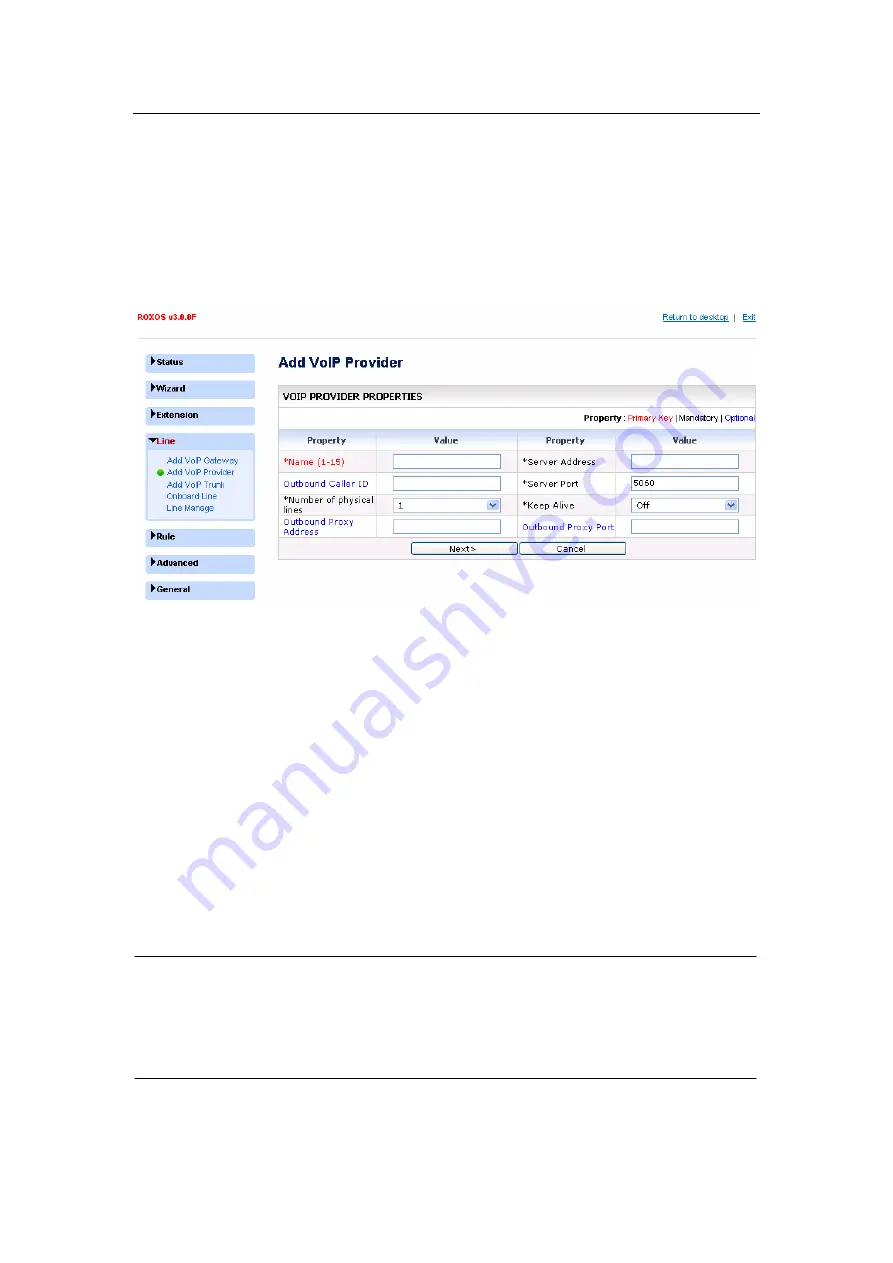
Click the “Lines” menu, and “Add VoIP Provider” submenu. The Add VoIP Provider screen
will appear. You can add a VoIP provider line group and add the SIP accounts acquired
from the VoIP provider.
l
Name –
A description name for memorization. The name will be automatically added
by the system with the prefix “pv_” by the system to clearly indicate it is a provider line
group.
l
Server Address –
The IP address or Domain name of the provider’s SIP server.
l
Server Port –
The SIP port on which the SIP server is operating. Default is 5060.
l
Outbound Caller ID –
An optional parameter which fills into the Caller ID field on
outgoing calls.
l
Keep alive –
Select ON to allow device to check if the line is reachable. Default is
OFF.
l
Number of VoIP lines –
Select the number of VoIP lines supplied by the VoIP
provider and that you are actually using.
l
Outbound Proxy Address –
Send outbound signaling to the proxy instead of directly
to the peer. Enter the Outbound proxy IP address.
l
Outbound Proxy Port –
Enter the Outbound proxy port number.
NOTE:
l
The total number of the lines is 4, including lines added via VoIP gateway, VoIP
provider and VoIP trunk, excluding the 2 onboard lines. So the available number in the list
of the “Number of VoIP lines” may change according to how many lines have been added
and how many lines remain available to be added.
Click the “Next” button, Individual lines will be created and displayed in a columnar format.
You should fill the SIP accounts information acquired from the provider into the fields of
www.vaidsys.ru
Содержание Glidervox-2G
Страница 54: ...54 www vaidsys ru...


