background image

Installation

This section covers:

n

Selecting the location for the camera

n

Verifying that the camera is ready to install

n

Installing the mount

n

Connection diagrams

n

Mounting the camera

And a required safety note here:

Note

PoE type networks connected to this equipment are for intra-building use only and should not be
connected to lines that run outside of the building in which this product is located.

Don’t Void Your Warranty!

Caution

This product is for indoor use. Do not install it outdoors or in a humid environment without the appropriate
protective enclosure. Do not allow it to come into contact with any liquid.

Do not install or operate this product if it has been dropped, damaged, or exposed to liquids. If any of
these things happen, return it to Vaddio for safety and functional testing.

Before You Install the Camera

Prepare for a successful installation:

n

Consider camera viewing angles, lighting conditions, line-of-sight obstructions, and in-wall
obstructions where the camera is to be mounted.

n

Ensure that the camera points away from the ceiling and lights. The camera will not perform well if it is
pointed toward a light source such as a light fixture or window.

n

Mounting the camera at eye level is best. If this is not feasible, mounting the camera above eye level
typically produces a better experience than mounting it below eye level.

n

If you make cables for this installation, check them for continuity.

n

Be sure you can identify all cables correctly.

Cabling Notes

Use Cat-5e or better cable. Use shielded cabling if the cables will be coiled, run tightly with other cables,
or routed near sources of electromagnetic interference such as power lines or fluorescent light fixtures.
We recommend using high-quality connectors and a high-quality crimping tool.

Caution

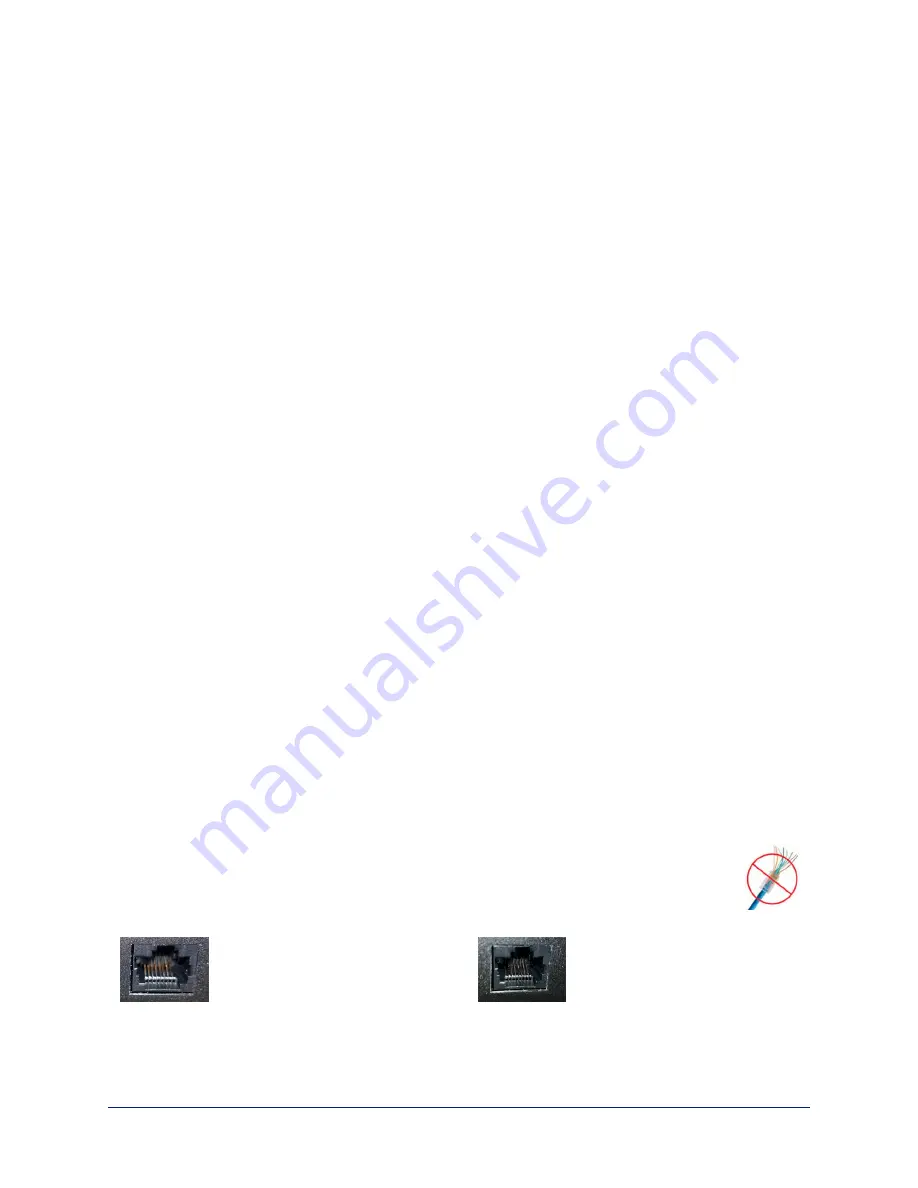
Do not use pass-through RJ-45 connectors when making cables for this product. Poorly
crimped connectors of this type can cause intermittent connections and degraded signal
quality. They can also damage the connectors on the product, which will void your warranty.

Intact

– will make reliable contact

with cable connector

Damaged

– Bent contact fingers

will NOT make reliable contact
with cable connector

Installation Guide for the IntelliSHOT Auto-Tracking Camera

4

Содержание IntelliSHOT

Страница 1: ...Installation Guide for the IntelliSHOT Auto Tracking Camera Document 411 0053 31 Rev A May 2021...

Страница 2: ...4 Before You Install the Camera 4 Cabling Notes 4 Pre Installation Functional Check 5 Getting the Camera s IP Address 5 If the Camera Is At 169 254 1 1 6 Status Lights 6 Installing the Wall Mount 6 Ba...

Страница 3: ...in this guide plus information on configuring operating and troubleshooting the camera Features n Integrated camera and audio system ideal for small to medium conference rooms n IntelliFrameTM intelli...

Страница 4: ...ts up to 10 ft 3 m away Status lights The illuminated trim detail on the camera s face indicates the camera s current state The status lights can be turned off in the administrative web interface Pivo...

Страница 5: ...3 0 USB Type B connector Connect to a computer for use with soft conferencing applications Provides uncompressed USB 3 0 stream HDMI output HDMI video and audio output connector IP button Press to dis...

Страница 6: ...the camera points away from the ceiling and lights The camera will not perform well if it is pointed toward a light source such as a light fixture or window n Mounting the camera at eye level is best...

Страница 7: ...mera as the USB video capture device These screen shots show how to access a camera s USB stream using VLC Media Player In this example the capture device is a different camera If the camera turns on...

Страница 8: ...Active n Red Audio is muted n Blinking red Video is muted n Yellow Firmware update is in progress n Blinking cyan Remote pairing mode n Blinking blue Pairing error Caution Do not remove power or reset...

Страница 9: ...t or using the wrong pin out can result in equipment damage and will void the warranty 1 Connect all required cables to the camera 2 Slide the camera into the mount 3 Secure the cable cover to the mou...

Страница 10: ...e chemicals Keep this device away from food and liquids Do not operate or store the device under any of the following conditions n Temperatures above 104 F 40 C or below 32 F 0 C n High humidity conde...

Страница 11: ...ft cosmonauts Alexander Samokutyaev and Anton Shkaplerov By NASA https www flickr com photos nasa2explore 16166230844 Public Domain https commons wikimedia org w index php curid 38931301 European Spac...

Страница 12: ...ount 6 inverted installation 7 IP address 6 default 6 L light status indicator 6 meaning of colors 6 location of the camera 4 locations of connectors 3 M microphones 7 mount 4 6 mounting the camera 4...

Страница 13: ...and com Vaddio is a registered trademark of Legrand AV Inc All other brand names or marks are used for identification purposes and are trademarks of their respective owners All patents are protected u...

Отзывы: