


4
Please refer to Display Setup - Live Viewing Mode for more information.
DVR Network installation (for TYPE 2)
Please connect DVR to HUB or router by using RJ-45 network cable and
make sure the DVR network indicator LED is on.
(Please refer to Network Setup for further network setting information of
using static IP, PPPoE or DHCP.
5. System Operation
There are 3 kinds of DVR control method: front panel, remote control and USB
mouse.
USB Mouse Operation
1. Quick Menu: Right click the mouse button under the live viewing mode to
go for enter into Quick Menu.
2. Left click the mouse button under the main menu to go to the sub-select
menu.
3. Left click the mouse button under the select menu to go to the sub-menu.
Use the mouse to change the setting.
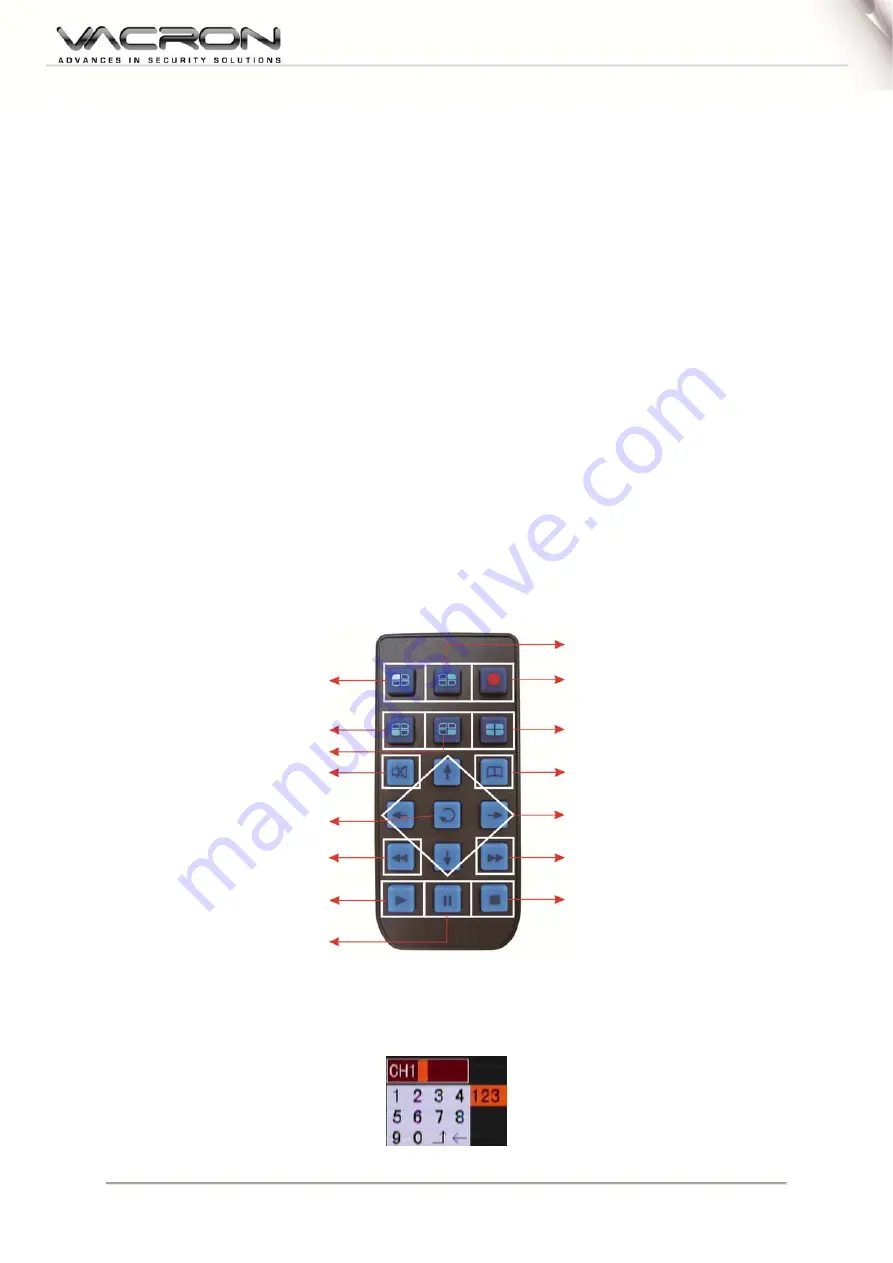
Remote Control Operation
Remote Control and front panel operation are the same; please refer to Front
Panel and the reference table of the button as below.
On live mode, click “Fast Forward” to switch on the GUI display.
Virtual Keyboard Operation
The text input of the virtual keyboard is as below:
CH2 display
Record
Quad display
Menu
Navigator
Fast Forward
Stop/ Remote ID Setup
Step/Pause
CH1 display
CH3 display
CH4 display
Mute
Enter
Fast Rewind
Play
Содержание 4CH / 8CH H.264 Digital Video Recorder
Страница 1: ...4CH 8CH H 264 Digital Video Recorder USER MANUAL 2013 FEB V1 0 optional TYPE2 ...
Страница 28: ...25 Step 3 Select Additional Tasks Step4 Install Confirmation Step 5 Installation Complete ...
Страница 55: ...52 Network setting E MAIL Log search ...
Страница 56: ...53 System Setting Date Time Setting HDD Management Display ...
Страница 57: ...54 System Information Account password Audio Setting ...
Страница 58: ...55 System Maintenance Host setting ...
Страница 60: ...57 ...


