6
17)
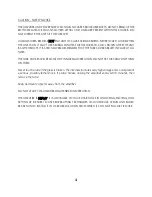
Connect both of the cables between the power supply an d the audio chassis. Note that
each has a locating key and a locking collar. Be sure to insert the connector properly, and
fully tighten the locking collar.
18)
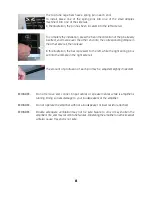
Connect the power cord to the power source indicated on the rear panel (will be either
100, 120, 220, or 240 volts AC). Voltage conversions must be done at the factory of by
an authorized VAC importer.
19)
Avoid power conditioners that float the ground pin.
20)
Power requirements are approximately 1000 watts. Pay close attention to power quality, and
be aware that different power cords can alter the sound.
21)
Check the bias settings of the output tubes when the unit is first
installed
and whenever a tube is changed. It is also a good idea to
verify the settings periodically, such as once a week. Follow the bias
procedure outlined later in this manual.
22)
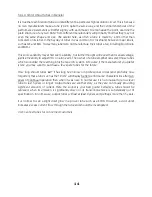
Note that there is a front panel TEST switch; this engages the eight
blue LEDs used for setting or monitoring the bias settings of the KT88
tubes. See Biasing & Checking Output Tube Condition for directions.
NOTE: Do not remove and connect input cables or speaker cables while is amplifier is running.
Doing so risks damage to your loudspeakers or the amplifier.
Do not operate the amplifier without a loudspeaker or load resistor attached.
Do not operate without the front glass and top rails in place.
Take care to keep everyone, especially children and pets, from being able to reach and
touch the tubes, which become extremely hot and cause serious injury.
Never touch a tube if the glass is broken. The internal structures carry high voltage and could
present a serious, possibly lethal shock. If a tube breaks, unplug the amplifier and wait 30
minutes, then remove the tube.
Keep flammable objects away from the amplifier.


