background image

5

4

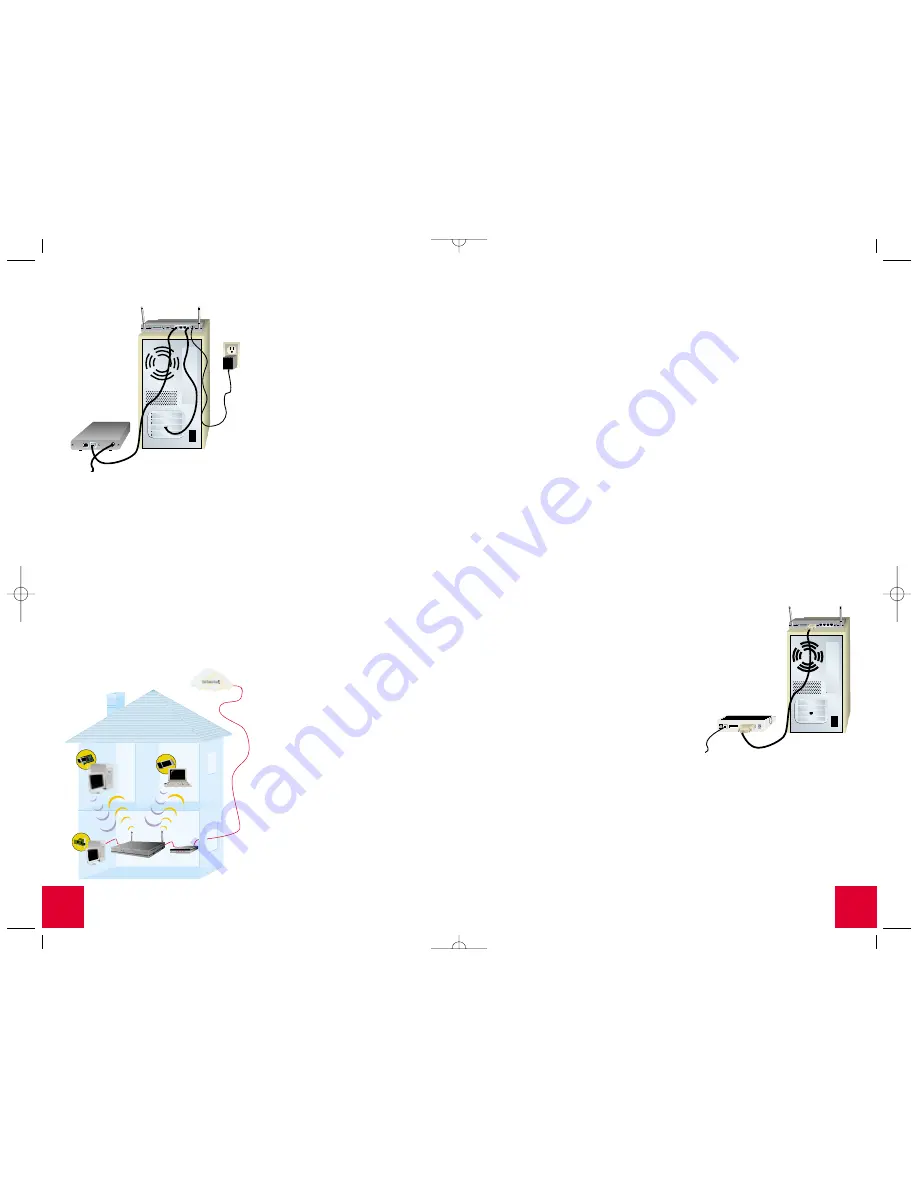
3. Connect the power supply

Turn on your cable or DSL modem. Connect 
the included power cord to the power jack on
the Wireless Cable/DSL Router. Plug the 
power cord into a standard power outlet. 
Turn on your PC.

Congratulations!

The installation procedure is

now complete.

You should now have secure and shared Internet
access. To verify your connection, launch a Web
browser and go to 

www.usr.com

. If the page

loads, you are finished with the installation 
procedure. 

If you have any difficulties connecting to the Wireless Cable/DSL Router,
check the top three issues below and see if they apply to your situation.

• If you are attempting to create a wireless connection, but cannot con-

nect to the Wireless Cable/DSL Router, make sure each Wireless Card
is set to 

Infrastructure

mode. If the Wireless Cards are set to 

802.11b

AdHoc

mode, you will not be able to connect to the Wireless

Cable/DSL Router. When each Wireless Card is set to 

Infrastructure

mode, it should automatically connect to the Access Point of the
Wireless Cable/DSL Router. If the Wireless Cards do not automatically
connect, rescan until they detect the Wireless Cable/DSL Router 

and connect. 

• If you create a wireless connection to the Wireless Cable/DSL Router,

but are experiencing poor link quality, check the positioning of the
Wireless Cable/DSL Router. Long distances, multiple floors, or steel 
or concrete walls can diminish the link quality. If possible, reposition 

the Wireless Cable/DSL Router to reduce the 
effect of any of these obstacles.

If you have the Wireless Cable/DSL Router 
properly connected and can access the 
Internet, but are experiencing difficulties 
connecting with special applications (e.g., 
ICQ, Battle.net, etc.), you must assign 
specific ports in order to bypass the fire-

wall 

function. For more information about how 
to configure this function, refer to the 
"Special Applications" section within the 
"Configuring the Wireless Cable/DSL
Router" chapter of the User Guide. 

Note:

If you want to attach a printer to your 

network, refer to the Print Server section of the 
User Guide for installation instructions.

For troubleshooting and support information, 
refer to the Companion Reference Guide or to 
the User Guide on the U.S. Robotics 
Installation CD-ROM.

Connecting an Analog or ISDN modem to the
Wireless Cable/DSL Router

There are two main reasons why you would want to use either an 
analog or ISDN modem with the Wireless Cable/DSL Router:

• You use dial-up Internet service instead of cable or DSL

Internet service.

• You have cable or DSL Internet service but want to have an analog 

or ISDN backup in case your broadband Internet service is unavailable.

Perform the following steps to connect an analog or ISDN modem, 
manually change the WAN type, and properly configure the Wireless
Cable/DSL Router:

1. Connect your modem to the Wireless 

Cable/DSL Router

Turn off your PC and your analog or ISDN modem. 

Connect a serial modem cable to your analog or ISDN modem and to the
COM port on the Wireless Cable/DSL Router.

Note:

If your analog or ISDN modem is connected to your PC using a USB

cable, disconnect the USB cable from both your PC and from your analog or
ISDN modem.

2 Connect your Wireless Cable/DSL

Router to your computer

To make an Ethernet connection:

Connect one end 

of the supplied Ethernet cable to your PC's Ethernet
adapter. Connect the other end to one of the LAN 
ports on the Wireless Cable/DSL Router.

To make a wireless connection: 

Make sure each

Wireless Card that will be connecting to the network 
is set to 

Infrastructure

mode. 

Note:

Each Wireless Access PC Card or PCI Adapter in the

wireless network must have the 

Infrastructure

mode

selected within the Configuration Utility. Refer to your
Wireless Access PC Card or PCI Adapter documentation 
for information on selecting 

Infrastructure

mode.

RESET

PRINTER

COM

WAN

3

2

1

12VDC

USB

ENET

PWR

RF

Cable/DSL/ISDN/ 
or Analog Modem

Model-2415 

Wireless Access 

PCI Adapter

Model-2410 

Wireless Access 

PC Card

Model-7900 

10/100 Mbps Network Card

Model-8011

Wireless Access Point Router

RESET

PRINTER

COM

WAN

3

2

1

12VDC

Содержание USR8011

Страница 1: ...Wireless Cable DSL Router Companion Reference Guide R24 0262 00 ...

Страница 2: ... Windows XP CD ROM Internet Explorer 4 or later OR Netscape 4 or later Front View 1 Power LED The green Power LED stays lighted to indicate the system is functioning properly and flashes during the self test phase or firmware upgrade process 2 Status LED This LED blinks to indicate normal system status 3 Config LED This LED blinks to indicate that the product is being configured or upgraded 4 W LA...

Страница 3: ...g or ISDN modem to the Wireless Cable DSL Router section of this Guide RESET PRINTER COM WAN 3 2 1 12VDC 1 2 3 4 5 6 Connecting a cable or DSL modem to the Wireless Cable DSL Router 1 Connect your modem to the Wireless Cable DSL Router Turn off your PC and your cable or DSL modem Locate the Ethernet cable from your cable or DSL modem that is connected to your PC s Ethernet adapter Disconnect that ...

Страница 4: ...ter of the User Guide Note If you want to attach a printer to your network refer to the Print Server section of the User Guide for installation instructions For troubleshooting and support information refer to the Companion Reference Guide or to the User Guide on the U S Robotics Installation CD ROM Connecting an Analog or ISDN modem to the Wireless Cable DSL Router There are two main reasons why ...

Страница 5: ...able DSL Router and connect If you create a wireless connection to the Wireless Cable DSL Router but are experiencing poor link quality check the positioning of the Wireless Cable DSL Router Long distances multiple floors or steel or concrete walls can diminish the link quality If possible reposition the Wireless Cable DSL Router to reduce the effect of any obstacles If you have the Wireless Cable...

Страница 6: ...lation Wizard When prompted to choose how your printer is attached to your computer select Local Printer Make sure that Automatically detect and install my Plug and Play printer is not selected Select USRPRTSHR for the printer port and click Next You will then need to supply Windows with the correct printer drivers provided by the printer s manufacturer When you are prompted to print a test page s...

Страница 7: ...in and hold the RESET button for five seconds This will reset the Wireless Cable DSL Router to the factory default set tings If you applied any personal configuration settings you will need to make the changes again My Cable or DSL service is not working but I need to access the Internet Possible Solution If you have an external analog modem and dial up Internet service you can still access the In...

Страница 8: ...7402 usrapsupport usr com 9 00 A M 5 00 P M M F Japan 03 5495 9408 usrapsupport usr com 9 00 A M 5 00 P M M F Korea usrapsupport usr com 9 00 A M 5 00 P M M F Malaysia 1800 80 1554 usrapsupport usr com 9 00 A M 5 00 P M M F Philippines 1800 1 651 0215 usrapsupport usr com 9 00 A M 5 00 P M M F Singapore 65 784 9910 usrapsupport usr com 9 00 A M 5 00 P M M F South Korea 00798 651 7135 usrapsupport ...

Страница 9: ...s guide If this option is not selected you will need to collect the necessary configuration information if it was not provided by your Service Provider Depending on your operating system you may need to click multiple tabs within the TCP IP window to obtain all the necessary information Select the Obtain an IP address automatically option and click OK If necessary click OK again to close the Netwo...

Страница 10: ...ws XP Users Click Windows Start and then Control Panel Double click Network Connections Right click your ISP connection and click Properties Click the Networking tab select Internet Protocol TCP IP from the menu and click Properties Proceed to Step B Macintosh OS 9 x Users Click Apple Control Panels and then TCP IP Proceed to Step B Macintosh X Users Click Apple System Preferences and then Network...

Страница 11: ... detailed in Annex II of Directive 1999 5 EC has been followed This product has been approved for use in the following countries France Germany Italy Spain Portugal The Netherlands Austria Denmark Switzerland and the United Kingdom U S Robotics Corporation Limited Warranty HARDWARE U S Robotics warrants to the end user Customer that this hardware product will be free from defects in workmanship an...

Страница 12: ...ENTAL CONSEQUENTIAL INDIRECT SPECIAL OR PUNITIVE DAMAGES OF ANY KIND OR FOR LOSS OF REVENUE OR PROFITS LOSS OF BUSINESS LOSS OF INFORMATION OR DATA OR OTHER FINANCIAL LOSS ARISING OUT OF OR IN CONNECTION WITH THE SALE INSTALLATION MAINTENANCE USE PERFORMANCE FAILURE OR INTERRUPTION OF ITS PRODUCTS EVEN IF U S ROBOTICS OR ITS AUTHORISED RESELLER HAS BEEN ADVISED OF THE POSSIBILITY OF SUCH DAMAGES A...

Страница 13: ...21 Printed in Taiwan ...

Отзывы: