US Blaster Turntable USB 7363 User Guide
6
Put the lever (8), with which you have just lowered the arm, back again. Now put the arm carefully
back in the arm holder and lock it. Then also fasten the protective cap back on to the element.
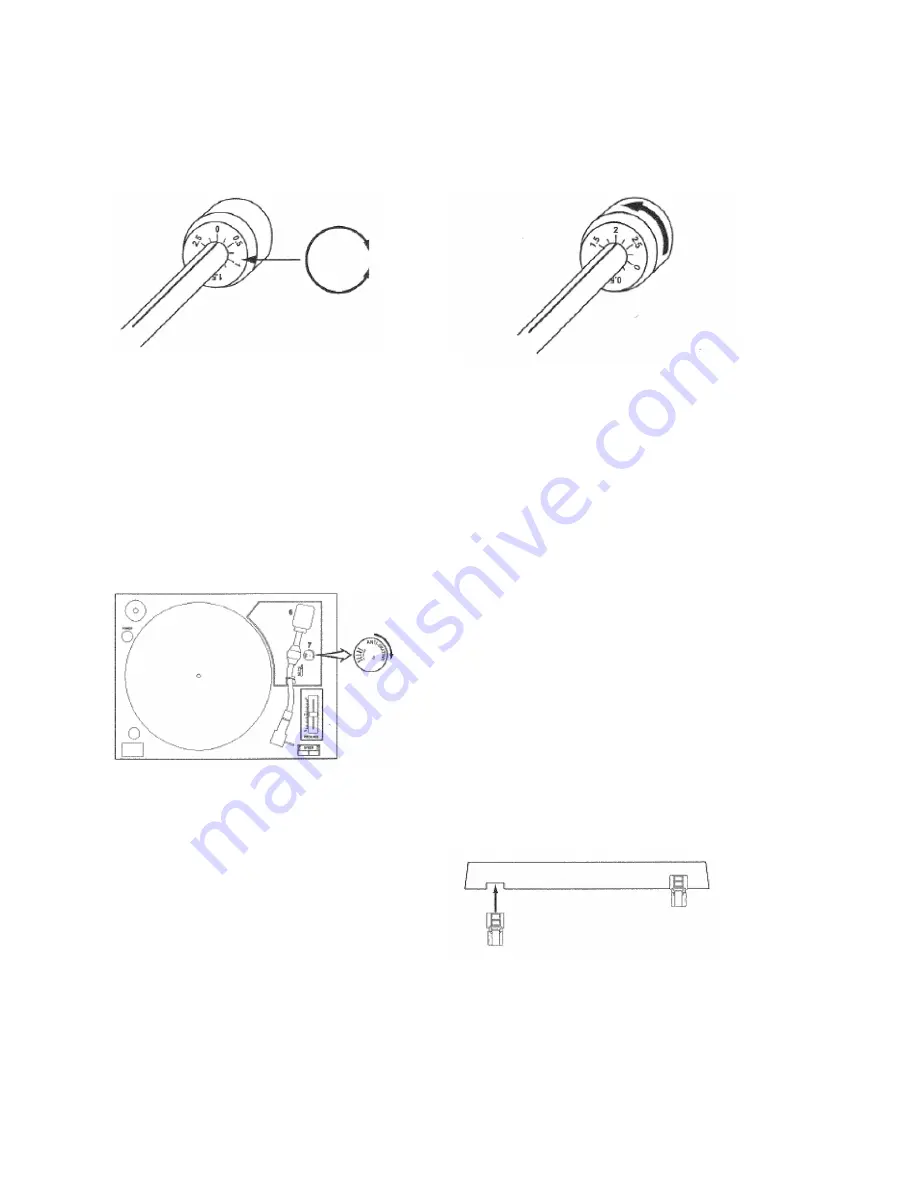
You can now set the numbered ring by the counterweight in such a way that the value 0 is level with
the line on the pick-up arm.
The scale on the ring indicates the weight of the needle pressure in grams. Depending on the element
that you have fitted in your pick-up arm, you can set the correct needle pressure.
You do this by turning the counterweight so that the numbered ring is set to the desired weight.
For the element supplied with the turntable you have to set the needle pressure to 2 (2 grams).
Setting ring in balanced position
Setting needle pressure
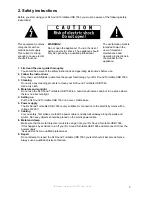
4.4 Setting antiskating compensation.
The antiskating compensation enables the needle to be set correctly for the record. If this angle is not
correct (the needle does not go into the groove on the record straight) you will not get the optimal
sound from the record, and there is an increased chance of extra wear to the record. The antiskating
compensation prevents this.
The rule of thumb is that the antiskating compensation is more or less the same as the needle
pressure.
Set the control for the antiskating compensation (7) to 2 therefore, if you are using the supplied
element.
Setting antiskating compensation
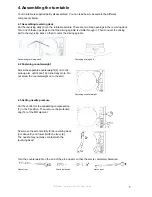
4.5 Assembling dust cap
Now you can set up the turntable, you can fit the
dust cap. You can slide the hinge on the
underside of the dust cap into the intended
grooves. Then you can fit the dust cap on the
turntable.


