4
Final Installation:
Confirm that connecting wires are present at the speaker locations you’ve chosen.
You’re now ready for the final installation.
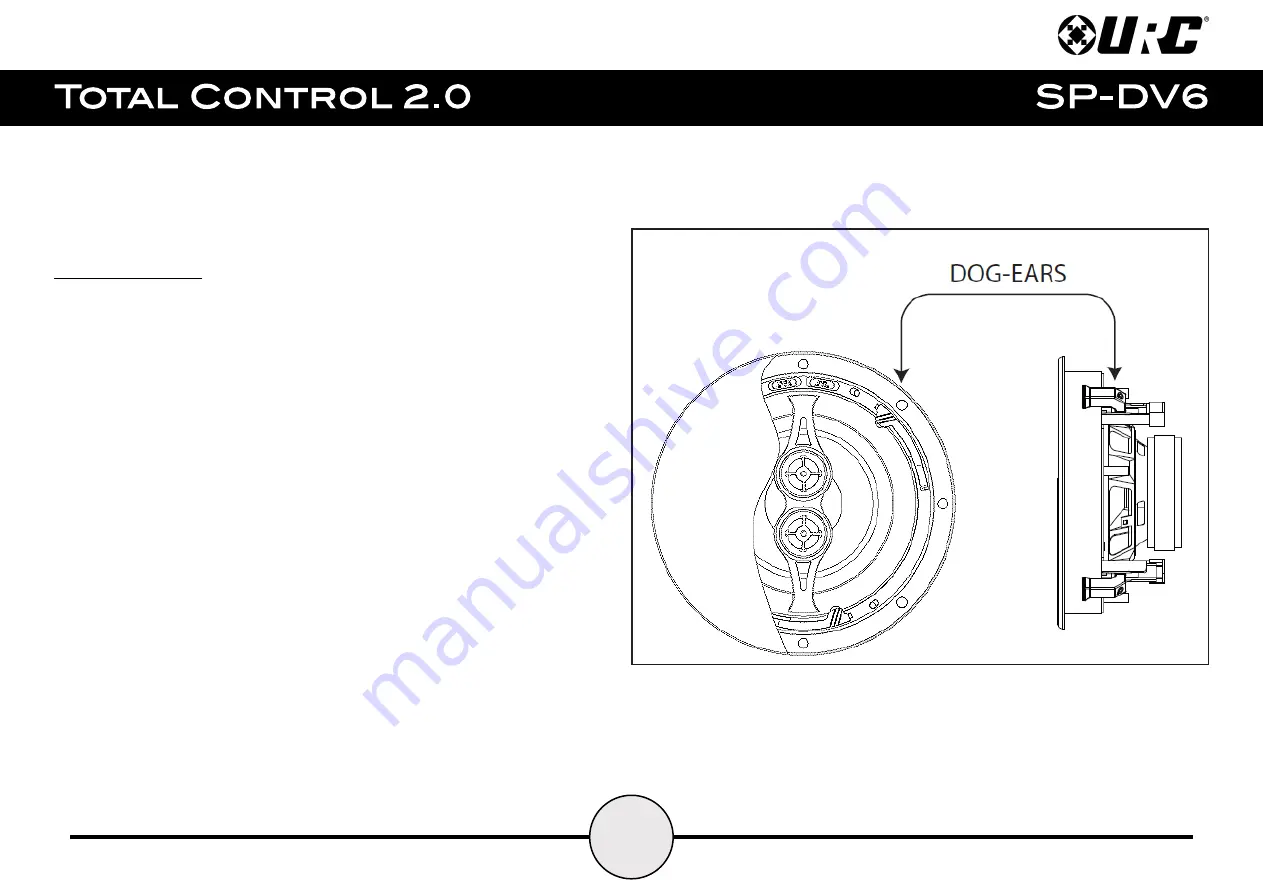
It is usually best to turn the speaker over (grill down) and securely hold the outer flange
for support. Then return the dog ears to their previous position so they are tight against
the frame and won’t interfere when pushing the speaker into the cut-out.
Make sure the dog ears are flush against the speaker frame so they will clear when
pushing the speaker into the cut-out hole and connecting the removable speaker plugs.
Hold the speaker securely near the cut-out hole and connect the positive and negative
wires, making sure to observe polarity – usually wiring will correspond in color to the
push terminals, red to red (+) and black to black (-).
When the connecting wires are secure, push the speaker into the cut-out until flush with
the ceiling surface, push the clamps down to tighten the dog ears to the ceiling. For
further instruction, refer to page 6. This will automatically rotates the dog ears away
from the frame and pulls them to the rear of the mounting surface.
Содержание Total Control 2.0 SP-DV6
Страница 1: ......


