background image

20

21

 UPPAbaby MESA Instruction Book

 UPPAbaby MESA Instruction Book

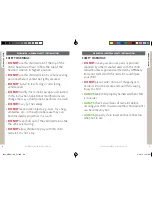
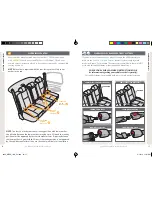
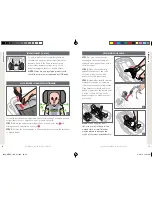
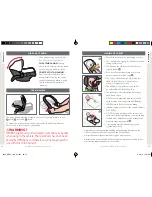
SAFETY CHECK

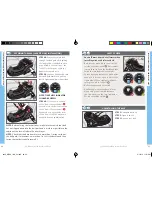
UNINSTALLING BASE

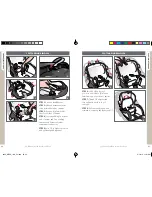
STEP 1:

 Press the red button on the lower anchor connector   while 

pulling the connector off the vehicle anchor  . 

STEP 2:

 Store lower anchor connectors in designated housing found on 

each side of the base. 

1

2

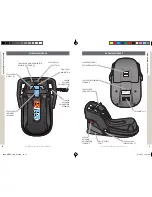
BASE INS

TALL

ATION WITH L

O

WER ANCHORS

BASE INS

TALL
ATION WITH L

O

WER ANCHORS

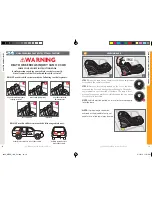
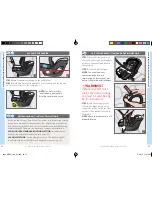
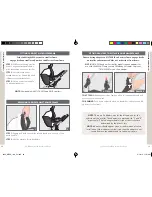
STEP 3:

 Locate the lower anchor connectors on either side of the base and  

remove by pushing the corresponding orange button on the top of the base 

 while pulling the connector out of the lower anchor storage pocket


STEP 4:

 Attach the lower anchor connectors to the vehicle lower anchors  

located in the vehicle seat bight (crease of seat).

NOTE: 

Check lower anchor connectors are in the upright position.

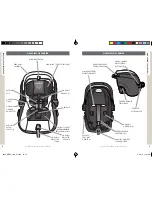
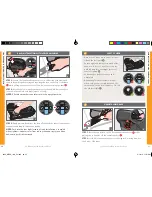
BASE INSTALLATION WITH LOWER ANCHORS

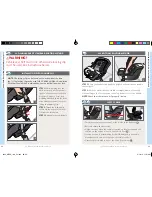
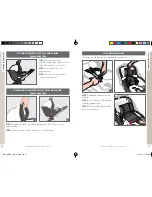
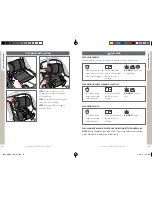
STEP 5:

 Apply pressure firmly into the base allowing all the excess lower anchor  

connector webbing to retract and tighten.  

NOTE:

 Push into the seat bight (crease of seat). Installation is complete 

when tightness indicator turns from red to green and stays green when 
downward push is discontinued.

5

3

4

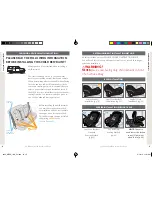
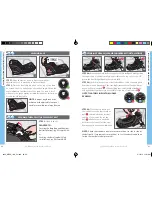
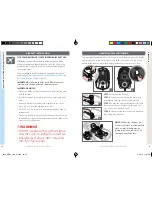
•  Base doesn’t move more than 1 in side to 

side at the belt path  .

•  Ensure tightness indicator is green after 

each use. If it is not, apply pressure by 
pushing base into seat bight (crease of 
seat) to tighten  .

•  Lower anchor belts are secure and  

untwisted

•  Recline angle is correct. Base is level 

when only green is visible between the 
two arrows on the level indicator. No red 
should be visible  .

LEVEL WHEN

NO RED

VISIBLE

LEVEL WHEN

NO RED

VISIBLE

LEVEL WHEN

NO RED

VISIBLE

LEVEL WHEN

NO RED

VISIBLE

0225_MESA_INS_V4.indd   20-21

3/19/15   11:07 AM

Содержание mesa

Страница 1: ...From 4 35 lbs ...

Страница 2: ...STALLATION WITH LOWER ANCHORS 19 LEVELING BASE 19 BASE INSTALLATION WITH LOWER ANCHORS 20 SAFETY CHECK 21 UNINSTALLING BASE 21 BASE INSTALLATION WITH VEHICLE SEAT BELT 22 LEVELING BASE 22 SECURING THE BASE WITH VEHICLE SEAT BELT 22 SECURING THE BASE LAP AND SHOULDER BELT INSTALLATION 23 SECURING THE BASE LAP BELT ONLY INSTALLATION 24 SAFETY CHECK 25 UNINSTALLING BASE 25 REAR FACING SEAT FEATURES 1...

Страница 3: ... should not be less than 1 in from the top of the headrest when in its highest position Harness should be at the shoulders or slightly below Retainer clip must be at armpit level and harness straps should be snug BEFORE YOU BEGIN CARE MAINTENANCE 41 SIP PADDING REMOVAL 41 SEAT PADDING REMOVAL 42 SEAT PADDING INSTALLATION 44 SIP PADDING INSTALLATION 46 CLEANING 47 LIMITED WARRANTY 48 GENERAL USE 31...

Страница 4: ...after 7 years from the date of manufacture or after a crash Refer to labels on bottom of Carrier and Base NOTICE OF EXPIRATION CARRIER BASE BEFORE YOU BEGIN WARNINGS GENERAL SAFETY INFORMATION WARNING DEATH OR SERIOUS INJURY CAN OCCUR BEFORE YOU BEGIN According to accident statistics children are safer when properly restrained in the rear seating positions than in the front seating positions Child...

Страница 5: ...strings on or over the carrier or attach to handle BEFORE YOU BEGIN WARNINGS GENERAL SAFETY INFORMATION NEVER place items with a string around a child s neck such as hood strings pacifier cords etc FALL HAZARD Child s movement can slide carrier NEVER place carrier on counter tops tables or any other elevated surfaces DO NOT use on shopping carts SAFETY WARNINGS Failure to follow these instructions...

Страница 6: ...r anchor connectors when not in use BEFORE YOU BEGIN SAFETY WARNINGS DO NOT use this child restraint if the top of the child s head is less than 1 in from the top of the headrest when in its highest position DO NOT use this child restraint in a vehicle seating position where it cannot be tightly secured DO NOT install in rear facing or side facing vehicle seats DO NOT modify this restraint except ...

Страница 7: ...B L E LEVELWHEN NORED VISIBLE L E V E L W H E N N O R E D V I S I B L E LATCH page páge 19 LATCH 1 2 3 3 2 1 4 To view installation videos visit Para ver los vídeos de instalación visite http uppababy com mesainstall LEVEL ADJUST BUTTON TIGHTNESS INDICATOR LOWER ANCHOR CONNECTORS LOWER ANCHOR CONNECTOR WEBBING VEHICLE BELT GUIDES 2 VEHICLE BELT LOCK OFF CLOSED LOWER ANCHOR CONNECTOR RELEASE BUTTON...

Страница 8: ...T BUTTONS 2 STROLLER ATTACHMENT OVERVIEW OF CARRIER RETAINER CLIP SIDE IMPACT PROTECTION SIP SIP ADJUSTER TAB HARNESS COVERS 2 HARNESS STRAPS HARNESS HOLDER POCKETS 2 HIDE AWAY CANOPY BUCKLE LATCH PLATES 2 BUCKLE INFANT INSERT RECOMMENDED BETWEEN 4 8 LBS HARNESS ADJUSTER STRAP HARNESS ADJUSTER RELEASE OVERVIEW OF CARRIER REAR FACING SEAT FEATURES REAR FACING SEAT FEATURES MANUFACTURED EXPIRATION D...

Страница 9: ...s child restraint you must determine the method of installation and the best vehicle seating position for that method This child restraint can be installed either using LATCH or the Vehicle Seat Belt LOWER ANCHORS VEHICLE SEAT BELT RETRACTOR VEHICLE SEAT BELT VEHICLE COMPATIBILITY DETERMINING BEST INSTALLATION METHOD BASE INSTALLATION CARRIER INSTALLATION WITHOUT BASE At this point take out your V...

Страница 10: ...BING WEBBING LATCH PLATE LATCH PLATE BUCKLE BUCKLE OVERVIEW OF LATCH Most vehicles manufactured after September 1 2002 are equipped with LATCH Lower Anchors and Tethers for CHildren Check your vehicle owner s instruction book to determine lower anchor compatible seating positions NOTE No tether is required with this rear facing carrier Only lower anchors are used OUTBOARD LOWER ANCHORS INBOARD LOW...

Страница 11: ...EVELING BASE LEVEL WHEN NO RED VISIBLE LEVEL WHEN NO RED VISIBLE LEVEL WHEN NO RED VISIBLE LEVEL WHEN NO RED VISIBLE 1 2 UNSAFE VEHICLE SEAT BELT SYSTEMS SEATING WARNING DEATH OR SERIOUS INJURY CAN OCCUR Lap belts with emergency locking retractor Motorized automatic Lap Shoulder with two retractors Inflatable Vehicle seats that face side of the vehicle Door mounted Vehicle seats that face rear of ...

Страница 12: ...ck lower anchor connectors are in the upright position BASE INSTALLATION WITH LOWER ANCHORS STEP 5 Apply pressure firmly into the base allowing all the excess lower anchor connector webbing to retract and tighten NOTE Push into the seat bight crease of seat Installation is complete when tightness indicator turns from red to green and stays green when downward push is discontinued 5 3 4 Base doesn ...

Страница 13: ...until you hear an audible click 4A 5A 6A 5A BASE INSTALLATION WITH VEHICLE SEAT BELT STEP 1 Place the base on the vehicle seat with the adjustment foot toward the vehicle seat back STEP 2 Press the level adjust button on the top of the base to extend the foot and change the recline angle Check the angle indicators on either side of the base The base is level when only the green marker is visible b...

Страница 14: ...IBLE LEVEL WHEN NO RED VISIBLE LEVEL WHEN NO RED VISIBLE 4B 5B STEP 4B Route the vehicle belt through the belt path while guiding the lap portion of the belt as close as possible to the topside of the lock off where the door hinges Buckle the vehicle belt STEP 5B With one hand push down base and hold firm as you pull lap belt to tighten and remove any slack NOTE TIGHTNESS INDICATOR SHOULD BE GREEN...

Страница 15: ... installation LAP SHOULDER STANDARD ROUTING METHOD Installation with both the lap and shoulder belt proceed to pg 27 LAP ONLY METHOD No shoulder belt is used This method applies to vehicle with no shoulder belt and aircraft proceed to pg 29 LAP SHOULDER BELT STANDARD ROUTING METHOD STEP 1 Route the lap portion of the seat belt through both lap belt guides on the carrier and buckle the seat belt ST...

Страница 16: ... See instructions below INSTALLATION WITH LOCKING CLIP Carrier doesn t move more than 1 in side to side at the belt path Belts are secure and untwisted Angle is correct when the vehicle is parked on level ground and the red line on the carrier is level to the vehicle floor Seating position is permitted by both UPPAbaby and your vehicle manufacturer for use with the type of Vehicle Seat Belt Carry ...

Страница 17: ...y handle in any of the 3 locked positions for use in the aircraft as long as it doesn t interfere with the back of the seat in front of the carrier WARNING DO NOT use base with aircraft installation Only the carrier is certified for aircraft use Inflatable seat belts are NOT compatible with this child restraint GENERAL USE CARRIER INSTALLATION WITH VEHICLE SEAT BELT HARNESS BUCKLE POSITIONING The ...

Страница 18: ... and tuck the latch plates into the side pockets to hold harness open STEP 3 Place infant in child restraint making sure their body is making full contact with the seating surface Place harness over child and insert buckle tongues into the buckle until a click is heard Pull up on the buckle tongues to make sure they are locked NOTE When using the inner slot with a small infant a rolled washed clot...

Страница 19: ... Pinch harness webbing at child s shoulders If you can pinch webbing the harness is too loose and should be tightened GENERAL USE NOTE For smaller babies it is recommended to remove the harness pads for a more secure fit GENERAL USE STEP 1 Place carrier on base until a click is heard STEP 2 Check for a secure connection by pulling up on carry handle STEP 1 Pull and hold carrier release button on b...

Страница 20: ...harness should be at the shoulders or slightly below Retainer clip must be at armpit level and harness straps should be snug The top of child s head should not be less than 1 in from the top of the headrest when in its highest position The child must weigh between 4 and 35 pounds and be no taller than 32 in The back seat is the safest place for children aged 12 and under NEVER use non regulated pr...

Страница 21: ...4 AND EARLIER FRAME TO ATTACH Place adapters logo facing out onto seat attachments and press until you hear a click TO REMOVE Push down release button on backside of adapter and lift up from stroller frame Prior to fitting adapter to VISTA 2014 and earlier frame engage brake on stroller and remove toddler seat or bassinet from frame NOTE VISTA 2014 and earlier stroller models require adapters for ...

Страница 22: ...TERS STEP 1 With carrier facing stroller handle align carrier stroller hubs with adapters on stroller STEP 2 Let carrier slide onto adapter posts STEP 3 Lift up on carrier handle to check attachment 1 2 STEP 1 Unbuckle retainer clip and harness STEP 2 Pull forward on SIP padding releasing harness straps STEP 3 Pull SIP padding down from bottom and release SIP PADDING REMOVAL 3 1 2 CARE MAINTENANCE...

Страница 23: ...er and free padding from around harness adjuster release button housing STEP 5 Raise SIP to highest position and pull back padding panel 1 2 4 5 3 CARE MAINTENANCE SEAT PADDING REMOVAL STEP 6 Slide SIP to lowest position and release 6 plastic tabs from upper portion of carrier STEP 7 Thread SIP adjuster tab through buttonhole in top of seat pad STEP 8 Pull seat padding up and forward to remove pad...

Страница 24: ...in seat padding STEP 5 Install buckle cover tucking tabs through buttonhole STEP 6 Raise the SIP and place buckle in harness holder pockets 1 2 4 3 6 5 CARE MAINTENANCE CARE MAINTENANCE SEAT PADDING INSTALLATION STEP 7 Lift lower part of SIP and secure padding panel STEP 8 Pull harness adjuster strap through opening in seat pad and install pad around harness adjuster release button housing STEP 9 ...

Страница 25: ... with mild detergent Dry flat and away from direct sunlight before re use or storage DO NOT bleach iron or dry clean CLEANING HARNESS WEBBING CANOPY Spot clean using warm water with mild detergent Air dry completely before re use or storage DO NOT bleach or iron CLEANING PLASTIC Spot clean using warm water with mild detergent Towel dry completely before re use or storage DO NOT bleach CLEANING BUC...

Страница 26: ...ue will NOT be covered by this warranty if The issue is caused by misuse or poor maintenance Please refer to this instruction book for guidance on car seat use and maintenance Damage is caused by improper installation of UPPAbaby parts and or accessories Please refer to this instruction booklet for guidance on car seat assembly and use Damage is corrosion caused by lack of maintenance or service D...

Страница 27: ...rved 2014 UPPAbaby UPPAbaby and all associated logos are trademarks All product specifications are correct at time of print UPPAbaby reserves the right to change anything at any time without prior notice Color representation is as close as print processes allow Not all colors available at all retailers 031915 ...

Отзывы: