Uponor Smatrix Wave PLUS U@home R-167 – Installation and con
fi
guration l 3
03 | 2015
Uponor Smatrix
Wave PLUS
E N I N S TA L L AT I O N A N D
O P E R AT I O N
M A N U A L
Installation and configuration
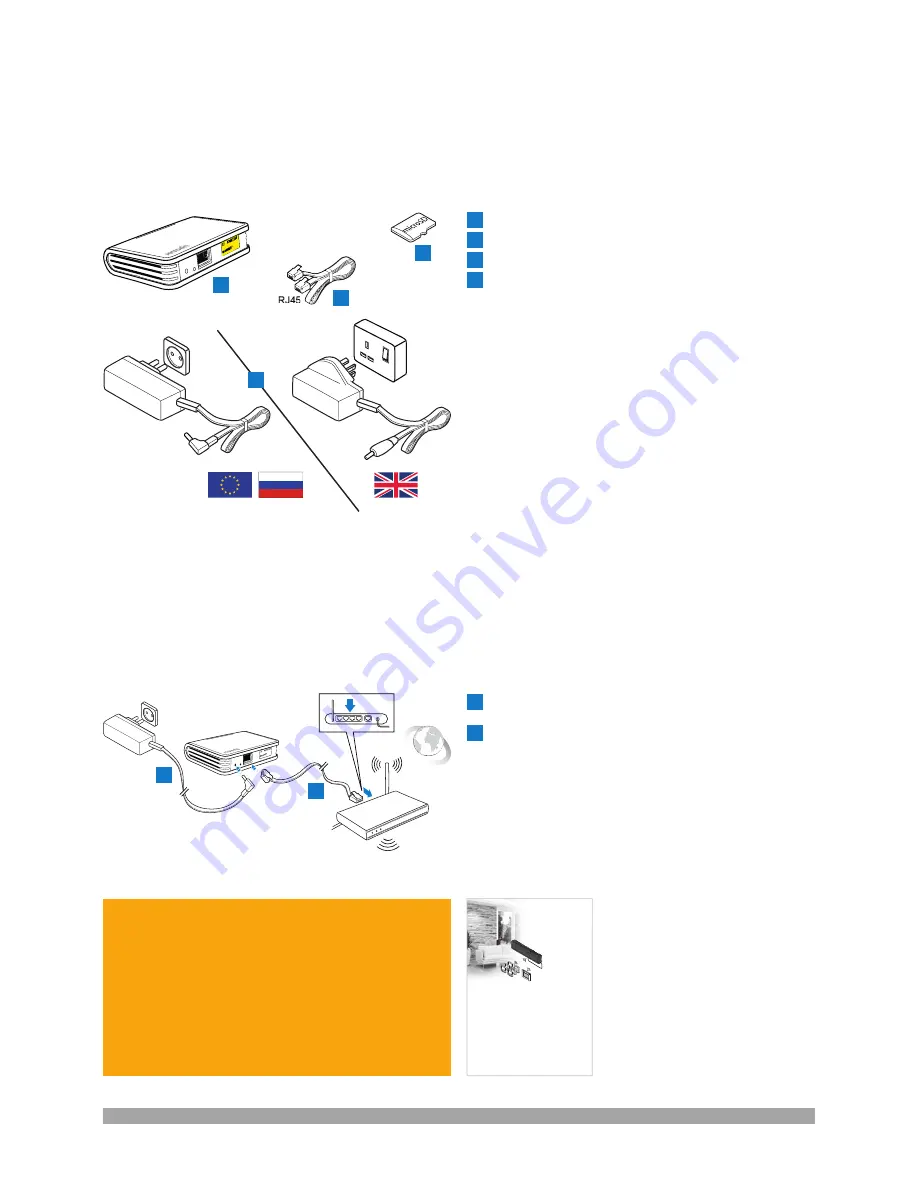
What is inside your U@home package?
I
U@home
module
II
Power
supply
III
Standard Ethernet cable (RJ45 connector)
IV
Micro SD card
UK
EUROPE & RUSSIA
I
II
III
IV
U@home module installation
The new Smatrix Wave PLUS U@home module R-167
(U@home module) has been designed to be placed on a table
or wall-mounted close to your home router.
1
Connect the Ethernet cable [III] to the back of the U@home module and
to one of the free ports on your router.
2
Connect the round power supply connector to the back of the U@home
module. Plug in the power supply. Now you should see the U@home
module LEDs indicating that it is powered.
1
2
Check the software version of Uponor Smatrix Wave
PLUS Interface I-167 (interface I-167). It should be
version 1.01 or later. If not, you need to update the
software by using the provided SD card [IV]. Use the
touch screen (interface I-167), go to the “Main menu” >
“Settings” > “SD card” > “Update with SD card”.
Please see further instructions in the Uponor Smatrix
Wave PLUS manual.


