


© UPLIFT Desk
• 800-349-3839 • [email protected] • upliftdesk.com
CAUTION:
Read all instructions before assembly. Failure to assemble or operate properly may
result in damage or personal injury. Retain manual for future reference.
CAUTION:
Maximum weight limit for all keyboard trays is 10 lb. Do not overload
CAUTIONS & WARNINGS
!
!
!
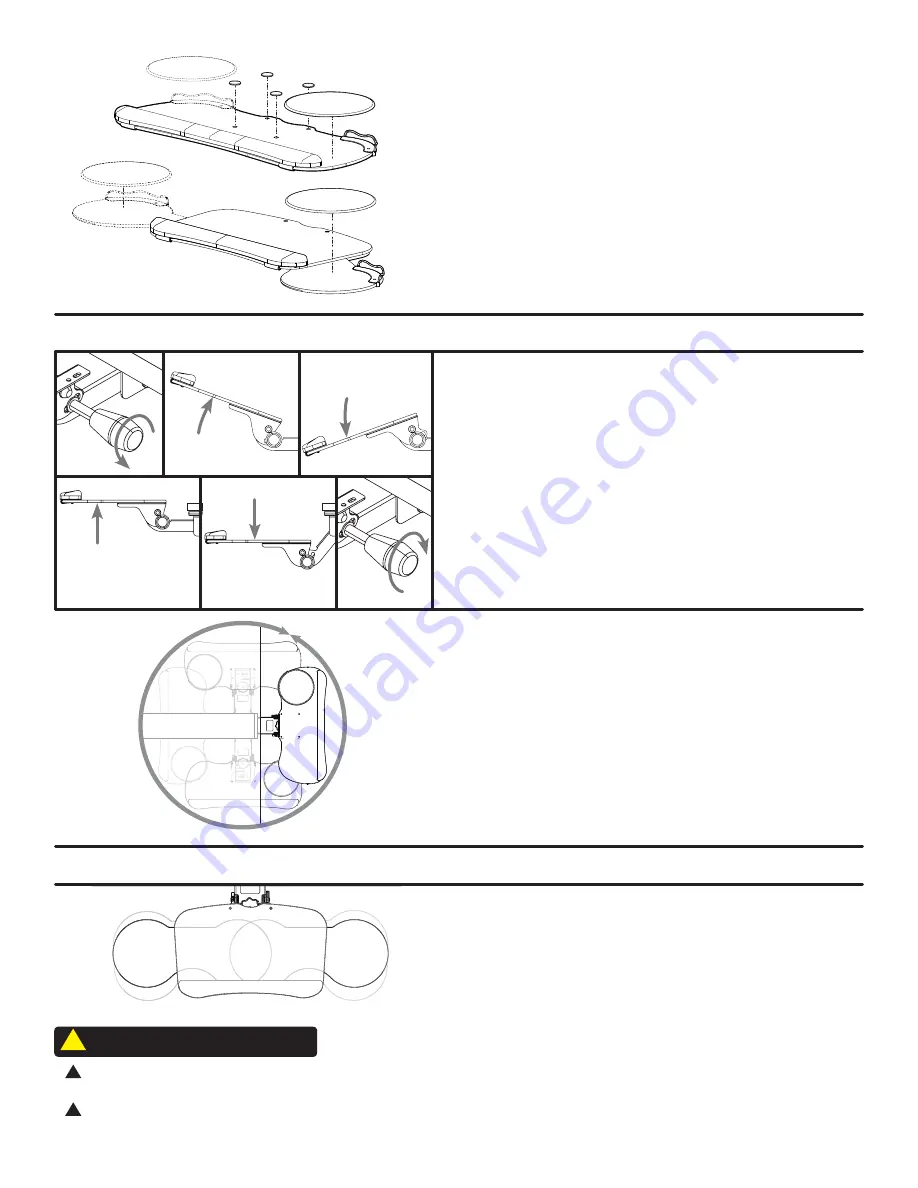
Rotate
The Tray rotates at the point where the Mechanism attaches to
the Track. The Tray can rotate a full 360 degrees (unless it is ob-
structed by something underneath the desktop).
Tilt and Height
Twist the adjustment knob counterclockwise to loosen the Mecha-
nism. This will allow you to tilt the Tray up and down, and to adjust
the overall height of the tray.
Once you’ve gotten your Tray to a position you are comfort-
able with, twist the adjustment knob clockwise to tighten the
Mechanism.
Adjustments applicable to all Keyboard Trays
Adjustments applicable to the Switch Keyboard Tray only
360°
Swapping sides for your mousing platform
The mousing platform on the Switch tray can slide from the right
or left side. It can also be adjusted forward and backwards.
Step 7
For the Big Ultra-Thin and Big Standard Trays:
Place the Mouse
pad and Cord catcher on the desired side. The non-slip Adhesive
pads keep keyboards from sliding and can be placed over the
heads of the machine screws, or in any other spot on the tray. Use
the Wire clip anywhere you need to secure loose wires to prevent
snags.
For the Switch Tray:
Slide the mouse platform to desired side and
place the Mouse pad and Cord catcher onto the platform. The non-
slip pads can be placed in any position on the tray. Use the Wire
clip anywhere to secure loose wires to prevent snags.


