2. Procedures for the first-time use
2-1. Connect the AC adapter and UTM
Ⅱ
■
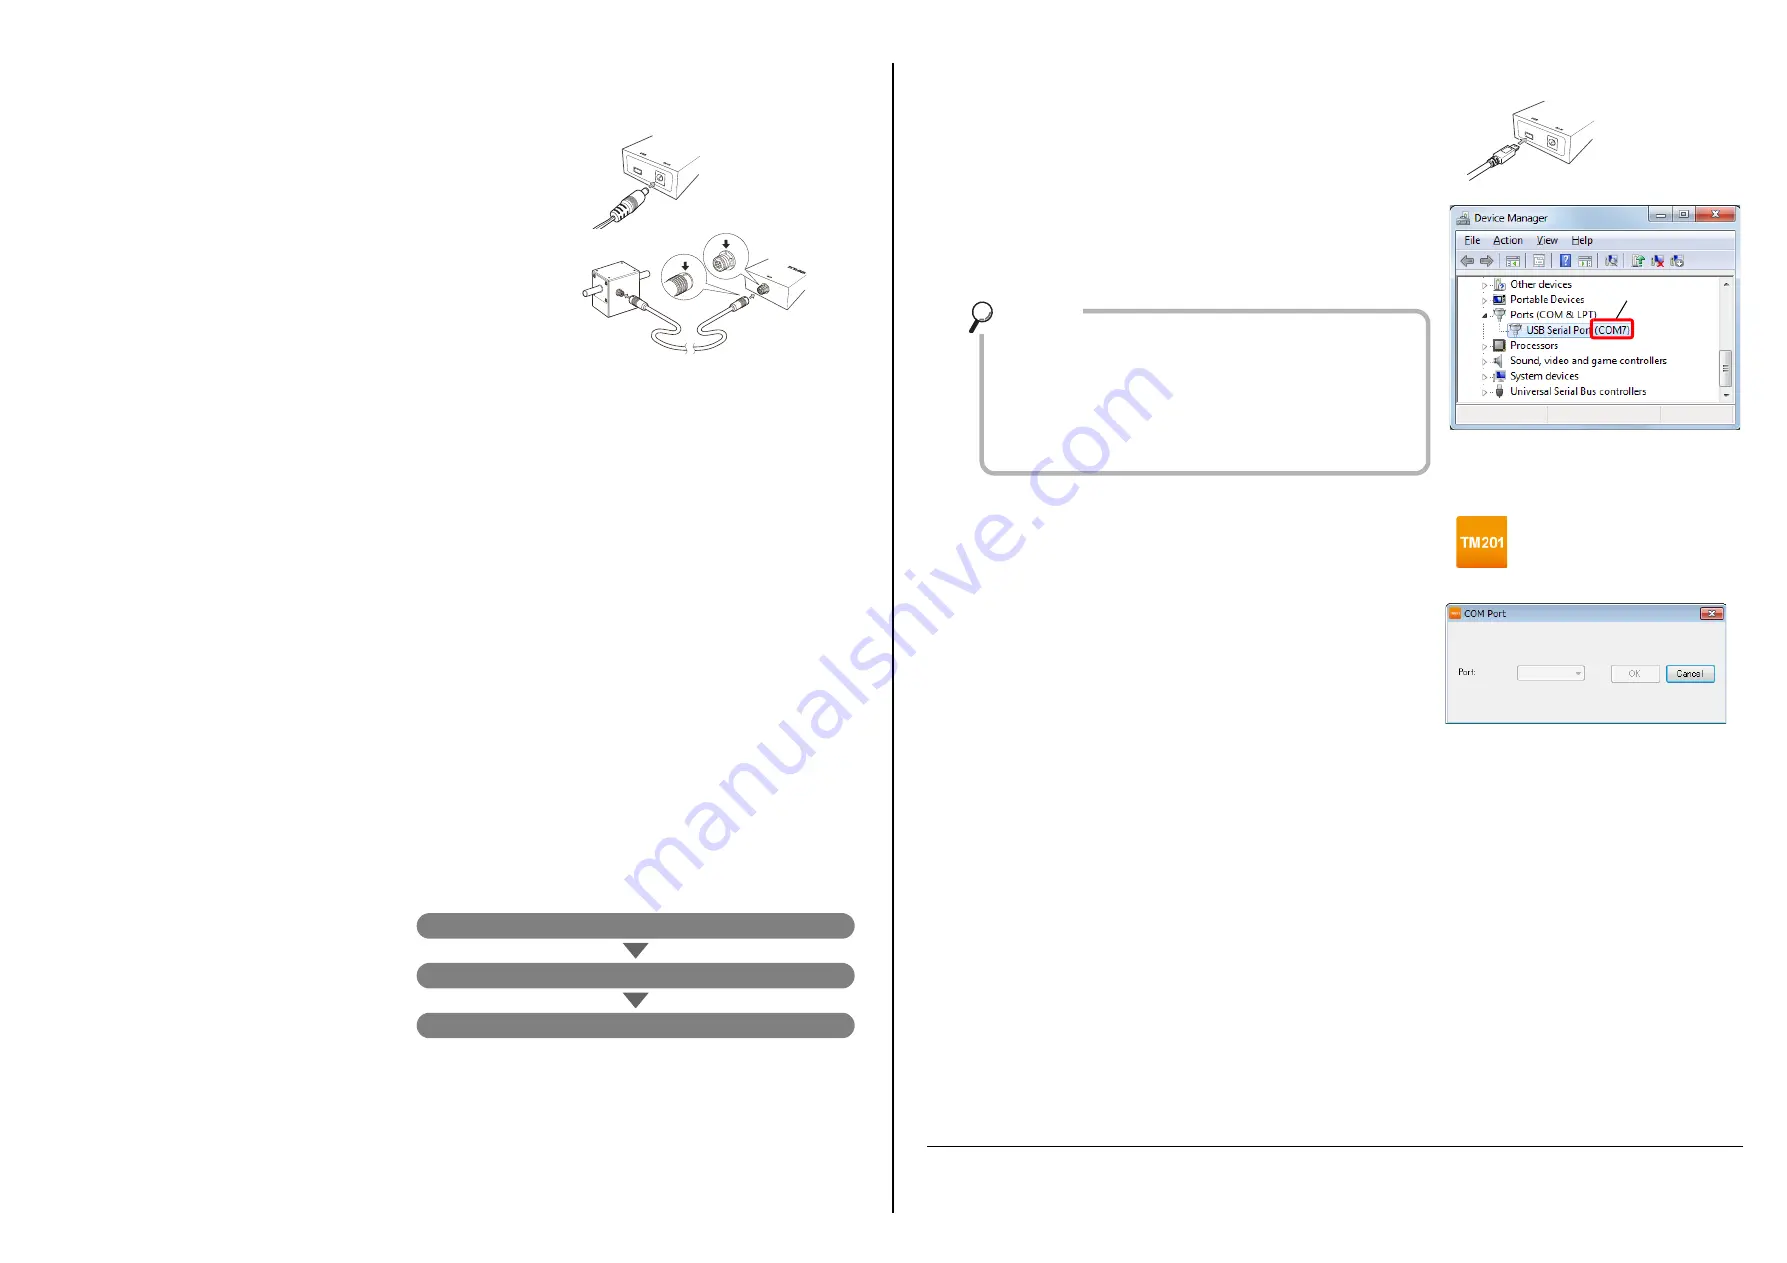
Connection of power input connector
The dedicated AC adapter for the TM201 is connected to the power input
connector of the main unit.
■
Connection of UTM
Ⅱ
The connection with UTM
Ⅱ
can be easily performed with the dedicated cable
included. Both ends of the connector have the same shape, and the cable is
connected straight. Since the cable has no directionality, either side of the
connector may be connected to UTM
Ⅱ
and TM201.
Connect UTM
Ⅱ
while paying attention to the direction of the arrow on the
connector.
■
Connection to the outlet
After connecting to UTM
Ⅱ
, the AC adapter is connected to the outlet.
Input power is AC100 to 240V (-15%, +10%), free power supply. Frequency is 50/60Hz.
2-2. Install the USB driver and the dedicated PC application
Please make sure to install USB drive and PC application prior to connecting TM201 to the PC for the first time.
■
PC operating environment
OS
Windows7
CPU
Core i3
2GHz or above
Display
800×600 pixel or above
Memory
2GB or above
USB port
One or more free ports
Hard disk
15GB free space or more
USB driver
Virtual COM Port (VCP) Drivers (made by FTDI Limited)
■
USB driver installation
Online network to perform automatic installation of driver.
Please go online network.
The driver automatically downloaded and installed via the network when TM201 connected to PC with the USB cable.
In case of failing driver installation or not starting of PC application software, you delete the USB driver and reconnect to PC.
Please try again.
If it doesn't automatically perform installation, see the homepage of FTDI.
Guide
http://www.ftdichip.com/Support/Documents/InstallGuides.htm
Driver
http://www.ftdichip.com/Drivers/VCP.htm
■
Installation of the dedicated PC application
Download and install the dedicated PC application
from the UNIPULSE website. To download the
application, user registration (free) is required.
* http://www.unipulse.com/en/products/TM201.html
Download the compressed file to the PC from the download page
Extract the compressed file on the PC and start up the installer
Follow the procedure and complete the installation
2-3. Connect the TM201 to the PC with the USB cable and start up the PC application
■
Connection of the USB cable
The USB cable included enables easy connection to the PC.
Once the USB cable is connected, the TM201 turns on due to power supply
from the USB cable, and ALM (red) lamp or STATUS (green) lamp operates.
■
Check of virtual COM port
Check the virtual COM port number to which the TM201 is connected from the
Device Manager of the PC.
The device manager is located inside the control panel.
■
Startup of PC application
Double-click the shortcut of the TM201 on the desktop or click
"UNIPULSE"
→
"TM201"
→
TM201 from the Start menu.
■
Specification of COM port
Select the virtual COM port checked in the Device Manager of the PC on
the start screen, click the "OK" button, and the PC application starts up.
Once the PC application starts up, the ALM lamp of the TM201 lights off.
If the lamp is a slow flash, check that power is supplied from the AC
adapter, and if the lamp lights on, check that the virtual COM port of the
TM201 has been properly selected in the PC application.
* If the number of valid COM ports is one, the PC application starts up without displaying this selection screen.
2-4. Set the sensor type in the calibration tab of the PC application and
perform calibration
Once set, the torque and rotation speed can be checked in the waveform tab of the PC application.
* Refer to the operation manual for details of functions and usage.
Virtual COM port number
If the COM port number of the TM201 cannot be determined
due to multiple USB Serial Ports and so on, unplug the USB
cable once and confirm that one COM port is removed from
the list of ports (COM and LPT). When the USB cable is
reconnected to the previous connector, the number of COM
ports displayed in the list increases. This number represents
the COM port number of the TM201.
Key points
Shortcut
International Sales Department
9-11 Nihonbashi Hisamatsu-cho, Chuo-ku, Tokyo 103-0005
Tel: +81-3-3639-6120 Fax: +81-3-3639-6130
Unipulse Corporation


