

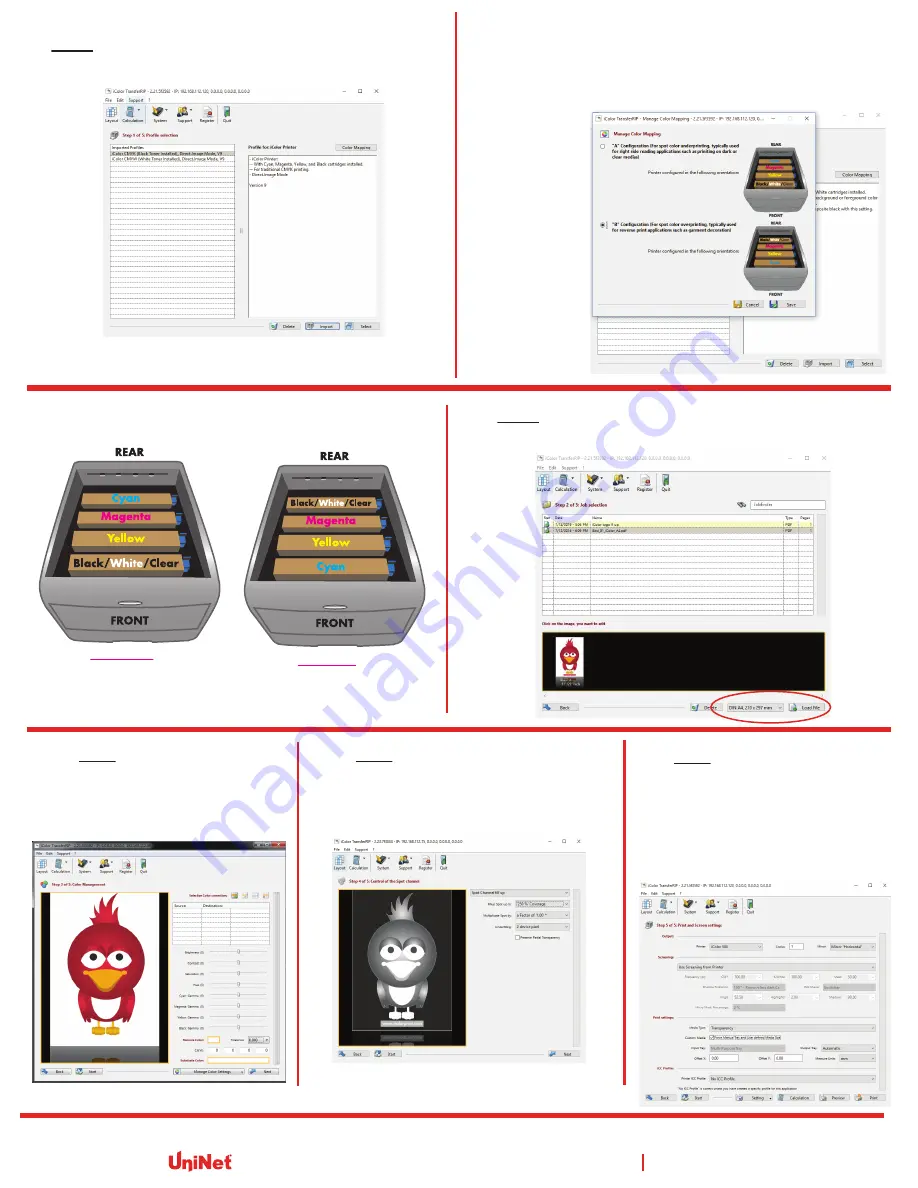
7. In Step 1 of the iColor TransferRIP software, import the two
profiles. The profiles are located on the “UniNet iColor Software”
USB Drive.
8. Then choose the desired profile based on the Black or White
cartridge being installed. Click on “Color Mapping”. Choose the
desired color mapping option. The location of the cartridges in
the printer
must match the
mapping in the
software. Then
click “Save”
and select the
desired profile.
Note: There are two options for “Color Mapping”
For
Underprinting
white.
Typically used for right side reading applications
like printing color on clear or dark medias
For
Overprinting
white.
Typically used for garment decoration.
For detailed instructions please refer to the iColor 600 Printer User Manual and the iColor TransferRIP User Manual
9. In Step 2 of the iColor TransferRIP software, select your paper
size then click “Load File”. Then click the preview graphic.
10. In Step 3 of the iColor TransferRIP
software, make any desired color
adjustments to the artwork.
Then click “Next”.
11. In Step 4 of the iColor TransferRIP software,
modify the white coverage depending on media
and artwork. 150% to 250% is suggested for most
applications. Then click “Next”.
12. In Step 5 of the iColor TransferRIP
software, adjust settings to print the artwork
based on the media being used. Use of the
MPT Tray is recommended. Then click “Print”.
When prompted, press the “online” button on
the front panel of the printer to print the job.
Note - Use of the “Underfilling” feature is highly recommended.
3232 W. El Segundo Blvd, Hawthorne, California 90250 - [email protected] www.icolorprint.com


