background image

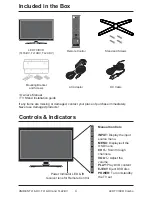
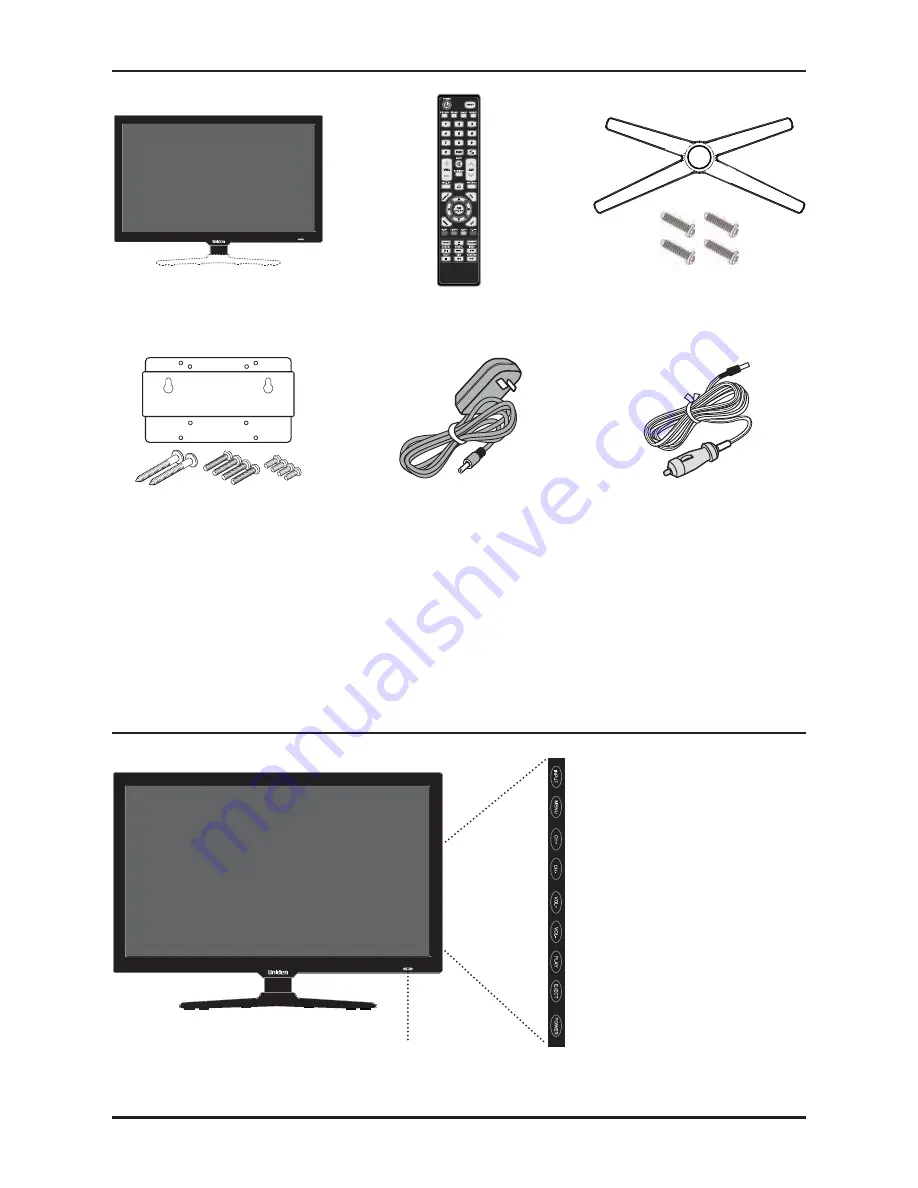
Included in the Box

4

UNIDEN TL16-DV, TL19-DV and TL22-DV

LED TV/DVD Combo

Manual Controls

INPUT:

 Display the input 

source menu.

MENU:

 Display/exit the 

OSD menu.

CH+/-:

 Scan through 

channels.

VOL+/-:

 Adjust the 

volume.

PLAY:

 Play DVD content

EJECT:

 Eject DVD disc

POWER:

 Turn on/standby 

the TV set.

If any items are missing or damaged, contact your place of purchase immediately. 

Never use damaged products!

Controls & Indicators

• Owner’s Manual

• TV Stand Installation guide

LED TV/DVD

(TL16-DV, TL19DV, TL22-DV)

Remote Control

Stand and Screws

AC Adaptor

Mounting Bracket

and Screws

DC Cable

Power Indicator LED & IR 

receiver lens for Remote Control 

Содержание TL16-DV

Страница 1: ...TL16 DV TL19 DV TL22 DV LED TV DVD Combo For more exciting new products please visit our website Australia www uniden com au New Zealand www uniden co nz ...

Страница 2: ...ires when removing from a socket During a thunderstorm or while leaving the TV for long periods disconnect the aerial if outdoor and mains power from the supply The PCB of the TV is conformal coated to prolong electrical function in marine environments Do not allow water or moisture to enter the TV Do NOT use in wet or moist areas such as Bathrooms steamy kitchens or near swimming pools Pull the p...

Страница 3: ...ule 12 Menu Settings 13 Picture menu 14 Sound menu 14 Channel menu In DTV mode 15 Channel Management 15 Favourite Management 15 Country 15 Auto Search 16 DTV Manual Search 16 ATV Manual Search 16 Feature menu 17 Lock 17 Language 18 Clock 18 Sleep Timer 18 Auto Power Off 18 Hearing Impaired 18 PVR Timeshift 19 Setup menu 21 DVD Operation 22 Selecting DVD Mode INPUT 22 Inserting a DVD Disc 22 Playin...

Страница 4: ... Play DVD content EJECT Eject DVD disc POWER Turn on standby the TV set If any items are missing or damaged contact your place of purchase immediately Never use damaged products Controls Indicators Owner s Manual TV Stand Installation guide LED TV DVD TL16 DV TL19DV TL22 DV Remote Control Stand and Screws AC Adaptor Mounting Bracket and Screws DC Cable Power Indicator LED IR receiver lens for Remo...

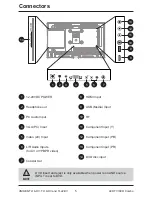
Страница 5: ... on AND source INPUT is set to DVD 1 12 24VDC POWER 2 Headphone out 3 PC Audio Input 4 VGA PC Input 5 Video AV Input 6 L R Audio Inputs for AV or YPBPR video 7 Coaxial Out 8 HDMI Input 9 USB Media Input 10 RF 11 Component Input Y 12 Component Input PB 13 Component Input PR 14 DVD disc input 8 9 10 11 12 13 14 1 2 3 4 5 6 7 ...

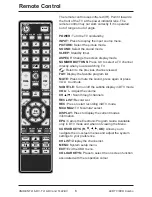
Страница 6: ...menu Colour Keys Press to select the on screen function associated with the respective colour POWER INPUT PICTURE ASPECT MUTE SOUND SLEEP SUBTITLE CH LIST REC LIST 1 2 3 4 5 6 7 8 9 0 D I S P L A Y E P G TV RADIO FAV VOL CH M E N U TV TXT CANCEL REVEAL NICAM A2 INDEX HOLD SIZE SUBPAGE E X I T REC D SET D MENU D LAN D SUB POWER INPUT Press to display the input source menu Turn the TV on standby PIC...

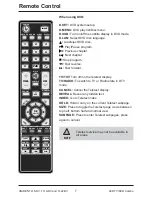
Страница 7: ...mode s information EPG To show the Electronic Program Guide during no menu state only in DTV mode CURSOR KEYS OK Allows you to navigate the on screen menus and adjust the system settings to your preference MENU System setup menu EXIT Exit the OSD menu CH LIST Display the channel list D SET DVD system setup D SUB Turn on off the subtitle display in DVD mode D LAN Select DVD disc language D MENU DVD...

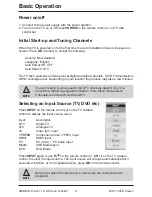
Страница 8: ...s may take a few minutes NOTE You will need to re tune search for DTV channels again if the TV is moved to a different geographic location From Menu mode select Channels Auto Search and then DTV Selecting an Input Source TV DVD etc Press INPUT on the remote control or on the TV sidebar control to display the Input source menu Input Description DTV Digital TV ATV Analogue TV AV Video AV Input YPBPB...

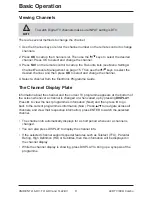
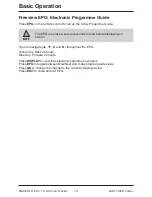
Страница 9: ... Electronic Programme Guide The Channel Display Plate Information about the channel and the current TV programme appears at the bottom of the screen whenever a channel is changed or when called up by pressing DISPLAY Press to view the next programme s information Next and then press to go back to the current programme s information Now Press to navigate across all channels and view their respectiv...

Страница 10: ...TE The EPG may take a several seconds to load before displaying on screen You can navigate and throughout the EPG Yellow Key Back 24 hours Blue Key Forward 24 hours Press DISPLAY to view the selected programme s synopsis Press EPG to toggle between Now Next and 8 day program guide views Press OK to change the channel to the currently displayed view Press EXIT to close and exit EPG ...

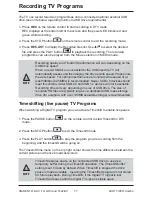
Страница 11: ...KEYS OK Allows you to navigate the on screen menus and adj system settings to your preference MENU System setup menu EXIT Exit the OSD menu CH LIST Display the channel list D SET DVD system setup D SUB Turn on off the subtitle display in DVD mo D LAN Select DVD disc language D MENU DVD play list Disc menu 5 on the remote control to start Timeshift in DTV mode 2 Press the STOP button POWER INPUT PI...

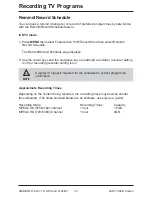
Страница 12: ...Schedule page displays 2 Use the colour keys and the navigation keys to add edit a reminder recorder setting is off or recording recorder setting is on NOTE A digital TV signal is required for the scheduler to extract programme information Approximate Recording Times Depending on the content being recorded the recording times may become shorter than indicated The times provided below are an estima...

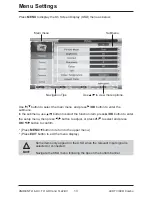
Страница 13: ...en press button to adjust or press to select and press OK button to confirm Press MENU button to return to the upper menu Press EXIT button to exit the menu display NOTE Some items only appear on the OSD when the relevant Input signal is selected or connected Navigate the OSD menu following the tips on the bottom banner Use to view more options Submenu Main menu Press MENU to display the On Screen...

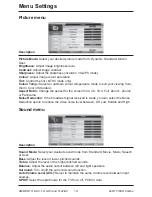
Страница 14: ... Ratio Change the aspect for the screen from 4 3 16 9 Full Zoom1 Zoom2 or Panorama Noise Reduction If the broadcast signal received is weak you can select the Noise Reduction option to reduce the video noise level between Off Low Middle and High Description Sound Mode Select your desired sound mode from Standard Movie Music Speech or User Bass Adjust the level of lower pitched sounds Treble Adjust...

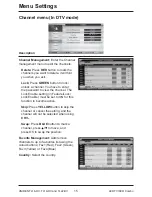
Страница 15: ...ave to enter the password to view the channel The Lock Enable setting in Feature Lock Lock Enable must be set to ON for this function to become active Skip Press YELLOW button to skip the channel or cancel the setting and the channel will not be selected when using CH Swap Press BLUE button to mark a channel press to move and press OK to swap the position Favorite Management Add remove channels to...

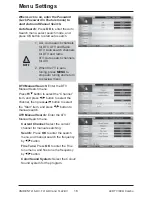
Страница 16: ...auto tuning press MENU to stop auto tuning and return to preview menu DTV Manual Search Enter the DTV Manual Search menu Press button to select the Channel item and press button to select the channel then press button to select the Start item and press button to manual search ATV Manual Search Enter the ATV Manual Search menu Current Channel Select the current channel for manual searching Search P...

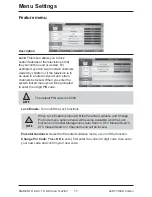
Страница 17: ...ocked menu you will be prompted to enter the 4 digit PIN code NOTE The default PIN code it is 0000 Lock Enable Turn on off the Lock functions NOTE When Lock Enable is turned ON the Parental Guidance and Change Pin Code menu options below will become available And the Lock functions in Channel Management Auto Search DTV Manual Search ATV manual Search in Channel menu will be locked Parental Guidanc...

Страница 18: ...lume for the TV Default Volume Set the default volume when the program is on Clear Lock Clear all the locks above it means set all the locks to OFF and max volume to 100 Database Export Export all Hotel Settings to the USB device Database Import Import all Hotel Settings from the USB device Language Lets you select from language options available Clock Allows you to set the clock the default infor...

Страница 19: ...device TS is the default setting If you are not familiar with TS and PS formats which are not related to record quality but refer to content storage then leave the setting as is Partition Select Timeshift Buffer Set Timeshift Buffer mode auto 30Mins 1hr 2hr Remind Record Schedule Enter the Remind Record Schedule menu to program when to change and or record a channel by timer Press the YELLOW butto...

Страница 20: ... DV and TL22 DV LED TV DVD Combo Record List Display the Record list menu Delete Press RED button to delete the selected record plan Recorder Start Press OK button to start recording performs the same function as REC on the remote control ...

Страница 21: ... a stable image is obtained Clock Adjust the pixel clock frequency until the image size is maximized for the screen Blue Screen Changes the background when there is no input between clear and a blue background only available for for some Input sources Reset TV Setting This clears all the TV settings for the television Software Upgrade From time to time new firmware may be released to improve the r...

Страница 22: ...X HOLD SIZE SUBPAGE E X I T REC D SET D MENU D LAN D SUB POWER INPUT Press to display the inp Turn the TV on stand PICTURE Select the picture mode SOUND Select the sound mode SLEEP Standby timer ASPECT Change the screen displ NUMBER BUTTONS Press 0 9 to select a TV channel dir are watching TV Return to the previous channel FAV Display the favorite program lis MUTE Press to mute the sound pre VOL t...

Страница 23: ...cut automatically 4 3 Letter Box This is selected when the player is connected to a normal TV Wide screen images are shown on the screen with black bars on the top and bottom Wide 16 9 Default Select when the player is connected to a wide screen TV OSD Language Use to select the OSD On Screen Display language Screen Saver When set On the screen saver image will appear when the player stops or the ...

Страница 24: ...itle to display in that language If not the language recorded will be used Disc Menu If the language selected is recorded on the disc you can set the Menu to display in that language If not the language recorded will be used Parental When playing a disc with parental lock function select an Age Control Grade according to grade of disc and your own preference E g If PG is selected DVD Video disc ra...

Страница 25: ...TL22 DV LED TV DVD Combo An optional external USB Drive can be connected to view multimedia content Basic Operation 1 Select Media as the INPUT source 2 Select the media type from Photo Music Movie or eBook 3 Press to select the USB device and press OK to enter the file list ...

Страница 26: ... move the picture by Cursor left right up down button in Zoom mode Display the information of the current file Display the photo setup menu and select the Repeat mode Background Music Slide Time Effect Display the playing list Press to select the option on the table and press OK to change Play Pause the music playing Stop and exit the music playing Play fast backward or forward Play the previous o...

Страница 27: ...et the A B repeat playing mode Play the previous or next file directly Display the playing list Display the information of the current file Display the movie setup menu and setup the Program Subtitle Audio Repeat mode Goto mode Input the time and start playing directly 4 eBook Press to select the option on the table and press OK to change Note Press OK to display the option table when it disappear...

Страница 28: ...rast adjustment Screen is too large or too small Adjust the screen size using the ASPECT key on the remote control Stripes appear on the screen and it shakes Stop using wireless telephones hair driers and electric drills in close proximity to the TV The screen does not move Press the PAUSE button Check if the Pause button is pressed on external equipment Screen appears Voice is not heard 1 Press t...

Страница 29: ...2V 3A 36W 0 5W 0 40 C 2 x 3W Inputs RF 75Ω Coaxial USB x 1 HDMI x 1 PC Input VGA PC Audio Component Video YPBPR Composite Video RCA Audio In for YPBPR and RCA Outputs COAX Earphone Unit Weight Unit Dimension with stand W H D mm Unit Dimension without stand W H D mm 1 4kg 373 x 276 x 126 373 x 227 x 40 3 3kg 447 x 320 x 126 447 x 270 x 40 3 6kg 513 x 347 x 160 513 x 308 x 40 Trademark Information H...

Страница 30: ...30 UNIDEN TL16 DV TL19 DV and TL22 DV LED TV DVD Combo ...

Страница 31: ...e to user generated data including but without limitation phone numbers addresses and images that may be stored on your Product Statement of Remedy If the Product is found not to conform to this warranty as stated above the Warrantor at its discretion will either repair the defect or replace the Product without any charge for parts or service This warranty does not include any reimbursement or pay...

Страница 32: ... 2013 Uniden Australia Pty Limited Uniden New Zealand Ltd Printed in PRC ...

Отзывы: