6
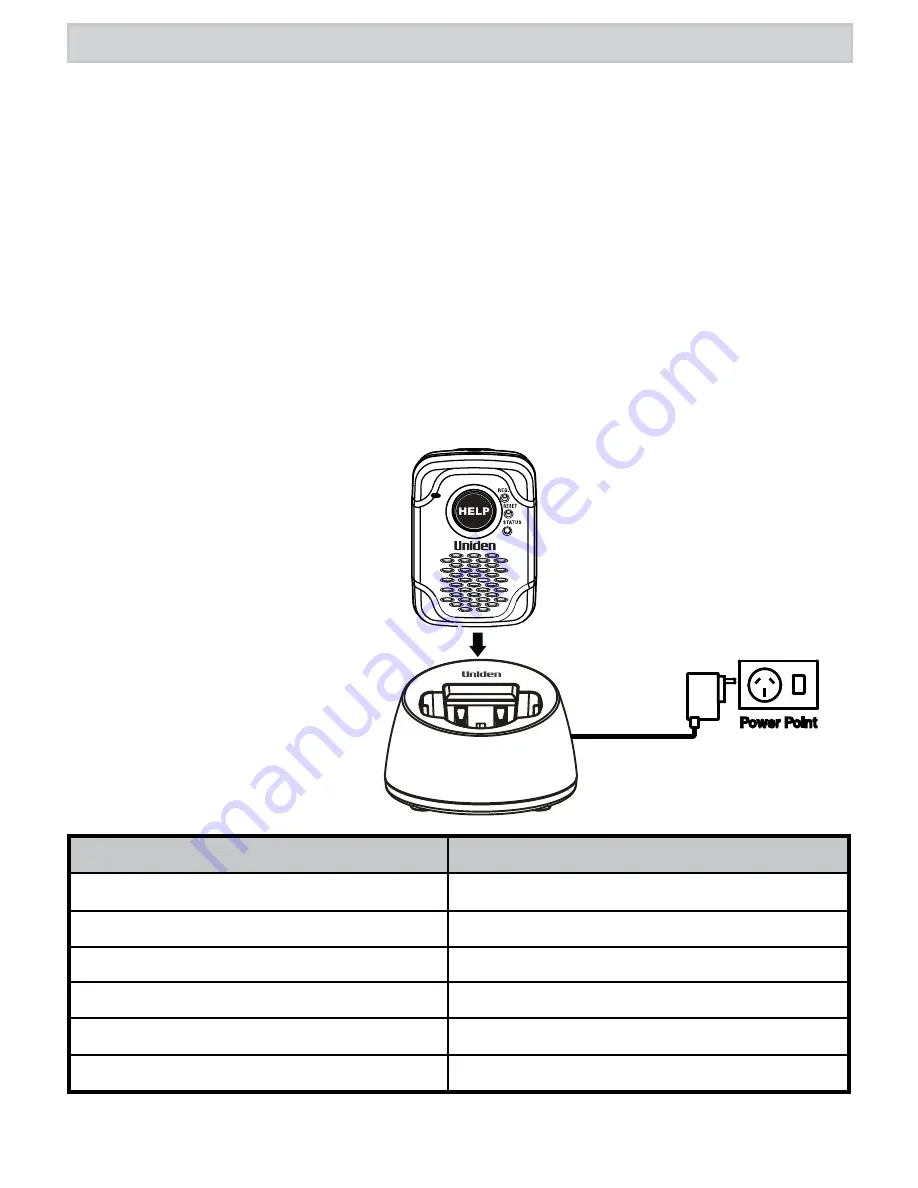
1. Connect the AC adaptor to the charger’s DC IN 5.4V jack.
2. Plug the other end of the adaptor into a standard 240V AC power outlet.
3. Place the Pendant on the cradle with the
HELP
button facing forward while
charging.
GETTING STARTED
Charging Your Pendant
The battery for the Pendant is pre-installed.
#
Charge the Pendant
completely (about 3 hours)
before using.
Before using the SSE P1 Pendant, it must first be charged, then registered to a
compatible base. Finally, to get the most out of the SSE P1 Pendant’s features,
it is strongly recommended that emergency contact numbers are stored in the
phonebook of the compatible base.
Status LED Indication
What it means
Blue
Charged
Red
Charging
Blinking Red
Battery is low
Blinking Blue
Successfully registered
Blinking Blue rapidly
During a call
Blink Blue and Red
During the registration process
#
Throughout the remainder of this manual the SSE P1 Pendant will be
referred to as the Pendant.
#
Do not charge the
Pendant when the ambient
temperature is below 0°
C (32°F) or above 40°C
(104°F).
#
The LED lights only when the Pendant is being used. The Pendant
automatically powers off after 2 minutes of inactivity.


