


Your FP098 Package will contain:
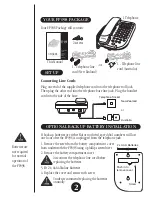
YOUR FP098 PACKAGE
1 Telephone
Connecting Line Cords
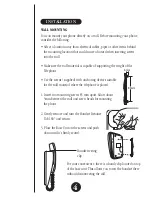
Plug one end of the supplied telephone cord into the telephone wall jack.
Then plug the other end into the telephone base line jack. Plug the handset
cord into the side of the base.
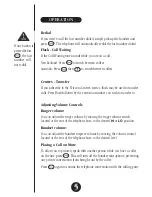
SET UP
VOLUME
RINGER
HI LO
FP098
MANUAL
OWNERS
Adjustable Volume
Controls
8 One Touch
Speed-dial
Memories
Mute Button
1 - Telephone line
cord (New Zealand)
1 - Telephone line
cord (Australia)
-or-
This Manual
2 screws
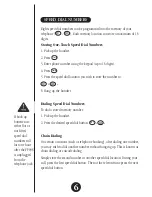
If back up batteries are either flat or not fitted, speed dial numbers will last
one hour after the FP098 is unplugged from the telephone jack.
1. Remove the screw from the battery compartment cover
from underneath the FP098 using a phillips screwdriver.
2. Remove the battery compartment cover.
Disconnect the telephone line cord before
replacing the batteries.
3. Fit 2 x AAA Alkaline Batteries.
4. Replace the cover and secure with screw.
Uniden recommend replacing the batteries
annually.
OPTIONAL BACK UP BATTERY INSTALLATION
2
2
Push in to
remove cover
Screw
New Zealand
or
Australia
2 x AAA Batteries
Batteries are
not required
for normal
operation of
the FP098
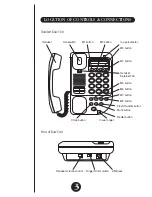
Telephone Socket