


www.ungerglobal.com
29
ENGLISH
H
i
F
lo
™ Ro-M
obile
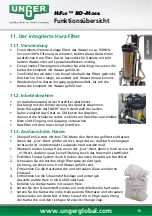
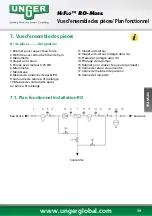
Function overview
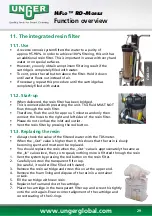
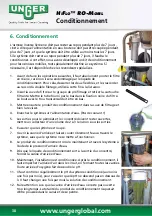
11. The integrated resin filter
11.1. Use
•
A reverse osmosis system filters the water to a purity of
approx. 95-98%. In order to achieve 100% filtering, this unit has
an additional resin filter. This is important in areas with very hard
water or on special surfaces.
•
However, you only obtain an optimum filtering result if the
cartridge is completely filled with water.
•
To vent, press the red button above the filter. Hold it down
until water flows out instead of air.
•
If necessary, repeat this procedure until the cartridge has
completely filled with water.
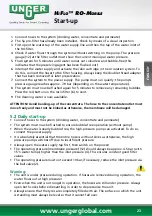
11.2. Start-up
•
When delivered, the resin filter has been bridged.
•
This is connected with preserving the unit. This fluid MUST NOT
flow through the resin filter.
•
Therefore, flush the unit for approx. 5 minutes and only then
connect the hoses to the right and left sides of the resin filter.
•
Please do not confuse the inlet and outlet.
•
Vent the resin filter by pressing the red button.
11.3. Replacing the resin
•
Always check the value of the filtered water with the TDS meter.
•
When the „Out“ value is higher than 0, this shows that the resin is slowly
becoming spent and must soon be replaced.
•
You should replace the resin when the „Out“ value is approximately the same as
the „In“ value since, then, so to speak, nothing more is filtered through the resin
1. Vent the system by pressing the red button on the resin filter.
2. Carefully unscrew the transparent filter cup.
(be careful, it could still be filled with water).
3. Remove the resin cartridge and screw this on at the upper end.
4. Remove the foam lining and dispose of the resin in a container
or sack.
5. Fill the cartridge with new resin.
6. Replace the foam and close the cartridge.
7. Place the cartridge in the transparent filter cup and screw this tightly
onto the unit again. Ensure correct alignment of the cartridge and
correct seating of the O-rings.
Содержание HiFlo RO-Mobil
Страница 86: ...www ungerglobal com 86 HiFlo RO Mobile Notes...
Страница 87: ...www ungerglobal com 87 HiFlo RO Mobile Notes...


