


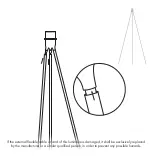

1. Remove the packaging carefully with-
out the use of sharp objects. Assemble
the tubes, ensure that all tubes are cor-
rectly assembled, then place the stand
firmly on the floor before moving onto
next procedure.
2. Unscrew the ring of the socket. As-
semble the suitable lampshade (not
included) and put it on the socket
and screw the ring back on until
lampshade is completely fastened.
3. Firmly screw an E26 light bulb (MAX
60W) into the socket. Do NOT put
your fingers into the socket!
4. Insert the plug into a suitable outlet
and turn on the power supply.
5. Press the cord-switch to on.
6. Always disconnect the power-supply
before cleaning, changing of light
bulbs or repair of the table stand.The
latter, should alwaysbe done by a
qualified electrician.
7. Let the light bulb cool off sufficiently
before changing the bulb.
8. Keep the tripod floor away from any
flammebles, or objects that cannot
handle heat.
9. Please always place the stand on a
level surface not more than 8° angle.
10. The stand is for indoor use ONLY.
11. If the stand in any way malfunctions,
to avoid accidents or mishandling of
the tripod floor stand, please always
contact UMAGE Service Center or
call a qualified electrician.
12. Only use the Tripod floor stand, where
these same official electricial- and
technical parameters exist!
THE SAFETY PROCEDURES
Содержание EOS
Страница 1: ...Eos assembly guide...
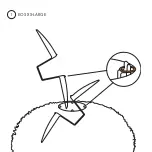
Страница 4: ...MAX 15W LED bulb 1 ATTACH THE CORD SET AND BULB TO THE FRAME...
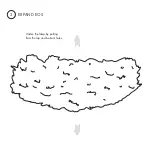
Страница 5: ...Widen the lamp by pulling from the top and bottom holes 2 EXPAND EOS...
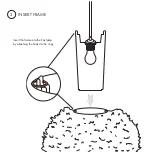
Страница 6: ...Insert the frame into the Eos lamp by attaching the hooks to the rings 3 INSERT FRAME...
Страница 7: ...1 EOS XX LARGE...
Страница 8: ...2 EOS XX LARGE...
Страница 10: ...assembly guide Tripod floor...