Operating Instructions
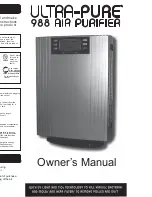
Congratulations on your purchase of the Ultra-Pure™ 988 Air Purifier.
This multi technology air purifier will greatly assist you in cleaning the
air in your home or office. It has been designed to significantly improve
the environment in which you locate this device.
Functions and Features
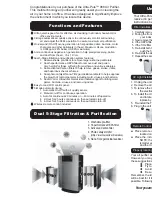
Dual 5-Stage Filtration & Purification
Ultra quiet 3-speed fan for effective air cleansing in all indoor household or
office
environments.
3-Stage automatic air quality sensor to continuously monitor surrounding
air and adjust the 988’s operation to assure maximum air purification.
On-demand (On-Off) ozone generation to help oxidize odors, bacteria, mold,
chemicals and other pollutants in the air. Maximum Ozone production
is 0.004ppm (20% below US EPA maximums).
Anion continuous negative ion generation to help precipitate smog, pollen
and dust from the air. >5 x 10 /cm.
Dual 5-Stage filtration and purification system features:
1. Dual washable pre-filters to remove larger airborne particulate.
2. Dual hi-performance HEPA filters to remove dust and pollen.
Very helpful for those suffering from asthma and various allergies.
3. Dual activated Carbon filters to help remove gases, smoke, odors,
and hazardous chemical fumes.
4. Dual photo catalyst Nano-TiO2 germicidal sanitizers to help suppress
the growth of microorganisms including mold, viruses, and bacteria.
5. Dual UVGI or Ultraviolet Germicidal Irradiation lights for killing mold,
germs, bacteria, viruses, and removing odors.
Easy to read LCD control panel.
5-Mode automatic timing:
1. Automatic On-Off with air quality sensor.
2. Manual on-off for continuous operation.
3. Auto for continuous 20 minutes on – 40 minutes off operation.
4. 2-Hour for 2 hours continuous on then automatic turn-off.
5. 4-Hour for 4 hours continuous on then automatic turn-off.
Wireless remote control included.
1
3 2
4 5
1
3
2
5
1. Washable pre-filter
2. Hi-performance HEPA filter
3. Activated Carbon filter
4. Photo catalyst UVGI
(Ultra Violet Germicidal Irradiation)
5. Nano TiO2 germicidal sanitizer
1
2
3
4
Unpacking and Installation
Your Ultra-Pure 988 air purifier has been carefully packaged so that you
receive it in perfect condition. Please read and very carefully follow all the
instructions below BEFORE you plug in the unit.
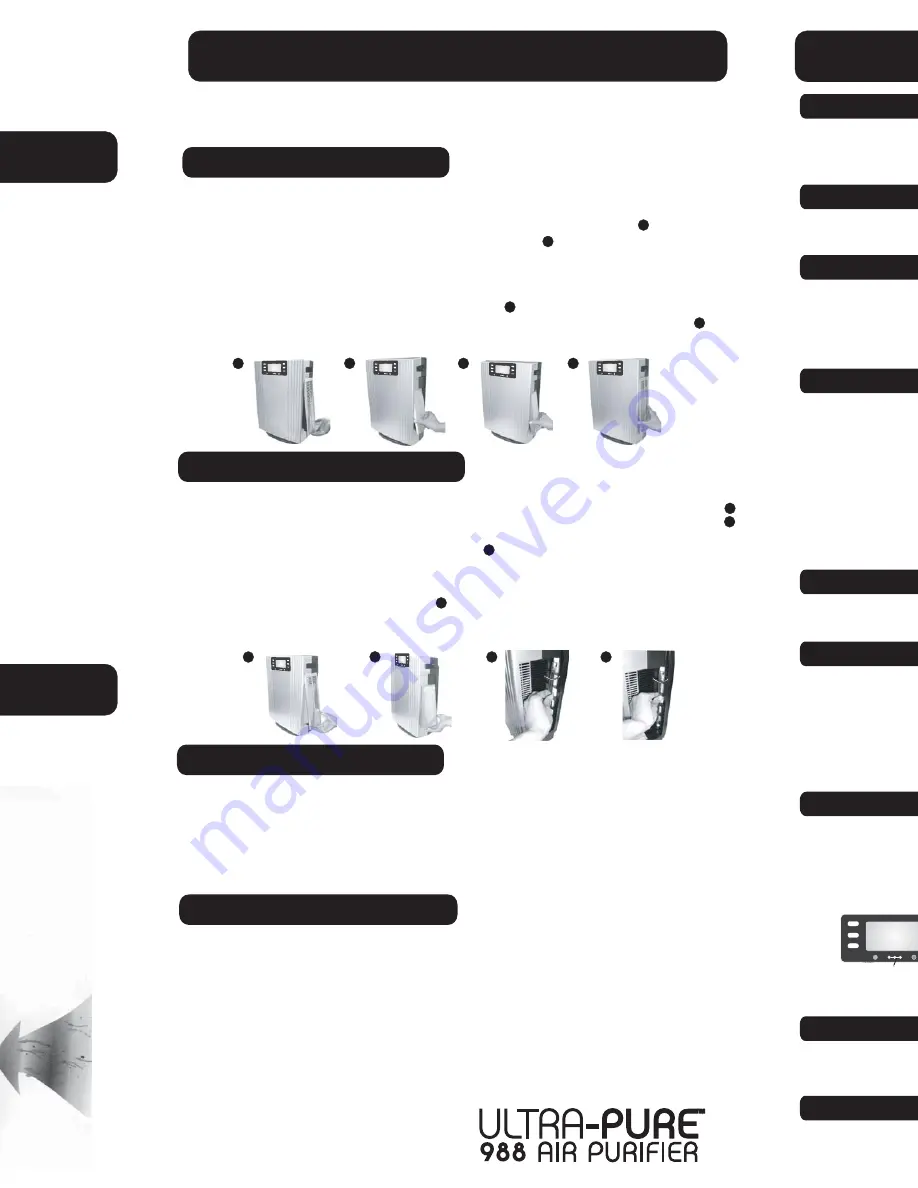
Place remote on its back. Carefully open the remote control battery housing
located on the bottom.
Place the, included, lithium (CR02025-3v) battery onto the clip.
NOTE; the battery only fits one-way. Be sure that inner battery lip
(smaller edge) properly fits into the battery housing. Slide the battery
and the clip back into place. DO NOT FORCE the battery clip into place.
Remote Control Battery Installation
Properly locating your Ultra-Pure 988
Your air purifier will function adequately almost anywhere you place it.
However you may improve its air cleaning, and purifying efficiency by following
these suggestions.
Place it on a table, or on a high shelf (circulated air tends to rise).
Try to avoid placing it in the corner of a room.
Avoid placing it behind furniture.
Be sure that the intake air vents are not blocked or restricted.
Remember, the idea is to place your Ultra-Pure Air purifier in a location that
will be best for it to clean and purifier as much of the air within a room as
possible. Following the above guidelines will help achieve your clean air goals.
Filter Installation and Replacement
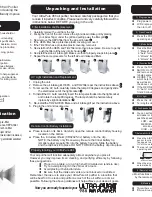
1. Carefully remove the unit from the box.
2. Facing the front of the unit, remove the right side air intake grill by placing
your index finger under the grill and pulling away the filter grill.
3. Now remove the HEPA filter from the side air intake.
4. If the HEPA filter has a protective plastic covering, remove it.
5. If the TiO2 filter has a protective plastic covering, remove it.
5. Re-install both the HEPA and TiO2 filters into their proper place. Be sure to gently
push the filter all the way into its housing.
6. Re-install the side air intake grill. Make sure that it properly snaps into place.
7. Repeat the same procedure for the left side air intake and filters.
1
2
3
4
UV Light Installation and Replacement
4
2
1
3
1. Unplug the unit.
2. Remove the air intake grill, HEPA, and TiO2 filters per the instructions above.
3. To remove the UV bulb: carefully rotate the lamp 90 degrees and gently slide
the electrodes out of the light socket.
4. To install the UV bulb: carefully insert the lamp electrodes into the light socket
and rotate the lamp 90 degrees. The lamp should be held securely
inplace by slight indentations.
5. Re-install the TiO2 & HEPA filters and air intake grill per the instruction above.
6. Plug in the unit and resume use.
4
1
2
3
Now you are ready to operate your
Plug power cord into 110v/60Hz wall socket,
LCD display will light for 10 seconds and
then turn off.
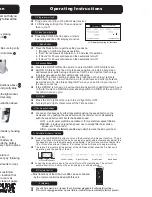
1) Plug in power cord
Press the POWER button and unit starts
operating and the LCD displays function.
2) Press Power Button
Press the UV Light button to turn the UV light ON or OFF.
Turning the UV light off also turns off the TiO2 sanitizer.
5) UV light
Press the FUNCTION button switch to select ANION or OZONE function.
ANION: On this setting the unit produces negative ions which help clean
and remove dust, pollen, smog and smoke from the air. A perfect technology
to help people who suffer from asthma and allergies.
OZONE: The Ozone setting enables the production of hydroxyl radicals
which help rid your room of bacteria, mold, chemicals and other pollutants,
as well as smoke. Use this setting ONLY when you need to rid your room of
the above concerns.
If the OZONE is turned on it will automatically switch to ANION after 2 hours.
In “Auto” mode the OZONE automatically switch to ANION at the end of the
first 20 minute on cycle.
4) Function Button
3) Mode Button
Press the Mode button to get the setting you desire.
1. “Manual” on-off for continuous operation.
2. “Auto” for continuous 20 minutes on – 40 minutes off operation.
3. “2Hours” for 2 hours continuous on then automatic turn-off.
4. “4Hours” for 4 hours continuous on then automatic turn-off.
6) Fan Speeds Settings
You can set fan speeds by either repeatedly pushing the speed button on the
air cleaner or by pushing the speed button on the remote control. Repeatedly
push the speed button until it sets the desired speed.
LOW - use for quiet, nighttime operation or for constant low-speed filtration.
MEDIUM - provides a higher fan speed; use to quickly filter dust, pollen,
smoke, etc. from a room
HIGH
–
provides the fastest possible way in which to clean the air in your room.
9) Memory
This unit has a memory. As long as the unit remains plugged in it will maintain settings.
If this unit is unplugged, or has a power failure, it will return automatically to factory pre-sets.
Press the AIR SENSOR button to turn on the Automatic Air-Sensor function. The air
sensor function will monitor the surrounding air quality and automatically adjust the
fan speed to assure the best quality air possible. The Air Sensor will not adjust the
UV or Ozone functions. It takes 1-3 minutes for the Air Sensor to begin working.
There are 3 indicators at the bottom of the LED panel that show the Air Sensor is
operating and the quality of the air.
When the air quality is good, the unit will turn-off automatically. The unit will
automatically turn-on when the surrounding air needs purified.
7) Automatic Air-Sensor Setting
Air-Sensor Indicators
Good Air Quality
Slightly Polluted
More Polluted
Most Polluted
u Most functions of the Ultra-Pure 988 can be controlled
by the remote control included with this unit.
8) Remote Control
UV LIGHT
UV LIGHT
AIR
AIR
SENSOR
SENSOR
AIR PURFIER
LCD display showing all functions.

