background image


P a g e

 | 10       Copyright UltraDisk™ 2009 All rights reserved  


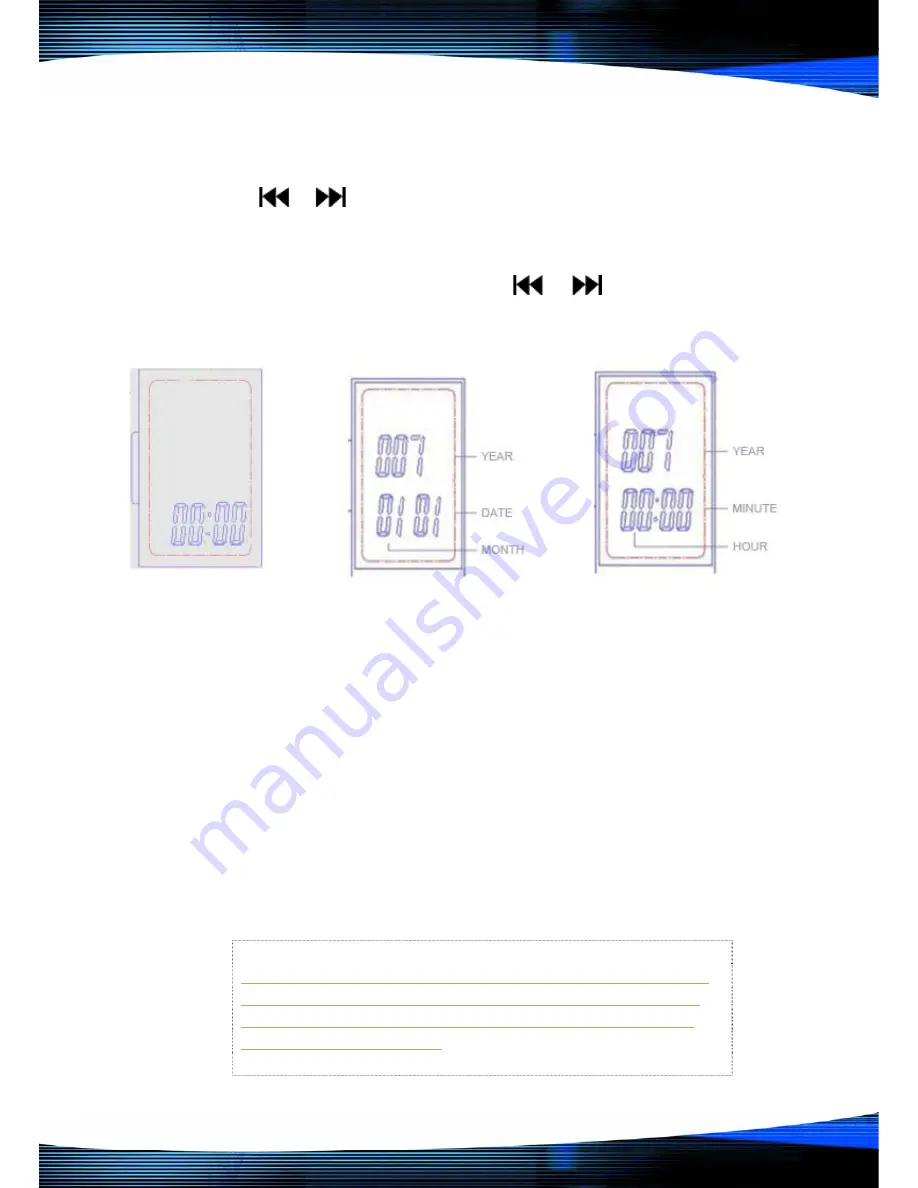
Record-time setting 

Press 

 or 

 button at standby mode to select the time-setting 

mode


Press “M” button to enter in. Press 

 or 

 button to select 

the part which should be adjusted. The selected part will flash. 
Press “VOL+/VOL-” button to adjust the part.  

                    
 After finishing setting the time, the recorder will automatically 
confirm the setting. The recorder will come back to the main 
menu in 10 seconds or press “M” button to enter into the main 
menu.  

Check the recording time 

Please upload the recording files to the computer. When the 
files are fully transferred right click the mouse over the 
recording file and open “Properties” of the recording . You can 
check the time data of the recording file:  
The creation time is the time when recording started. 


The modified time is the time when recording stopped 


The access time is the time when the recording files 
uploaded to the computer. 

 
Please Note: There is no clock memory function in the 
recorder, the time which is indicated would be a little 
different with daily time, please reset the time when 
you need this function.  
 

Содержание DVR 7

Страница 1: ...P a g e 0 Copyright UltraDisk 2009 All rights reserved www UltraDisk co uk Digital Voice Recorder User Manual DVR 7...

Страница 2: ...d audio via Line in 8 Recording monitor function 8 Hearing aid function 8 Automatic section break 9 Play LP SP recordings 9 Play HP recordings 9 Adjust volume 9 Record time setting 10 Check the record...

Страница 3: ...ic recording section break function Recording time setting function Work as Music player Low battery indication Built in speaker Work as USB flash disk FM radio Selectable A B marker repeat function B...

Страница 4: ...sing the recorder Do not press the screen forcefully Otherwise it may cause damage of the LCD screen and improper work of the screen display If there s any quality problem with the recorder please con...

Страница 5: ...rights reserved Appearance and buttons 1 Play stop playing 2 Menu Delete M 3 Forward 4 Backward 5 Record REC 6 Volume 7 Volume 7 Power Switch OFF ON 9 Earphone 10 Signal in 11 Screen 12 USB plug 13 i...

Страница 6: ...n shows picture bottom Turn off the recorder Hold and press button at standby mode the screen shows OFF as the following picture The recorder is turned off Low battery indication The symbol will flash...

Страница 7: ...and recording ACT format SP Good quality with Voice Activated recording WAV format HP High quality recording MP3 format SP recording mode is defaulted as Voice Activated recording The VAR sensitivity...

Страница 8: ...Attention Please don t switch off the power when recording is in progress It will cause the loss of the recording messages or may lead to a corrupt file The recorder will then have an issue starting I...

Страница 9: ...n to start recording then turn on the external player and play the audio files the sound it plays will be recorded Recording monitor function Listening with earphone when the recording is in progress...

Страница 10: ...s Re press to pause stop recording Play HP recordings Please Note The HP recordings are in mp3 music file format and are played back via the mp3 player mode see music player section The recording file...

Страница 11: ...M button to enter into the main menu Check the recording time Please upload the recording files to the computer When the files are fully transferred right click the mouse over the recording file and o...

Страница 12: ...ng music Press button to start playing after enter into music mode Repress button to stop playing Adjust volume Press volume volume button to adjust the volume Select the music to play Press button fo...

Страница 13: ...3 seconds to delete the one you selected The screen shows Repress M button to confirm the deletion Attention After entering in the Delete mode no further operations on the recorder within 3 seconds th...

Страница 14: ...bout 3 seconds then repress M button to confirm the deletion of all saved channels Connect with the computer Please insert the USB plug into USB port of computer the screen of recorder shows below int...

Страница 15: ...indicator light of the recorder is light uped during recharge indicator light off when recharge over And the recorder displays FUL on the screen Install the Sound Conversion tools to the computer On e...

Страница 16: ...o fulfill software installation To start from PC s Start Program MP3 Player Upgrade Sound Convert MP3 Player Upgrade is an upgrade tool and Sound Convert is for converting the Voice Files MP3 player D...

Страница 17: ...check the file to see if the file is damaged corrupted It will not record Please format the recorder at FAT system But please backup the important files onto your pc laptop before formatting All data...

Отзывы: