COMPLETING THE PATTERN OF 3MM HOLES
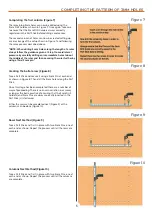
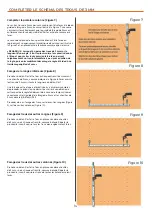
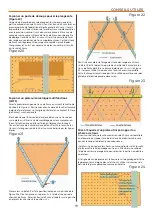
Completing the first column (Figure 7)
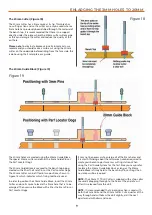
Creating the bottom row (Figure 8)
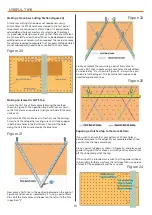
Rows Next Method (Figure 9)
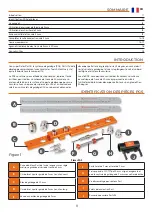
Columns Next Method (Figure 10)
The remaining 3mm holes can now be drilled using the
3mm Drill Guide as shown in Figure 7. Once again, take care
to ensure that the 3mm Drill Guide is always correctly
registered in the Parf Stick before drilling commences.
The second column of holes can now be created setting up
a mirror image of the setup shown in Figure 7 and following
the same process described above.
“NOTE: When drilling 3 mm holes along the length of a ruler
always follow the guidance given at Step 1 to avoid lateral
pressure by carefully drilling an intermediate hole at about
the middle of the ruler and then securing the ruler further by
using a third 3 mm pin.”
Take a Parf Stick and secure it using a 3mm Pin at each end
as shown in Figure 8. Then drill the 3mm holes along the Parf
Stick.
Once this stage has been completed there are a number of
ways of proceeding. There is no known variation in accuracy
as long as the basic practice of ensuring that the 3mm Drill
Guide(s) and 3mm Pins are always correctly inserted in the
Parf Stick (s) is followed.
Either the rows can be completed next (Figure 9) or the
columns can be done (Figure 10).
Take a Parf Stick and fix it in place with two 3mm Pins, one at
each end as shown. Repeat the process until all the rows are
complete.
Take a Parf Stick and fix it in place with two 3mm Pins, one at
each end as shown. Repeat the process until all the columns
are complete.
Figure 7
Figure 8
Figure 9
Figure 10
5

