


Wireless Temperature & Humidity Sensor
Wireless Temperature & Humidity Sensor
Overview
Name: Wireless Temperature & Humidity Sensor
Battery Type: CR123A x 1
Dimension: 21 x 69 x 23.5 mm
Accessories: Double-side Tape
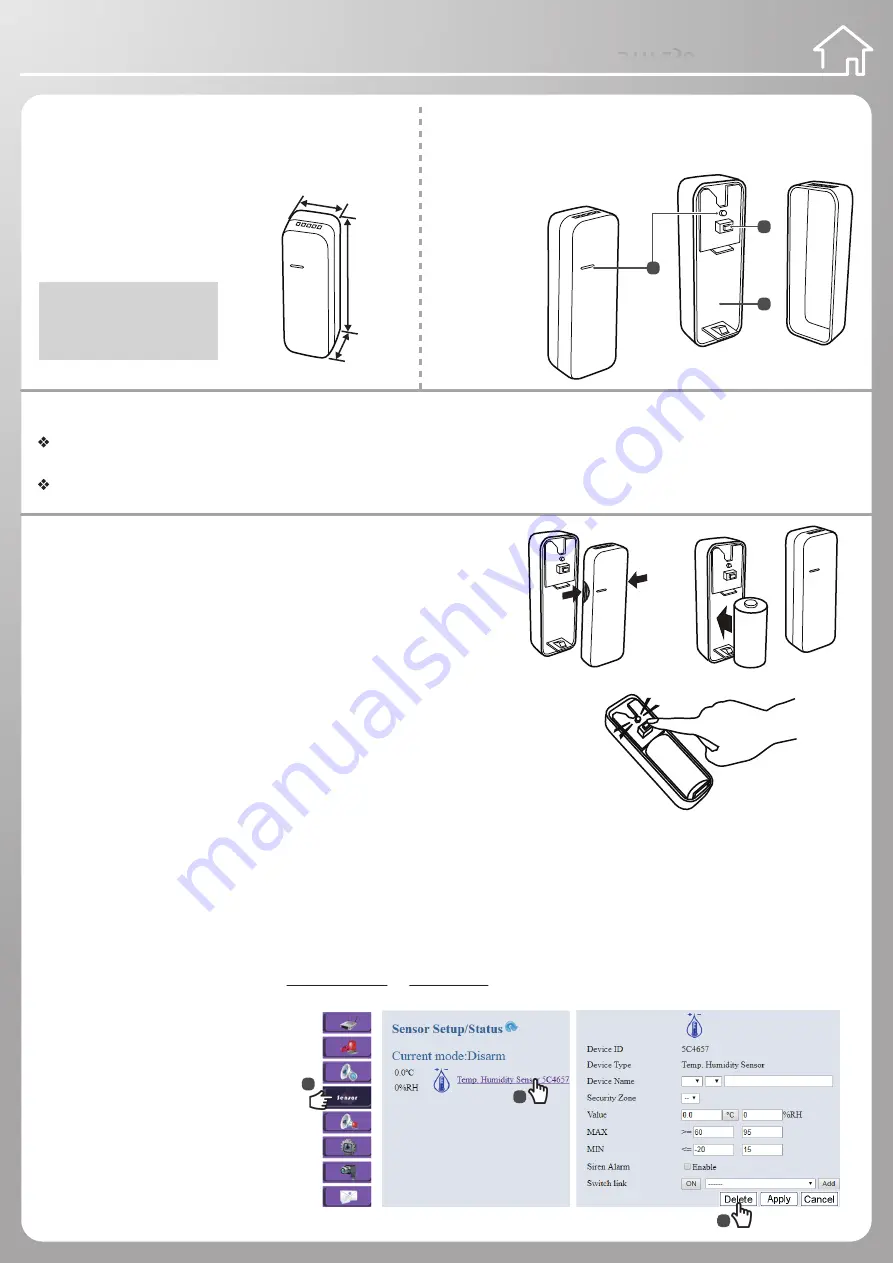
Names of Parts
1. Status LED
2. SET Button
3. Battery Slot
Features
Power Saving – one CR123A battery can be used for more than 2 years. It is also equipped with the low battery alert function.
Every 5 seconds, it will read temperature & humidity.
Easy Setup – Simply press the SET button at the front of the device to join the system at the first time.
Open the top cover.
Insert battery and close the cover.
Wireless Temperature & Humidity Sensor
Installation Guide
Installation Guide
Installation Guide
STH-230
CAUTION
RISK OF EXPLOSION IF BATTERY IS
REPLACED BY AN INCORRECT TYPE.
DISPOSE OF USED BATTERIES
ACCORDING TO THE INSTRUCTIONS.
69mm
23.5mm
21mm
1
2
3
III. Device Deletion (Back to factory default settings)
1. First, Login into website.
About Login methods, please refer to
4. Basic Setting
of
Installation
in
Wireless Gateway Installation Guide.
(Page1).
2. To remove the device joining, take out the
battery, long press SET button 10 seconds.
3. Delete the device from the website.
(See the features on the right side.)
4. Press and hold the set button of the
device to install the battery. (Do not
release the button while installing
the battery.) After 6 seconds, the LED
indicator blinks light blue once and
starts blinking. That means device
deletion sucessfully. (Please complete
the procedure in 3 minutes.)
1
2
3
Installation
I. Before Installation
1. Power on the Gateway.
2. Waiting for about 90 seconds until the Gateway led light become solid
green instead of blinking.
Note:
We suggest to use auto joining all device via APP at the first time.
Please refer to
APP Quick Installation Guide
.
II. Device Installation and Manual Joining
1. Press the both side of STH-230 to open top cover. Install the battery .
Note:
Do not use rechargeable battery.
2. Press the SET button at the top of the Gateway or short press the set button
at the bottom of Router (Power Switching). Then press the SET button of device.
3. The Gateway/Router and the device are joining as both LED indicators blink blue light around 60 seconds. The device blinks
light blue LED indicators once and turns off, indicating the device joining process is successful.
Note:
If the device joining process is failed, both LED indicators on those joined devices will light blue and stop blinking after
60 seconds.
4. Use the double-sided tap or flathead screw to fix bottom case.
Note:
After device deletion, it will back to auto joining mode.