background image

Press the bottom-right button to choose High/Low Speed Mode. The display screen 
will show Mode 1 or Mode 2.Mode 1 is Low Speed Mode, which is suitable for beginner. 
Mode 2 is High Speed Mode, which is suitable for skilled user.

Press the top-left button of the transmitter and you will hear constantly beep, which 
indicates flip mode is ready. Push the right stick to any direction of forward/backward/
left/right to utmost and then release. The drone will do 360°flip in corresponding direction. 

Press the top-right button of the display screen and the drone will do 360°flip automatically.
Warning: Flying field must spacious enough and the flying heigh must at least 5M when 
                 doing a flip, or danger may occur. 

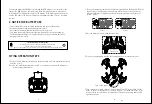
Flip Button

One Button Flip

High/Low Speed Mode

FLIPS

9

Camera Button

Video Button

1. Insert a TF card into the video and the indicator light turns to green and keeps bright.
2. Press the camera button and the indicator light turns from red to green about 2 
    seconds later, which indicates fnished taking a picture, and it will store in TF card 
    automatically.
3. Press the video button and its indicator light turns to red and slowly flashes, which 
    indicates start recording. Press the button again to finish recording and the video 
    will store in TF card.
4. Take out TF card and insert into the attached card reader to connect with computer 
    to read the datas.
    Notice: The above description is base on the camera indicator light of HD 829. Others 
                 may different and please refer to the entity.
    HD829: Video DPI 1280 x 720P / 30 FPS; Picture Size: 1280 x 720P.
    HD818: Video DPI 1280 x 720P / 60 FPS; Picture Size: 1280 x 720P.

VIDEO AND CAMERA OPERATION

10

High/Low Speed Mode

Notice: The flip function will stop automatically if the the drone LED light flashes and 
              the transmitter issues "di---di" low voltage warning.  

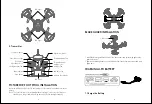
LED Indicator Light

TF Card Slot

Содержание FALCON U842

Страница 1: ... the drone randomly If you have any questions about use operation repair etc please contact the local distributor 5 The drone inside is consisted of precise electronic components Humidity or water vapor may damage electronic components and cause accident 6 The RC drone is made of metal fiber plastic electronic components etc Keep away from heat and sunshine to avoid distortion and damage 7 Keep yo...

Страница 2: ...ton 2 Transmitter Left Right Rudder Trim Power Indicator Light Throttle Left Right Rudder Stick Camera Button Video Button LCD Screen Forward Backward Trim Left Right Trim Forward Backward Left Right Stick One Button Flip High Low Speed Mode PICTURE FOR FOOT STOOL INSTALLATION 3 Insert the pillar of the foot stool to the fuselage hold correctly in accordance with the picture Note The foot stool mu...

Страница 3: ...tery and charger on the ground and keep away from flammable when charging to avoid accident 5 FLYING OPERATION STEPS 1 Put four 1 5V AA batteries excluding to the battery box of the the transmitter correctly and then close it Note Do not install the battery oppositely Do not mixed use new and old batteries or different types of batteries 2 Turn on the transmitter switch and the indicator light sta...

Страница 4: ...lying Control Adjust the Trim to right till stable if the drone rotates to left automatically and adjust to left if the drone rotates to right 5 Left Right Rudder Trim Adjust the Trim to right till stable if the drone drifts to left or adjust the Trim to left if the drone drifts to right 6 Left Right Flying 8 Adjust the Trim to backward till stable if the drone drifts to forward automatically and ...

Страница 5: ...he video and the indicator light turns to green and keeps bright 2 Press the camera button and the indicator light turns from red to green about 2 seconds later which indicates fnished taking a picture and it will store in TF card automatically 3 Press the video button and its indicator light turns to red and slowly flashes which indicates start recording Press the button again to finish recording...

Страница 6: ... the damaged blade with new blade and install in accordance with the following steps 1 Blade replacement If the motor damaged or performance degradation purchase new motor from local distributor and replace it and install in accordance with the following steps 2 Motor replacement INSTALLATION AND REPLACEMENT OF MOTOR AND BLADE 11 Remove the LED shade and four screws of motor cover Remove two screw...

Отзывы: