background image

20

Cocoon 1100

Cocoon 1100

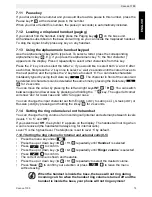
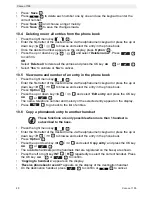
Press  ‘ 

Save 

.

Press 


 to delete each number one by one and use the keypad to enter the 

correct number.

Press  ‘

Save

’ 

 and choose a ringer melody.

Press  ‘

Save

’ 

 to save the changes made. 

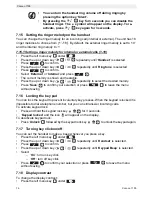
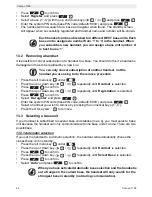
10.4 Deleting one or all entries from the phone book

Press the right menu key 


.

Enter the first letter of the desired name via the alphanumeric keypad or press the up or 
down key 


 / 


 to browse and select the entry in the phone book.

Once the desired number appears on the display, press ‘

Option

.

Press the up or down key 


 / 


 and select ‘

Delete name?

’. Press 


to confirm.

OR

Select ‘

Delete all

’ to delete all the entries and press the OK key 


 or 


.

Select  ‘

Yes

’ to validate or ‘

No

’ to cancel.

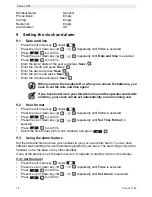
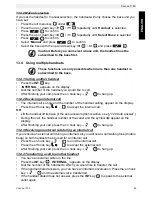
10.5 View name and number of an entry in the phone book

Press the right menu key 


.

Enter the first letter of the desired name via the alphanumeric keypad or press the up or 
down key 


 / 


 to browse and select the entry in the phone book.

Press  ‘

Option

’ .

Press the up or down key 


 / 


 and select ‘

Edit entry

’ and press the OK key 


or 

 .

The name, telephone number and melody of the selected entry appear on the display.

Press 


 to go back to the list of entries.

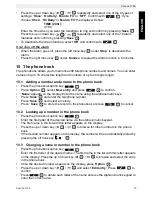
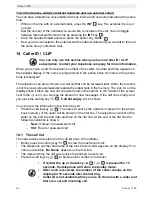
10.6 Copy a phonebook entry to another handset

Press the right menu key 


.

Enter the first letter of the desired name via the alphanumeric keypad or press the up or 
down key 


 / 


 to browse and select the entry in the phone book.

Press  ‘

Option

’ .

Press the up or down key 


 / 


 and select ‘

Copy entry

’ and press the OK key 


or 

 .

The available handsets (all the handsets that are registered on the base) are shown.

Press the left or right key 

INT

/

R


 repeatedly to select the correct handset. Press 

the OK key 


 or 


 to confirm.

Copying to handset x

’ appears on the display.

Receive phonebook record?

’ appears on the display of the destination handset.

On the destination handset, press 

 to confirm or 


 to cancel.

These functions are only possible when more than 1 handset is 
subscribed to the base.

2

15

2

2

2

3

10

2

3

10

2

OK

11

2

2

3

10

2

3

10

OK

11

2

15

2

3

10

2

3

10

OK

11

2

14

4

OK

11

2

2

15

Содержание COCOON 1100

Страница 1: ...COCOON 1100 CORDLESS PHONE USER GUIDE 1 2...

Страница 2: ...e operation of a handset at up to 4 base units Caller ID is a network provider service After subscribing to Caller ID this phone will display the caller s phone number Important To use Caller ID displ...

Страница 3: ...ivate handsfree function 14 7 7 Out of range warning 14 7 8 Setting the speaker volume 14 7 9 Call Duration Indicator on the Display 14 7 10 Turning off the microphone mute 14 7 11 Pause key 14 7 12 L...

Страница 4: ...key flash 22 11 3 Changing the PIN code system PIN code 23 11 4 Setting the dialing mode 23 12 Tools 23 12 1 Appointment 23 12 2 Stopwatch 24 13 Additional handsets and bases 24 13 1 Adding a new han...

Страница 5: ...sfactory repairs can lead to considerable danger for the user Children frequently underestimate the dangers associated with electrical equipment Therefore you must never leave children unsupervised in...

Страница 6: ...r area 3 Cleaning Clean the telephone with a slightly damp cloth or with an anti static cloth Never use cleaning agents or abrasive solvents 4 ECO mode low radiation This cordless telephone compliant...

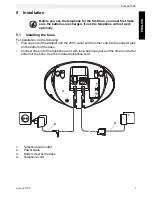
Страница 7: ...of the base Connect one end of the telephone cord with the wall phone jack and the other end to the bottom of the base Use the included telephone cord 1 Telephone wall outlet 2 Power cable 3 Bottom v...

Страница 8: ...ting to know your telephone 6 1 Keys LED Handset 1 Display 2 Right Menu key 3 Up Redial key 4 Right Flash key 5 On Hook OFF key 6 Alphanumeric keys 7 Keypad Lock Key 8 Pause key 9 Microphone 10 Ringer...

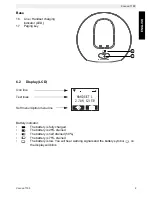
Страница 9: ...CD Icon line Text lines Soft menu Option menu line Battery indicator The battery is fully charged The battery is 25 drained The battery is half drained 50 The battery is 75 drained The battery is low...

Страница 10: ...ates the following status OFF no base power connected or handset not in base for charging ON handset charging Blinking slowly off hook or during ringing Blinking rapidly during registration On hook Of...

Страница 11: ...played Exit or go back one level in the menu To go to the previous level in the menu press To cancel and return to standby at any time press the key If no button is pressed for 15 seconds the handset...

Страница 12: ...3 Making Calls 7 3 1 External Call Press the off hook key The line handset charging indicator LED on the base unit will blink and the Call symbol appear on the display You will hear the dial tone Dial...

Страница 13: ...et ringing by pressing the option key Silent All subscribed handsets will ring when you receive a call The Call symbol blinks on the display The telephone number of the caller appears on the display i...

Страница 14: ...ng 7 8 Setting the speaker volume Use the up and down keys during conversation to set the volume of the speaker You can select from 5 levels The telephone is set to level 3 by default 7 9 Call Duratio...

Страница 15: ...the Delete key for 2 seconds You can move the cursor by pressing the left and right keys INT R You can switch between upper and lower case by pressing and holding the key The upper left corner will sh...

Страница 16: ...ossible to dial a telephone number but you can still answer incoming calls To activate keypad lock Press and hold the keypad lock key for 3 seconds Keypad locked and the icon will appear on the displa...

Страница 17: ...When there is an incoming call and the handset is on the base the phone automatically takes the line when lifted This function can be turned on or off Press the left menu key under Press the up or do...

Страница 18: ...Press to confirm Select the time format 12h or 24h notation and press 9 3 Using the alarm feature Set the date and time and use your handset to give you a reminder alarm You can have different alarm s...

Страница 19: ...confirm Name appears on the display Enter the name using the alphanumeric keys Press Save and enter the telephone number Press Save and select a melody Press Save to store the record in the phonebook...

Страница 20: ...the phone book Press Option Press the up or down key and select Edit entry and press the OK key or The name telephone number and melody of the selected entry appear on the display Press to go back to...

Страница 21: ...pying to handset x appears on the display Receive phonebook record appears on the display of the destination handset On the destination handset press to confirm or to cancel 11 Base operation 11 1 Set...

Страница 22: ...IN code of the base The PIN code has 4 digits The default PIN code setting is 0000 If you would like to change the PIN code and set your own secret code do the following Press the left menu key under...

Страница 23: ...s the OK key or to confirm Press the up or down key repeatedly until Stopwatch is selected Press the OK key or to confirm Press Start to start the stopwatch Press Stop to stop the stopwatch To restart...

Страница 24: ...your handset is subscribed to several base unit stations max 4 you must select a base unit because the handset can only communicate with one base unit at a time There are two possibilities 13 3 1 Aut...

Страница 25: ...number of the caller and the symbol appear on the display After finishing your call press the on hook key to hang up 13 4 3 Receiving an external call during an internal call If you receive an externa...

Страница 26: ...essages If the call list is empty and you press the call log key Call list empty will be shown You can view the information of an incoming call Press the call log key The name if sent by the network o...

Страница 27: ...et returns to the call list 14 4 Deleting numbers from the call list 14 4 1 Deleting one number Press the call log key to go to the call list Press the up or down key to look up the desired number Pre...

Страница 28: ...set out of range Bring the handset closer to the base The base has no power supply Check the mains connection to the base The handset is not registered to the base Register the handset to the base Bas...

Страница 29: ...channel Range 300 m in open space 50 m maximum in house Base power supply In 230V AC 50Hz Out 6V DC 200mA Handset Batteries 2 rechargeable batteries AAA NiMh 600mAh Handset standby time 100 hours in s...

Страница 30: ...aired by the service centre 18 3 Warranty exclusions Damage or defects caused by incorrect treatment or operation and damage resulting from use of non original parts or accessories are not covered by...

Страница 31: ......

Страница 32: ......

Страница 33: ......

Страница 34: ......

Страница 35: ...tails Model name Serial Nr Purchase date DD MM YYYY Fault description Original proof of Purchase has to be attached to this return card to be valid for warranty Product Details Model name Serial Nr Pu...

Страница 36: ...Cocoon 1100 visit our website www ucom be MD2500208...

Отзывы: